# Joystick Override / Hold Group guide
This is a guide on how to handle 'Joystick override' and 'Hold groups' for CCU operators - allowing automatic routing of cameras to a confidence monitor.
Imagine these operator steps:
1. CCU 1 presses the joystick :: Route cam 1 to monitor
2. CCU 4 presses the joystick :: Route cam 4 to monitor
3. CCU 2 presses the joystick :: Route cam 2 to monitor
...
4. CCU 4 lets go of the joystick :: (nothing happens)
5. CCU 2 lets go of the joystick :: Return to route cam 1 to monitor
6. CCU 1 lets go of the joystick :: Return to original input for monitor
You can of course have more CCU's - and the order of who does what when is remembered by the system.
#### Prerequisite
This setup requires a 4 things:
- Blue Pill device --> Is the brain, running the config and controlling both ETH-GPI Link and video switcher/router
For example 'Blue Pill Server' : [https://www.skaarhoj.com/product/blue-pill-server](https://www.skaarhoj.com/product/blue-pill-server)
- ETH-GPI Link --> Handles the GP inputs from the CCU's
[https://www.skaarhoj.com/product/eth-gpi-link](https://www.skaarhoj.com/product/eth-gpi-link)
- A number of CCU's with GP output for joystick press
- A video switcher/router (for example; Aja Kumo, ATEM, Tricaster, vMix etc.)
NOTE: The Blue Pill device must have Reactor 2.2.3-pre10 or later installed. This is handled on the 'Packages' page.
NOTE: The ETH-GPI Link must be in 'Blue Pill Mode', which means it's controlled by a Blue Pill device.
#### Configuration
1. Goto IP address of Blue Pill device to see Reactor, the configuration manager.
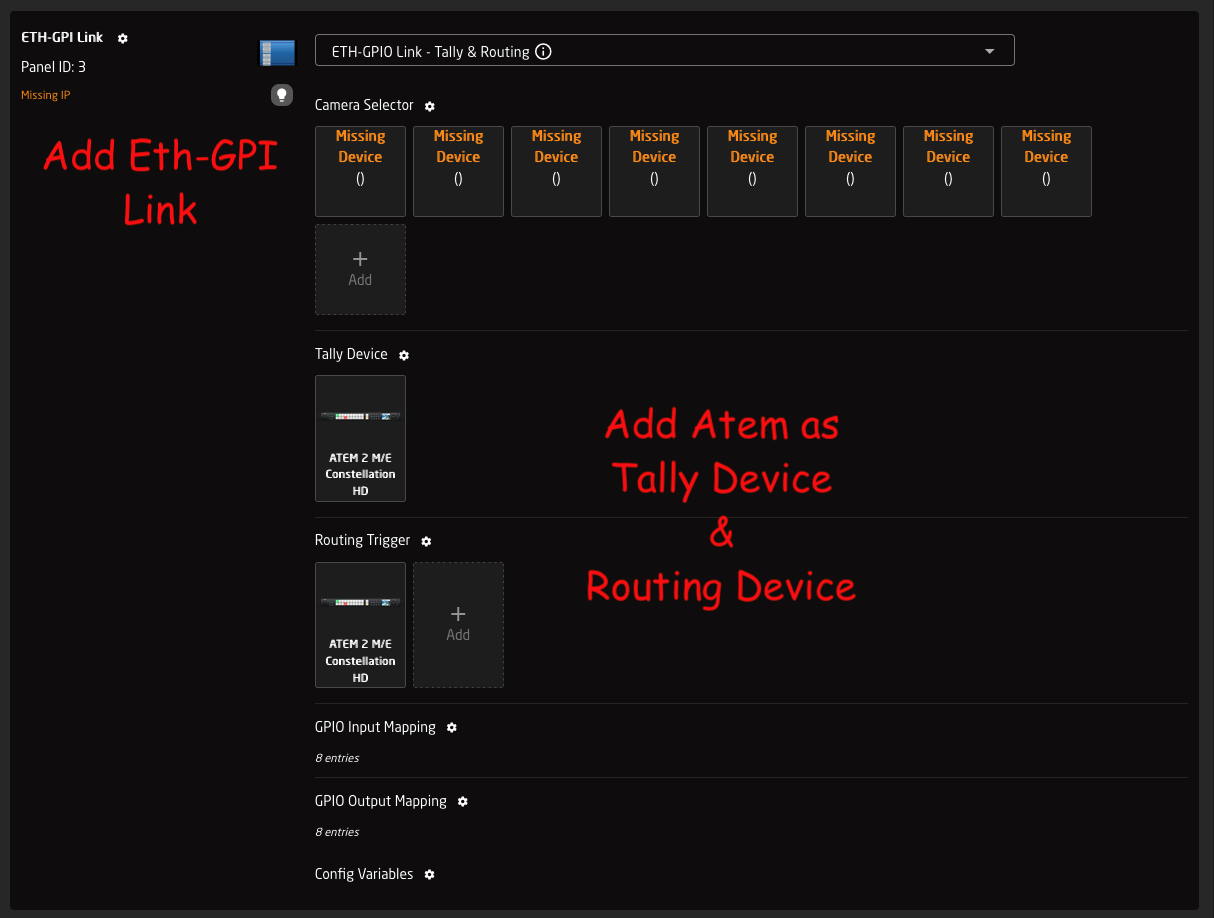
2. Click '**Add panel'** and select your ETH-GPI Link
3. Click '**Add device**' and select your routing device
4. In the ETH-GPI Link configuration drop-down menu, **select default configuration** 'Tally & Routing'
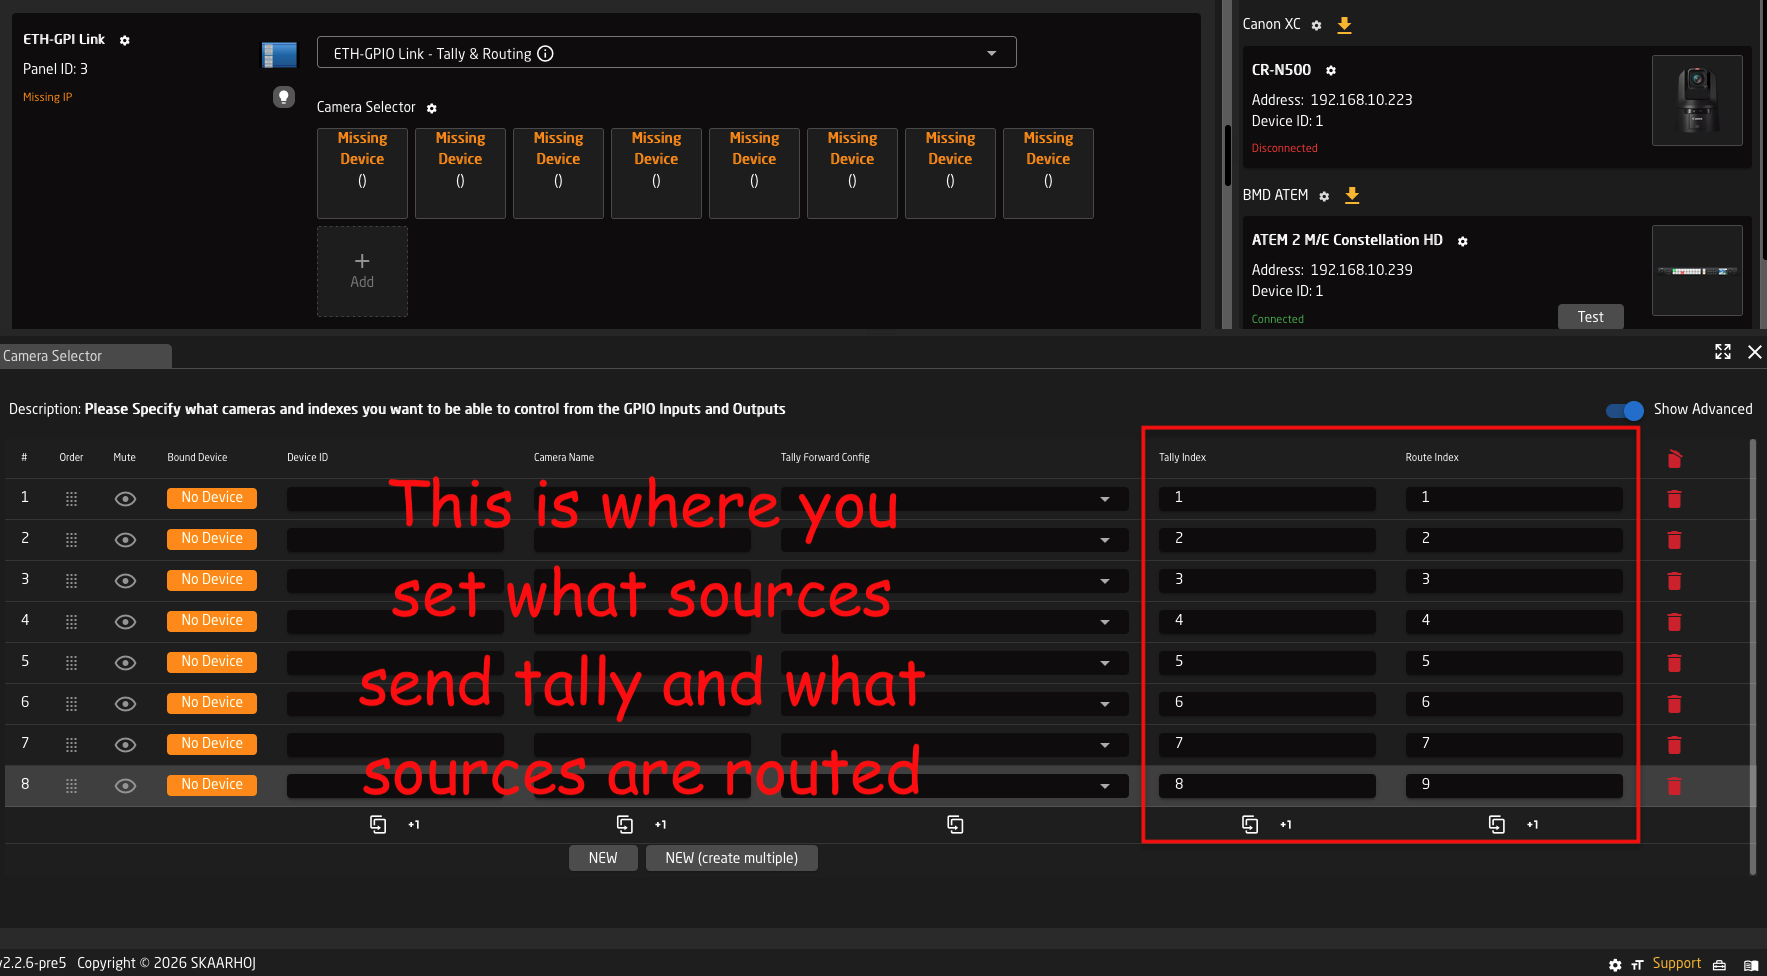
5. Click '**Camera Selector**' to open settings -> Add empty rows (by holding Shift) -> Set route index \[1, 2, 3..\]
(these are the camera inputs on the switcher/router)
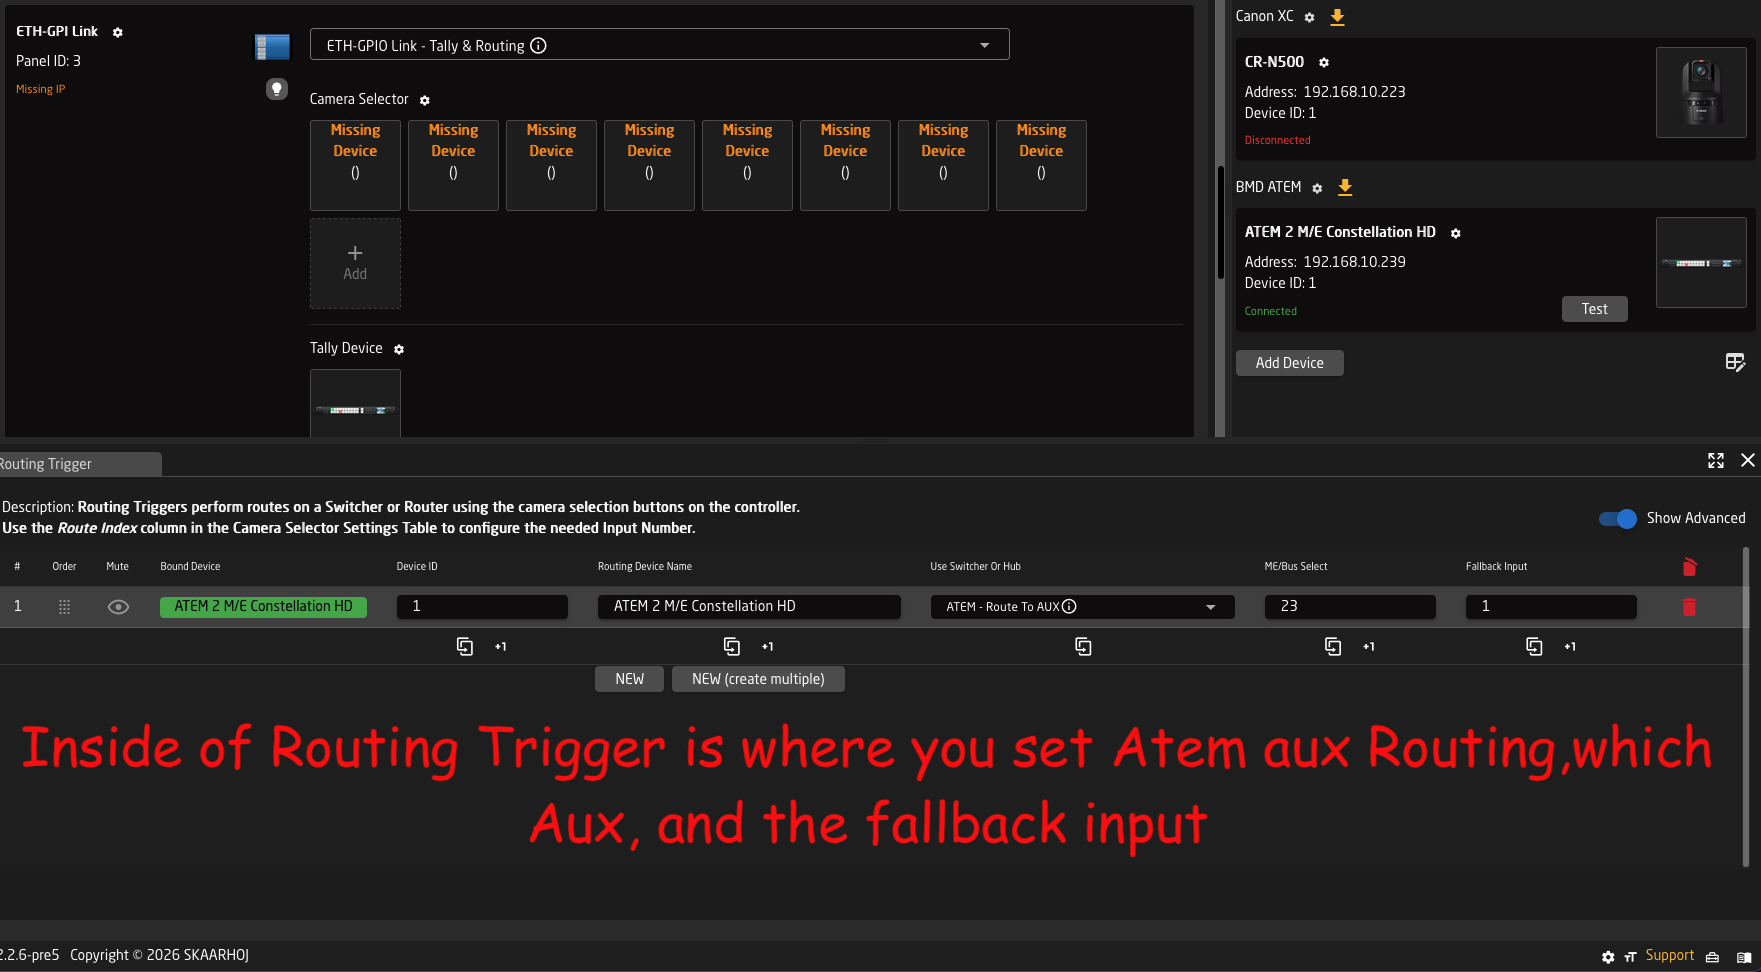
6. Click '**Routing Trigger**' to open settings -> Select the output to route to
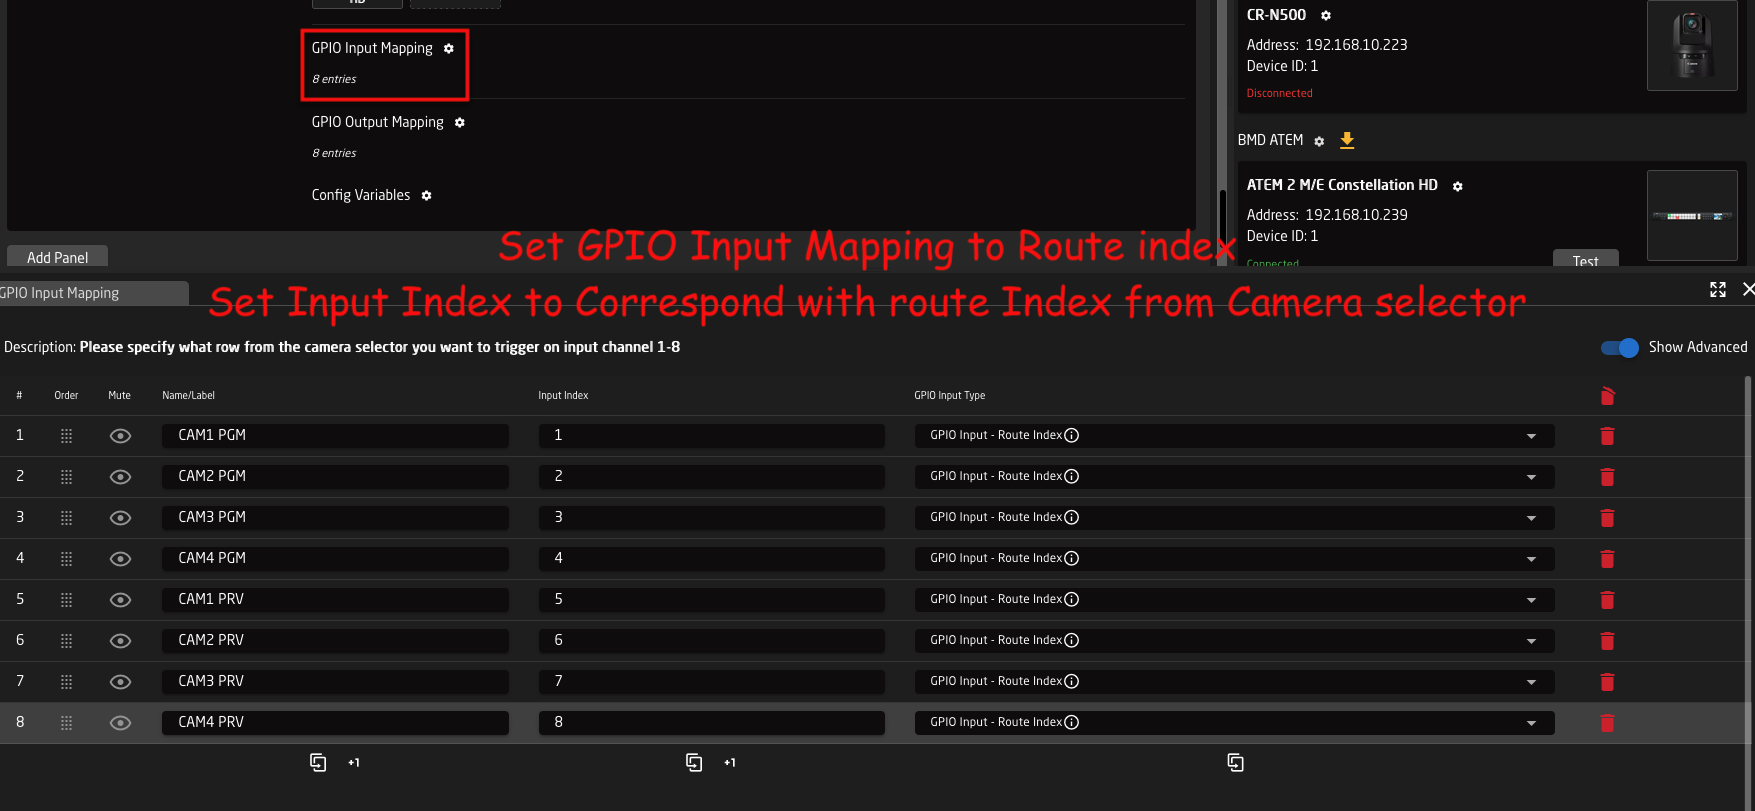
7. Click '**GPIO Input mapping**' to open settings -> Change type from ‘Tally Program’ to ‘Route Index’
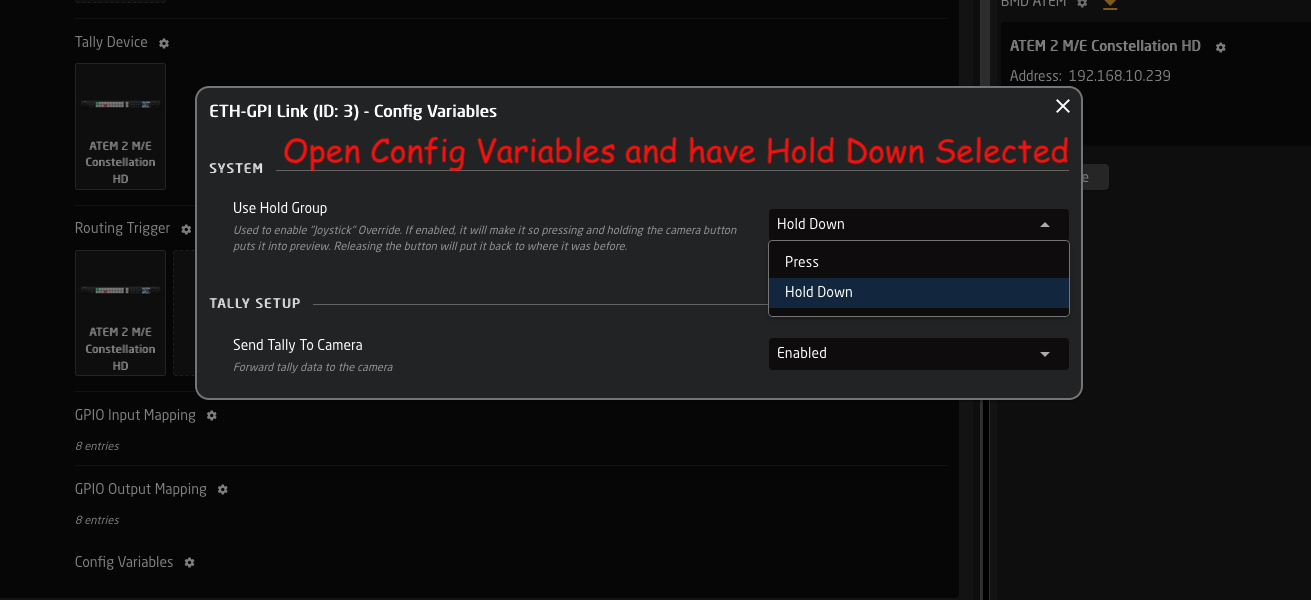
8. Click '**Config Variables**' to open settings -> Select 'Press' or ‘Hold down’
Advanced step to share stack between multiple \[Blue Pill Inside\] RCP panels in the same configuration:
1. Goto Configuration page -> click '>>' in window left/top top show Layer Tree
2. Find variable: HoldGroupState -> right-click it and copy it
3. Scroll down to lowest Root layer -> right-click it and paste variable here (variables here are shared by all panels)
#### Screenshots
Same as config steps above
2:
[](https://wiki.skaarhoj.com/uploads/images/gallery/2026-03/2-add-panel.png)
5:
6:
7:
8: