This documentation might be outdated. Please consult the Reactor manual at [https://docs.skaarhoj.com/3\_configuration/variables-conditions.html](https://docs.skaarhoj.com/3_configuration/variables-conditions.html)
For increased flexibility in a configuration Variables are often applied. A variable works as an adjustable value which can be numerical or text based that can be used in place of a set value. Variables live on the layers of the tree but are used in lots of different places and in different ways. It is on the layers that you can see what Variables are available, their names, and their current value. In the example below you can see how: 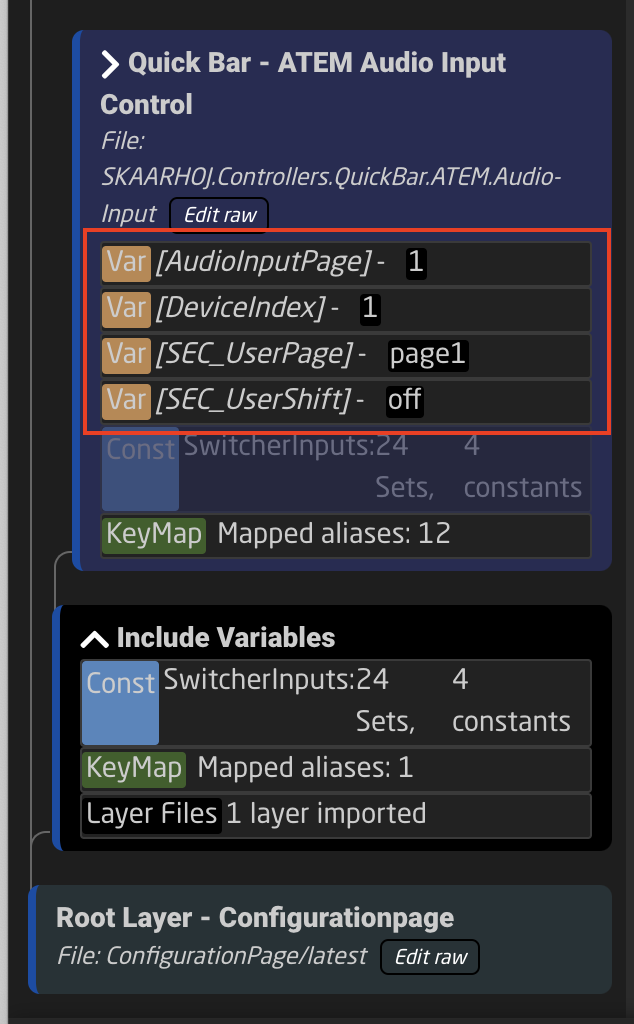Please note, Variables in the tree are only accessible to the same layer they are created on or higher in the tree, unless defined otherwise in the variable set up. Additionally, layers limited by Active If conditions also set limits on the variable.
There are two types of variables; range or options.| Name | Variable's name |
| Description | Easy to understand description to help identify the variable's purpose |
| Type | Range or Options |
| Min | Minimum value for the variable (must be lower than the max). Can be set to 0 |
| Max | Maximum value for the variable (must be higher than the max) |
| Center (or Default) | Default value for the variable if not saved on panel reboot. |
| Default to first | Sets default value to the first. |
| Default Value | Define the default value if not first. |
| Always define | Separates this instance of the variable from ones of the same name lower in the tree (overridden by Expand Scope). |
| Accept Any Value | Allows any value to be accepted during conformity check. |
| Expand Scope | Allows the variable to be used lower in the tree towards the root. |
| Capture | Allows a variable to capture any expanded-scope variable from a branch. |
| Persistent | Saves value between panel reboots. |
| Zero set Allow | Allows for the variable to be blank |
| Force value (test) | Force set a value for the variable, use for testing |
This is only a single example of the use of Options Variables.
First looking at a breakdown of the parameter the variable is going to be added into: Atem Program Input Video Source DC:bmd-atem/1/ProgramInputVideoSource/1/1 **DC** (DEVICE CORE) **:bmd-atem** (BMD-ATEM) **/1** (DEVICE ID 1) **/ProgramInputVideoSource** (Specified parameter) **/1** (M/E number) **/1** (Input Number) A range variable would most naturally be put in place of numerical values, making Device ID, M/E Number, or Input Number great places use a variable. Using the variable in place of the Device ID will allow for switching instances of the Atem. It is possible to find the specific Device ID number of the Atems in the Device Details on the Home Page of Reactor. 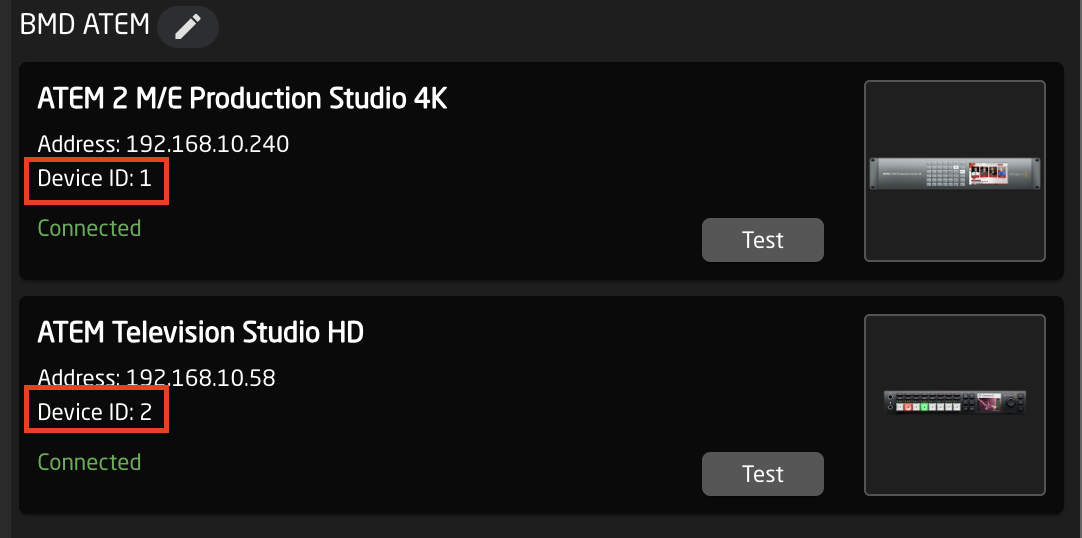 When creating the variable it is best to name is something easy to identify the place it should be used. 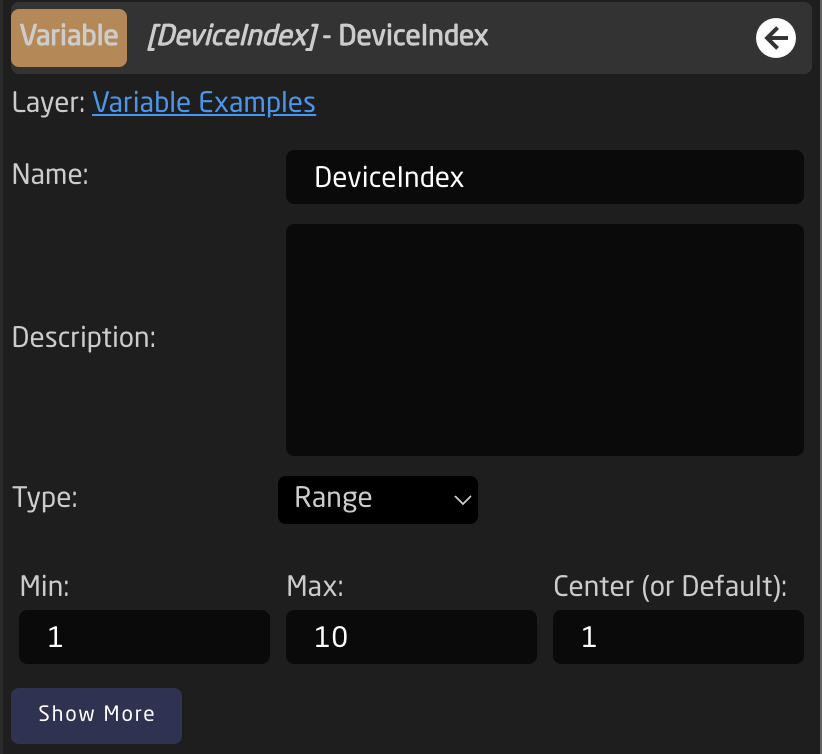 Insetting that variable in the command would look like this: DC:bmd-atem/**Var:DeviceIndex**/ProgramInputVideoSource/1/1Please note: Formatting is important for the variable name.
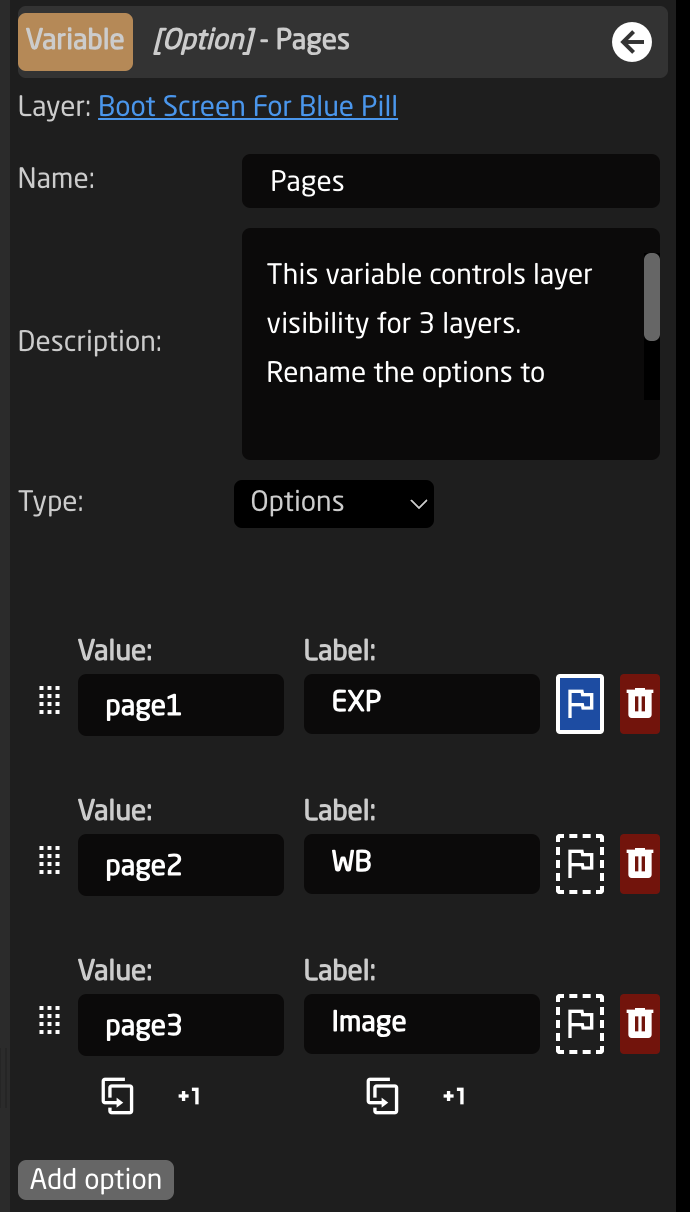
After setting the variable into a parameter it is important to set up a way to control the variable. 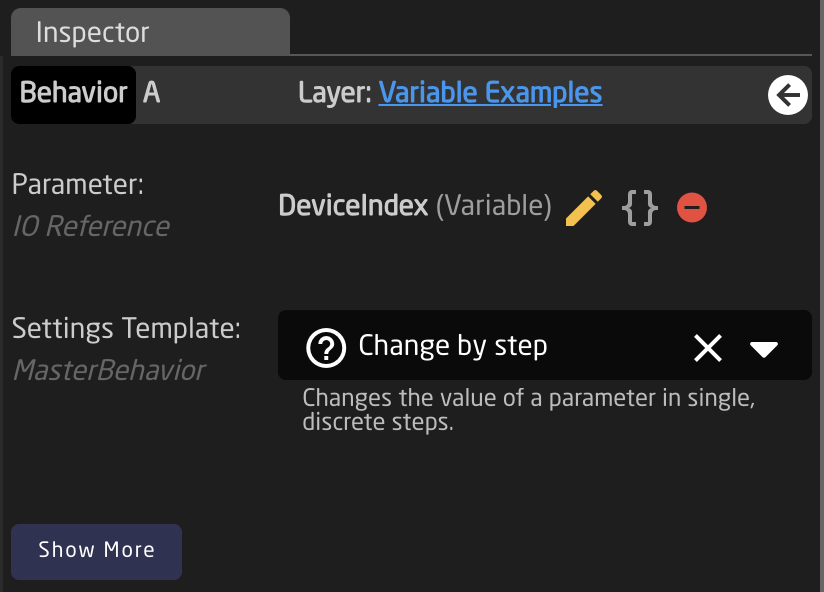 The feedback will look like:  Confirm the variable is changing properly in the tree: 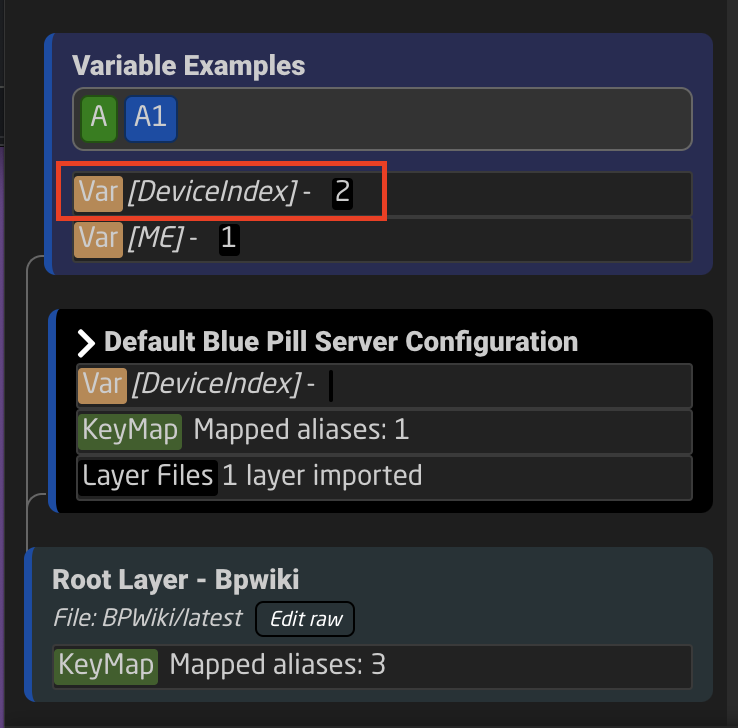| Name | Variable's name |
| Description | Easy to understand description to help identify the variable's purpose |
| Type | Range or Options |
| Value | Value string for the variable |
| Label | Easy to understand label used for feedback |
| Flag | Sets the option as the default value |
| Trash | Deletes the Option |
| Duplicate | Duplicates the line |
| +1 | Increments the line by +1 |
| Add option | Default value for the variable if not saved on panel reboot. |
| Default to first | Sets default value to the first. |
| Default Value | Define the default value if not first. |
| Always define | Separates this instance of the variable from ones of the same name lower in the tree (overridden by Expand Scope). |
| Accept Any Value | Allows any value to be accepted during conformity check. |
| Expand Scope | Allows the variable to be used lower in the tree towards the root. |
| Capture | Allows a variable to capture any expanded-scope variable from a branch. |
| Persistent | Saves value between panel reboots. |
| Zero set Allow | Allows for the variable to be blank |
| Force value (test) | Force set a value for the variable, use for testing |
This is only a single example of the use of Options Variables.
 In the tree it would look like this. The blue line next to a layer indicates it is the active layer. In the layer where the variable lives, the variable also shows what its current value is. 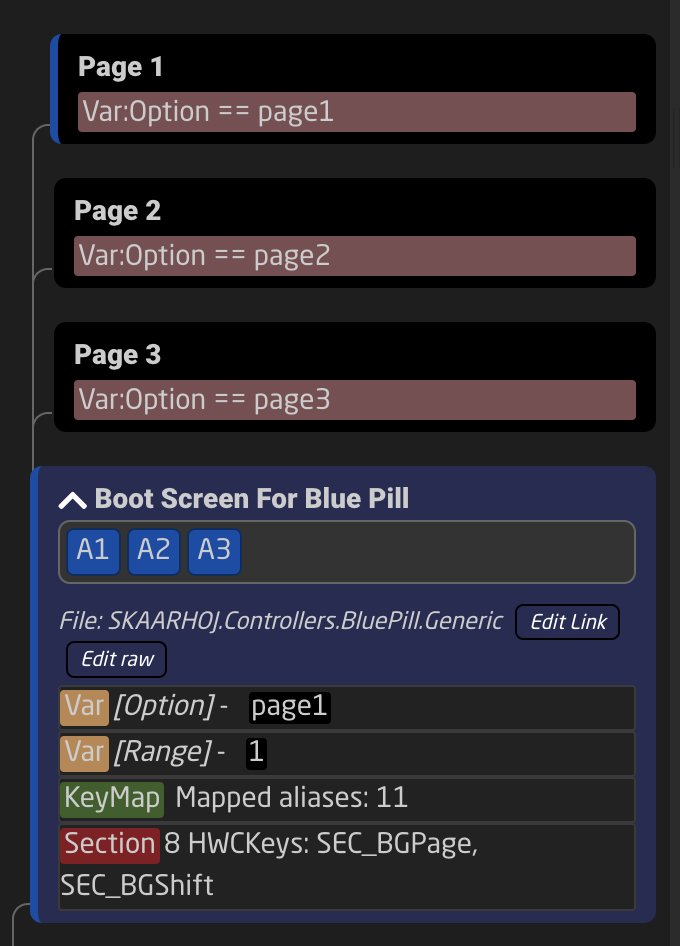 On the page layer, the variable is set as the Active If conditions, meaning that need to be true for the layer to be the active layer. 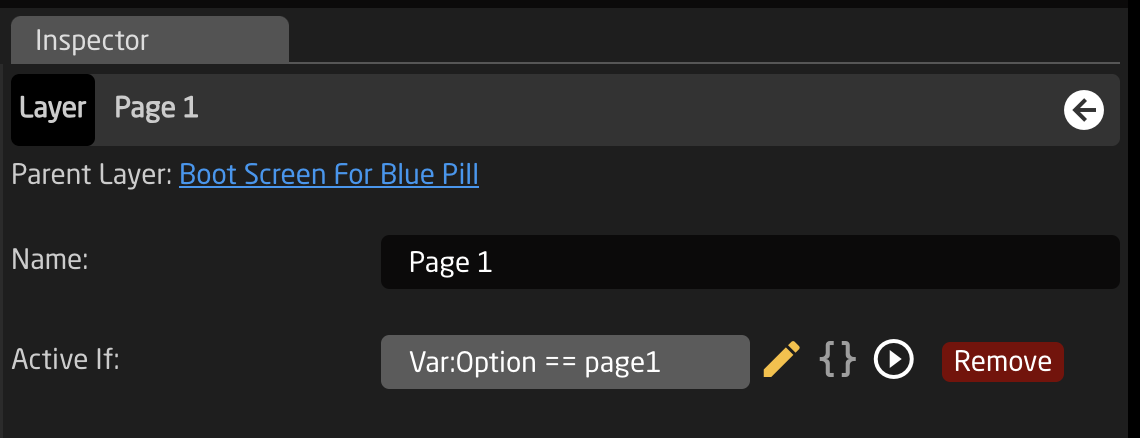 There are two main way to select the value of the parameter. To set a specific value, mainly on key press or by trigger, select the variable as a parameter with the Settings Template as Set a Value Directly. 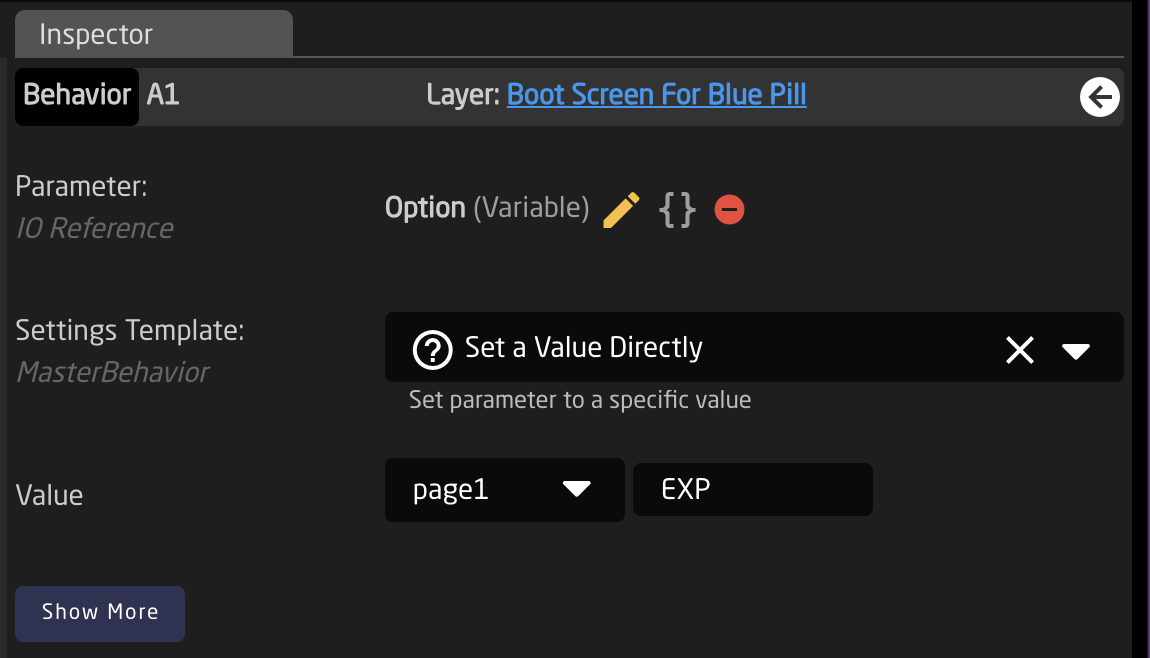 The feedback will look like this: 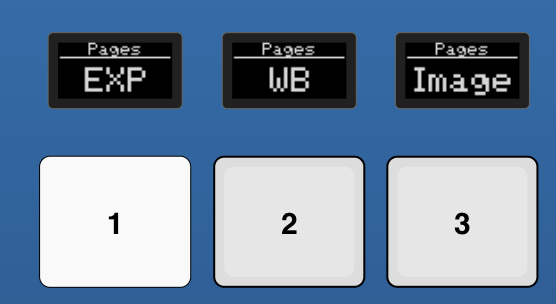 To cycle through the values, mainly on the pulse of an encoder, select the variable as a parameter with the Settings Template as Change Variable.  The feedback will look like this: 