# Kessler Crane
### Adding and connecting to a Kessler Crane device from the Blue Pill platform
The Blue pill can connect to a Kessler Crane device in two ways, via WiFi or USB. In both cases, there are some special things that needs to be handled for the Blue Pill Core to connect successfully.
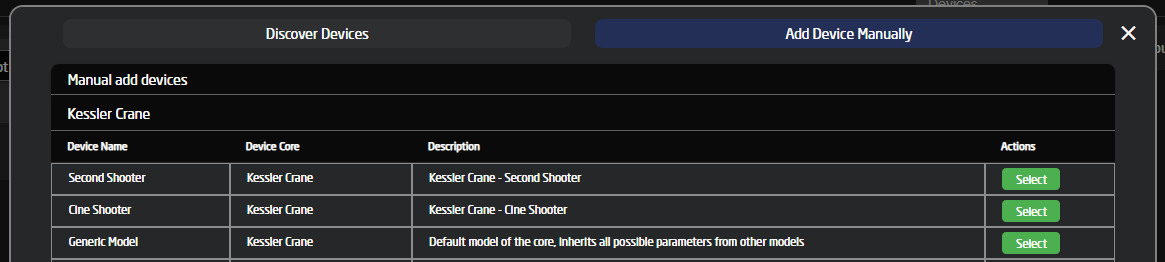
First, add your desired device inside the reactor, by clicking the add device and selecting "Add Device Manually". Then search and click add on your desired model.
[](https://wiki.skaarhoj.com/uploads/images/gallery/2022-07/image-1657270287772.png)
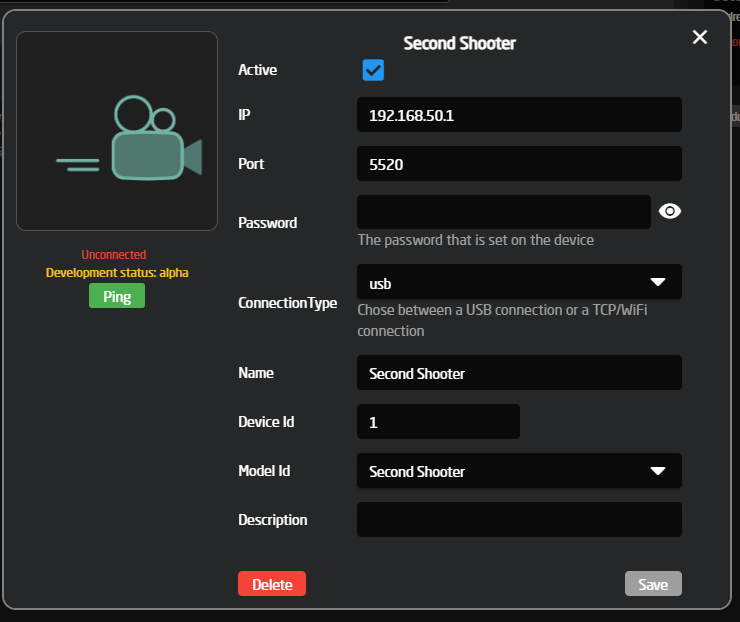
You should now be prevented with this device config box:
[](https://wiki.skaarhoj.com/uploads/images/gallery/2022-07/image-1657270736037.png)
If your config box does not have the "Connection Type" option, please click the save button and wait until you see the device on the left side say "Disconnected" or "Connected". If it's your first time installing the core, it will say "Installing Core" wait for that to finish, then restart reactor to load the new Device Config structure.
Clicking this "running" button will give you the option to restart reactor:
[](https://wiki.skaarhoj.com/uploads/images/gallery/2022-07/image-1657271066379.png)
After restarting reactor, click on the device on the left side, and you should now see the "Connection Type" inside the device config popup. Please set this option to your desired setup type and continue the setup below.
Updating your SkaarOS and enabling USB-A
For the Kessler core to connect over USB, you must be on **SkaarOS v0.14-pre2** or newer and have the USB-A connector enabled on the settings tab.
#### Update SkaarOS
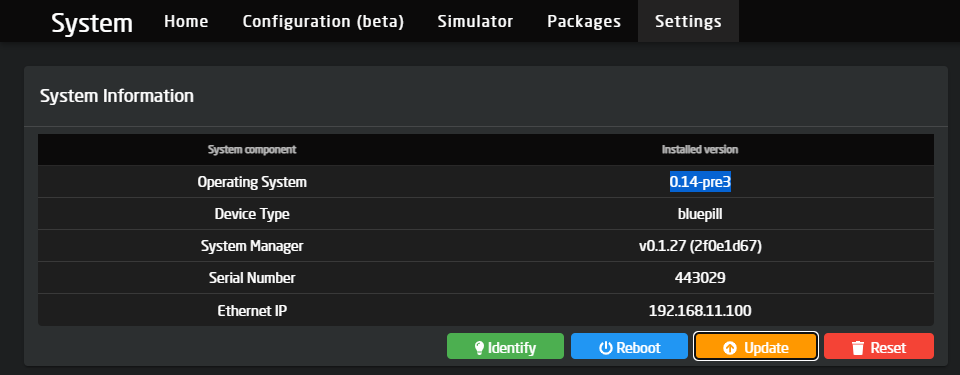
To update SkaarOs, go to "Settings" and click "Update".
[](https://wiki.skaarhoj.com/uploads/images/gallery/2022-07/image-1657272707368.png)
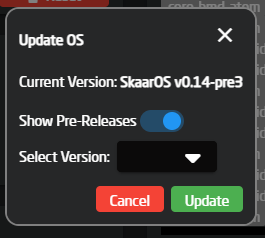
This will give you a popup where you select the v0.14 stable version (or higher). If you don't see a stable version for v0.14, enable "Show Pre-Releases" and choose the newest version available, the minimum supported version we need is v0.14-pre2. Then click update and **wait **for the Blue Pill to finish installing and restart the device.
[](https://wiki.skaarhoj.com/uploads/images/gallery/2022-07/image-1657272819340.png)
*Note if you do not see the prerelease option, scroll down to settings and enable "Advanced Mode"*
#### Enable the USB-A connector
To enable the USB-A connector on a Blue Pill device, please go to "Settings" and scroll down to enable it here:
[](https://wiki.skaarhoj.com/uploads/images/gallery/2022-07/image-1657273253186.png)
Connecting over USB
Connecting over USB is very simple but has two caveats that need to be addressed before it will connect.
First, please check with the guide inside the "Updating your SkaarOS and enabling USB" block and make sure you have that set up first.
If you are on a supported SkaarOS version and have the USB-A enabled.
Connect a USB-A to USB-Micro cable between the USB-A connector on the bluepill and the USB-Micro on the Kessler Device.
After that setup the device as shown below, a few things a not in use by the core when connecting over USB and can be left as is, this Includes the IP and Port.
[](https://wiki.skaarhoj.com/uploads/images/gallery/2022-07/image-1657271798820.png)
If you get a green "Connected" status, you are now ready to use the device. If you do not get that, please open the package logs and check if there are any errors. If you get an error like this one, it means that your SkaarOS might not be on a supported version or that the USB is not enabled/connected on both ends.
[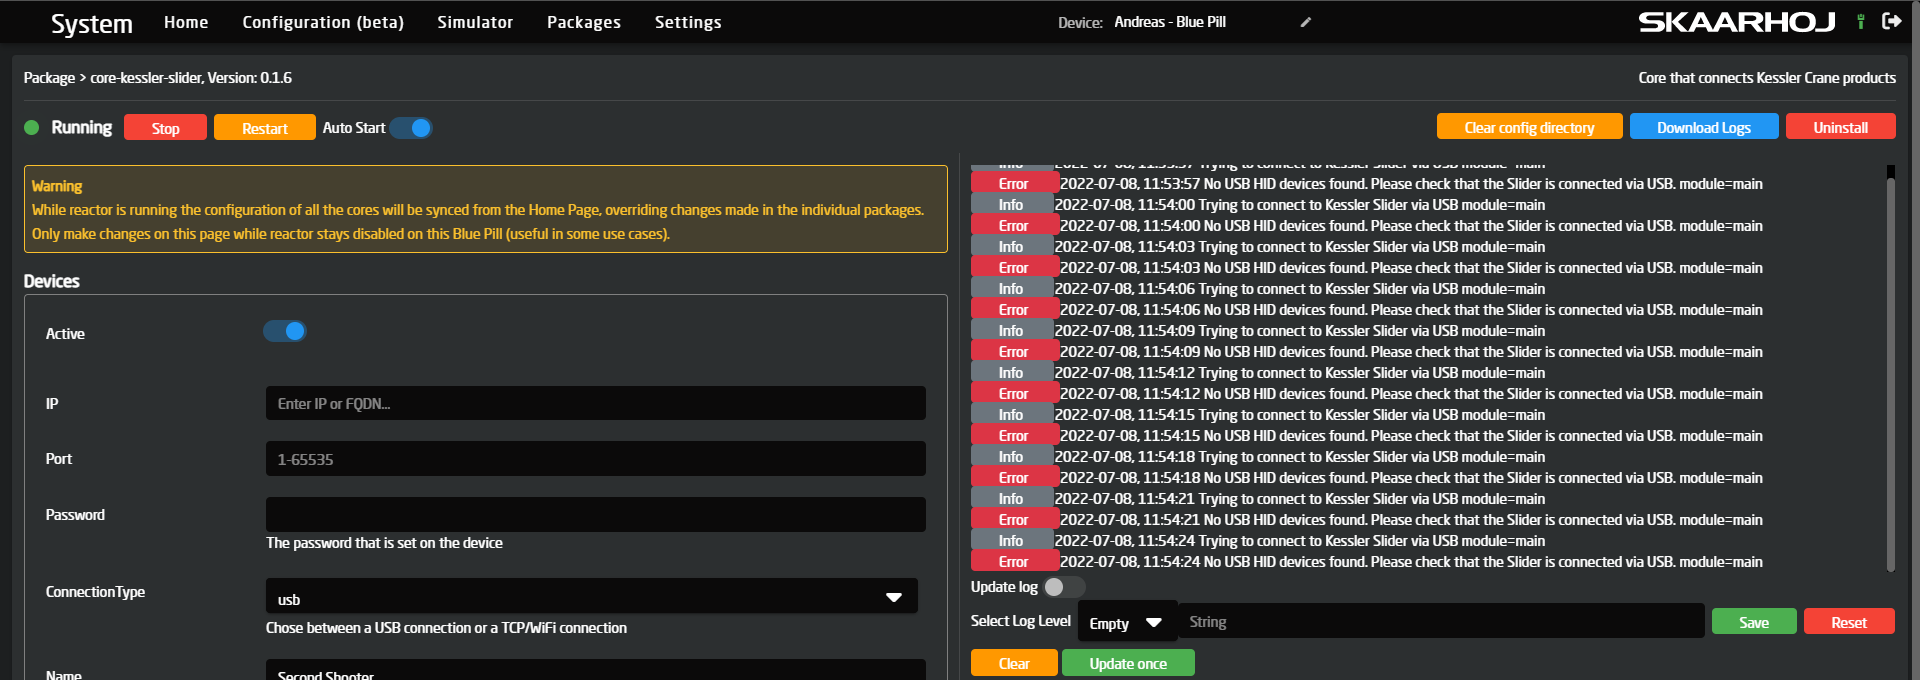](https://wiki.skaarhoj.com/uploads/images/gallery/2022-07/image-1657274081682.png)
Connecting over WiFi
When connecting to a Kessler Crane device over WiFi, you should configure the device like this inside reactor. All the default values should already be correct, as the IP and port of all Kessler sliders are the same when they host their own WiFI.
One thing does need changing from the default, and that is the Connection Type, which needs to be changed from "USB" to "TCP", as it, by default, is set to "USB".
The "Password" field is optional and depends on whether you set a password on the device itself.
The final setup should look like this:
[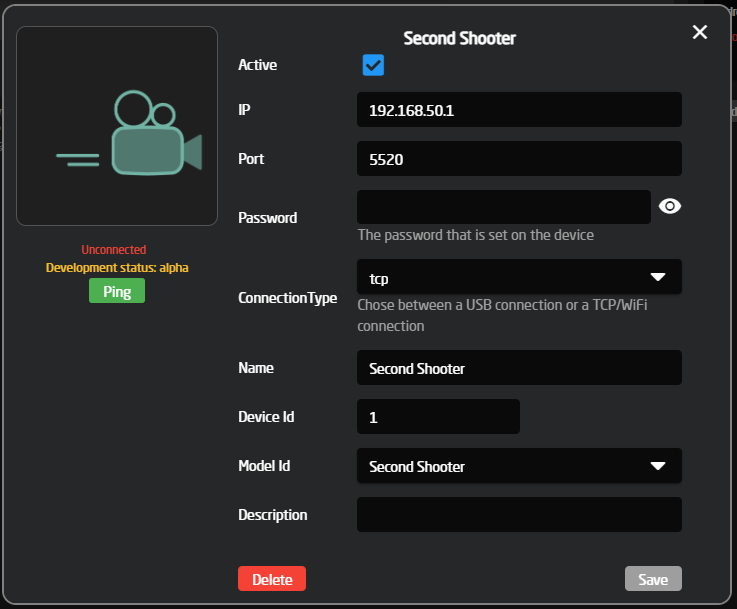](https://wiki.skaarhoj.com/uploads/images/gallery/2022-07/image-1657271830207.png)
More info to be added here about how to enable WiFi on the slider themselves and how to connect to the WiFi...