Biamp Tesira
This is a short guide on how to connect and control a Biamp Tesira audio processor. Since the Biamp Tesira uses 'Block names' and 'Channel numbers inside a block' there is an extra setup-layer involved, compared to other devices.
Add device
On Reactor > Home page you click 'Add Device' to open the devices list. Tesira can by auto discovered. If you don't see the Tesira, you may have to go to the 'Packages' page and manually install the 'core-biamp-tesira' package.
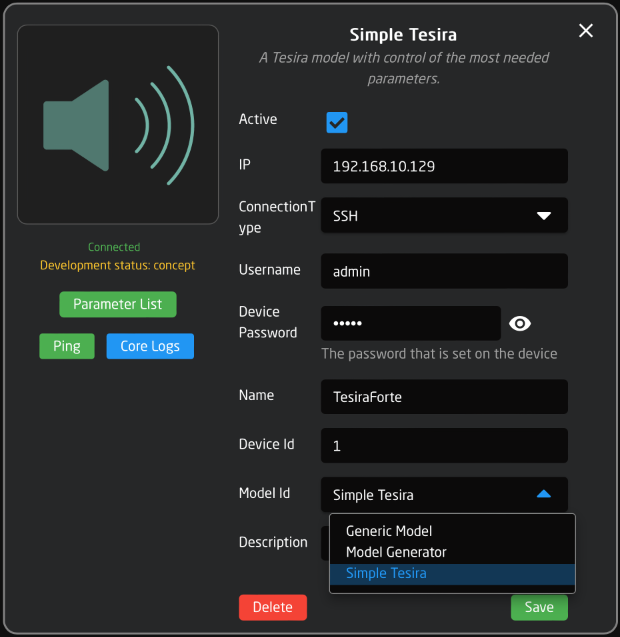
When adding the Tesira, please select the Model Id : Simple Tesira.
Create custom configuration
We have not yet made any default configurations for the Biamp Tesira. This means you must make your own configuration to assign commands to buttons/faders/etc.
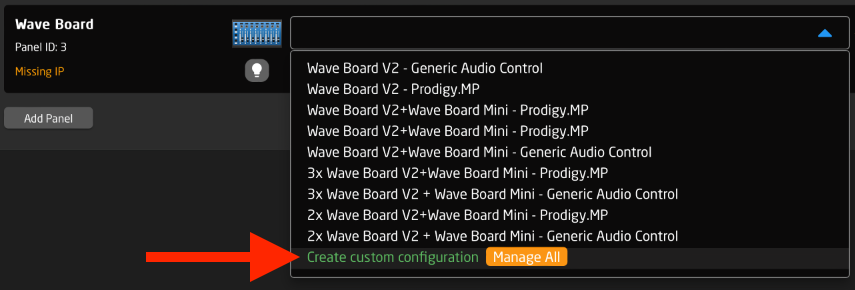
Next to your device icon, open the Configuration pop-up menu and select 'Create custom configuration'. Give it a name and click 'Create'.
Configure 'Instances'
Biamp Tesira is a very flexible audio processor. Instead of just having fixed 'channel numbers' you have both 'Block names' and 'Channel number within a block'. Because of this we need an extra layer to point towards the desired control. We call these 'Instances'.
An 'Instance' is a number, which is linked to a 'Block name' and a 'Channel number'.
For example, we can specify:
- Block name 'Level3' = Instance 1
- Channel number 1 = Instance 1
Then we can send the command:
- Level [Instance 1] = -10dB
NOTE: Depending on the blocks, an Instance include different parameters. Fx. a 'Level Block' includes; Level, Mute, and Label. Other blocks include other parameters.
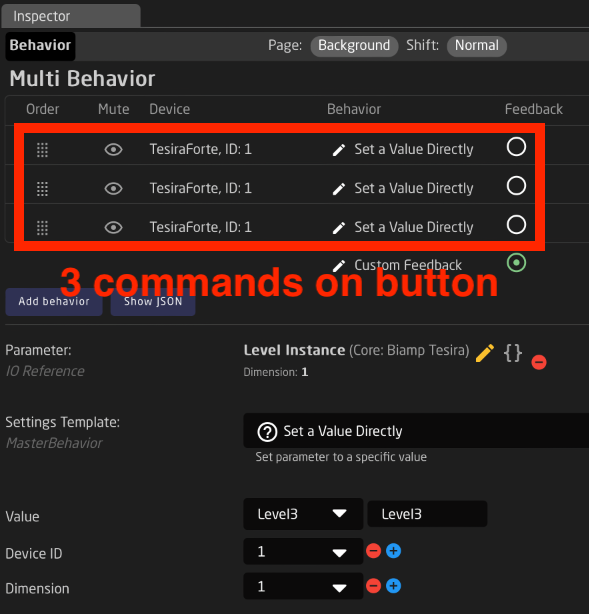
You can send all 3 commands in a row from a button using a 'Multi behavior'.
Use Virtual Triggers for Instance setup
Instead of sending 3 commands from each button, you can pre-configure all 'Instances' using Virtual Triggers. This way you specify the link between 'Block name', 'Channel number' and 'Instance number' once at startup. After this, when sending commands you just use 1 command that includes the 'Instance number'.
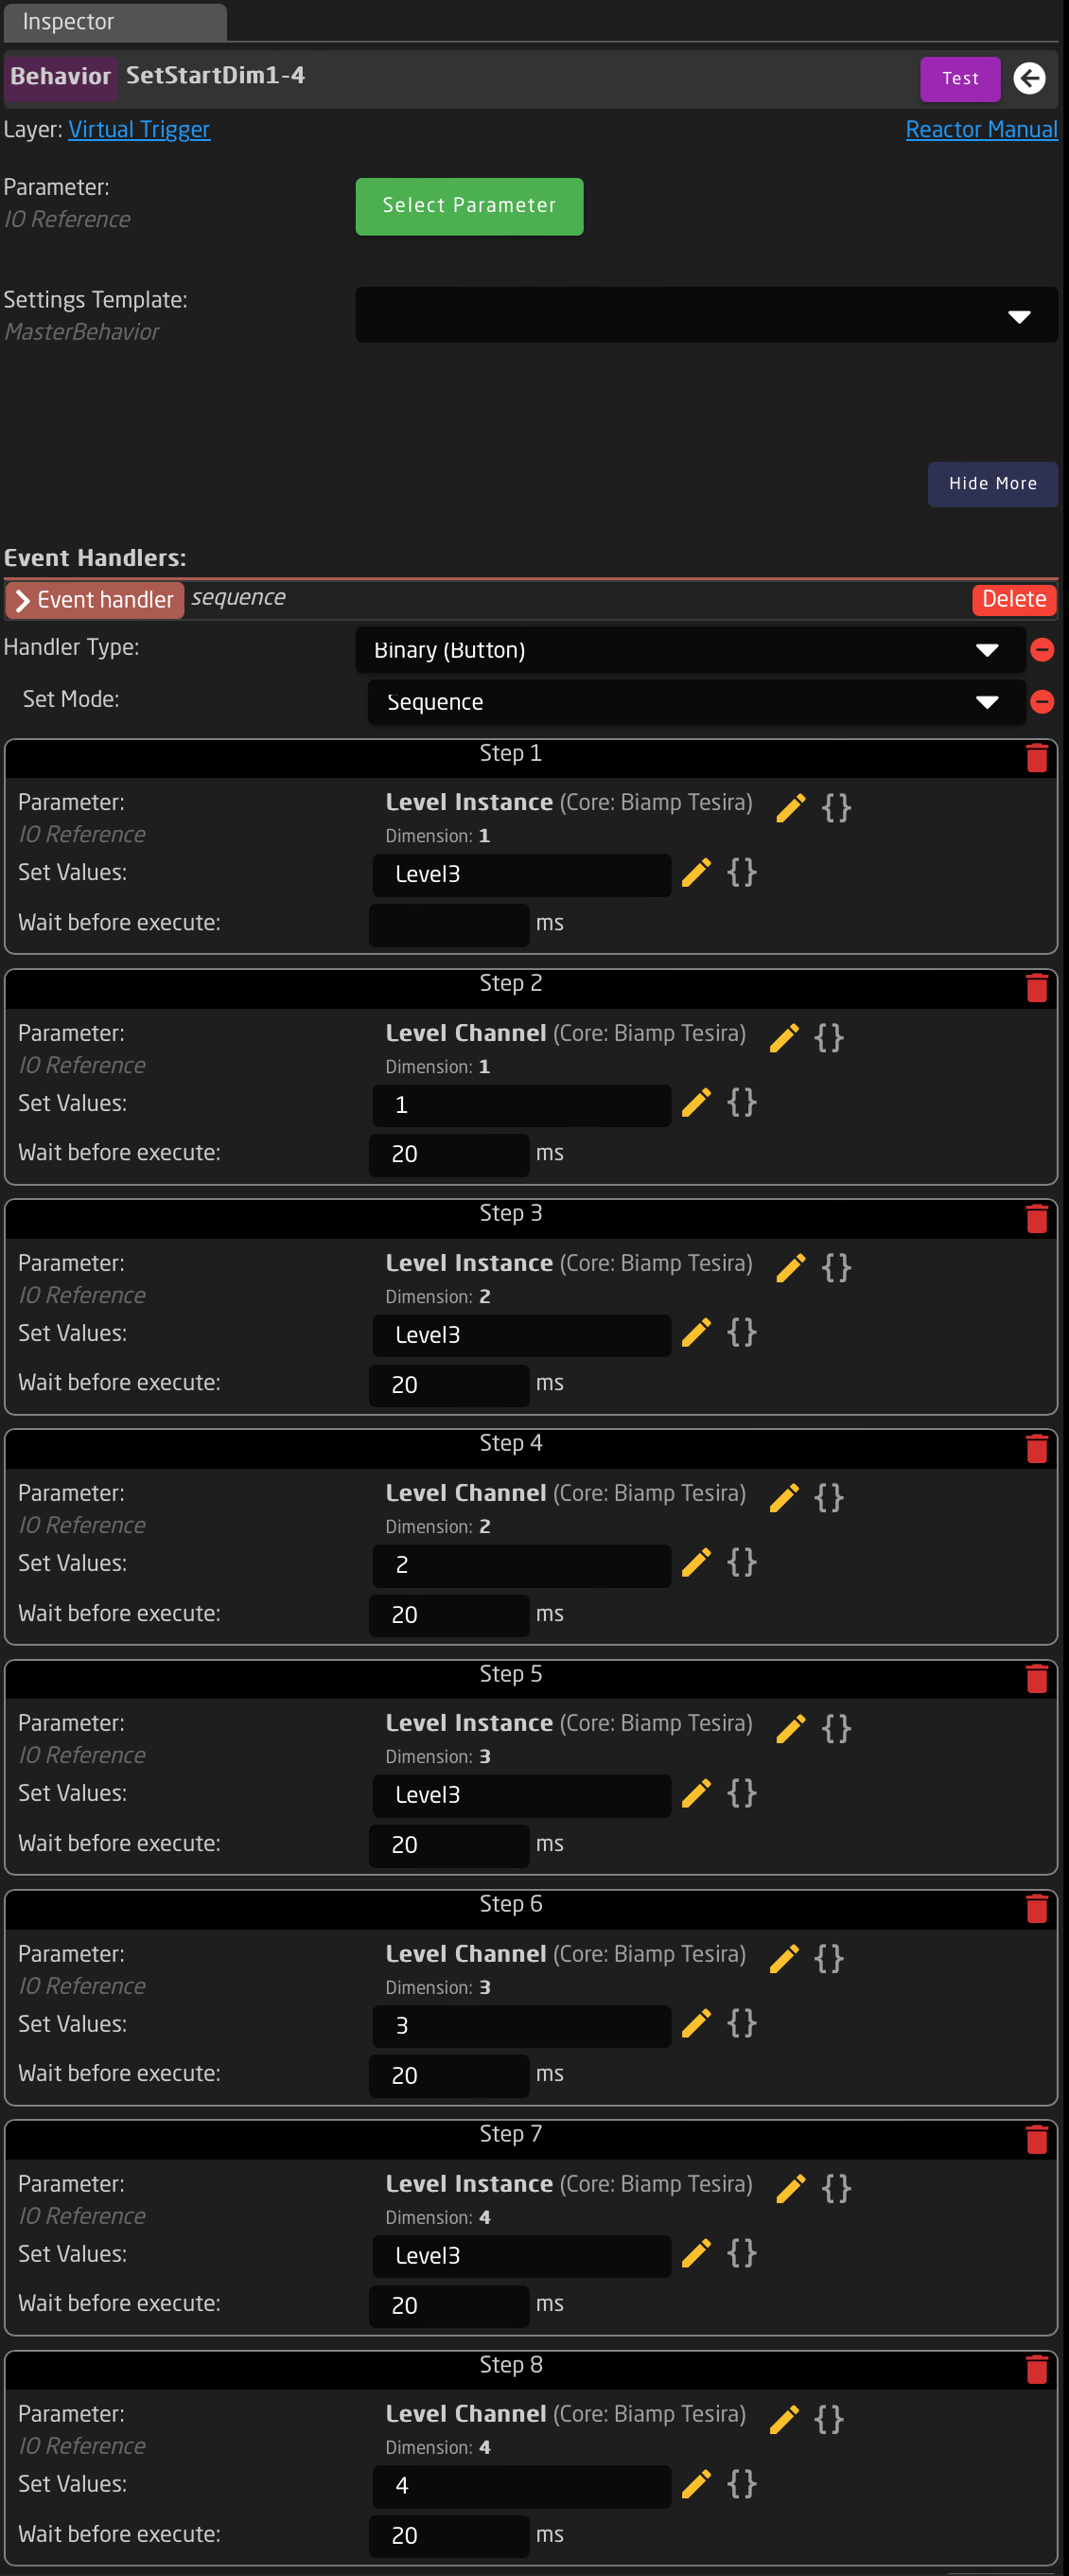
Example of Virtual Trigger that defines 4 instances:
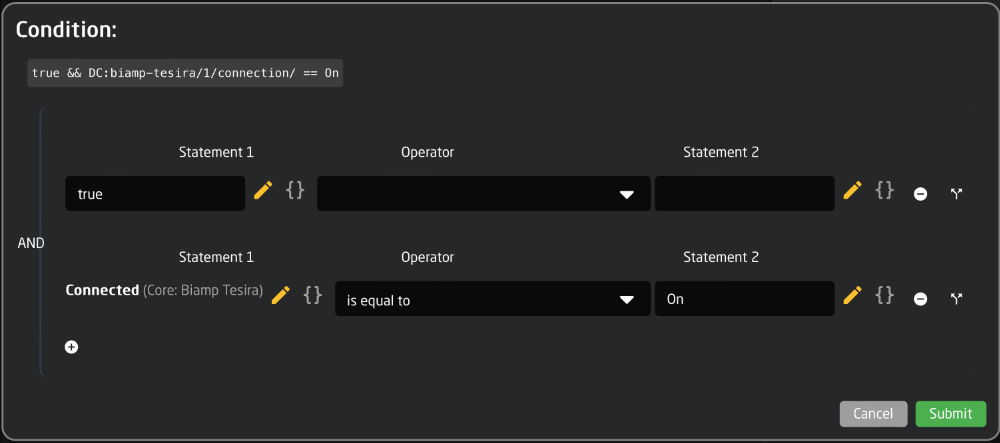
IF: At startup and Tesira is connected
THEN:
- Block name 'Level3' = Instance 1
- Channel number 1 = Instance 1
- Block name 'Level3' = Instance 2
- Channel number 2 = Instance 2
- Block name 'Level3' = Instance 3
- Channel number 3 = Instance 3
- Block name 'Level3' = Instance 4
- Channel number 4 = Instance 4
After this you only need to send 1 command from buttons/faders. For example:
- Level [Instance 1] = -10dB
- Level [Instance 2] = 0dB
- Mute [Instance 3] = On
'IF' screenshot:
'THEN' screenshot (using one Event Handler with 'Binary > Sequence'):