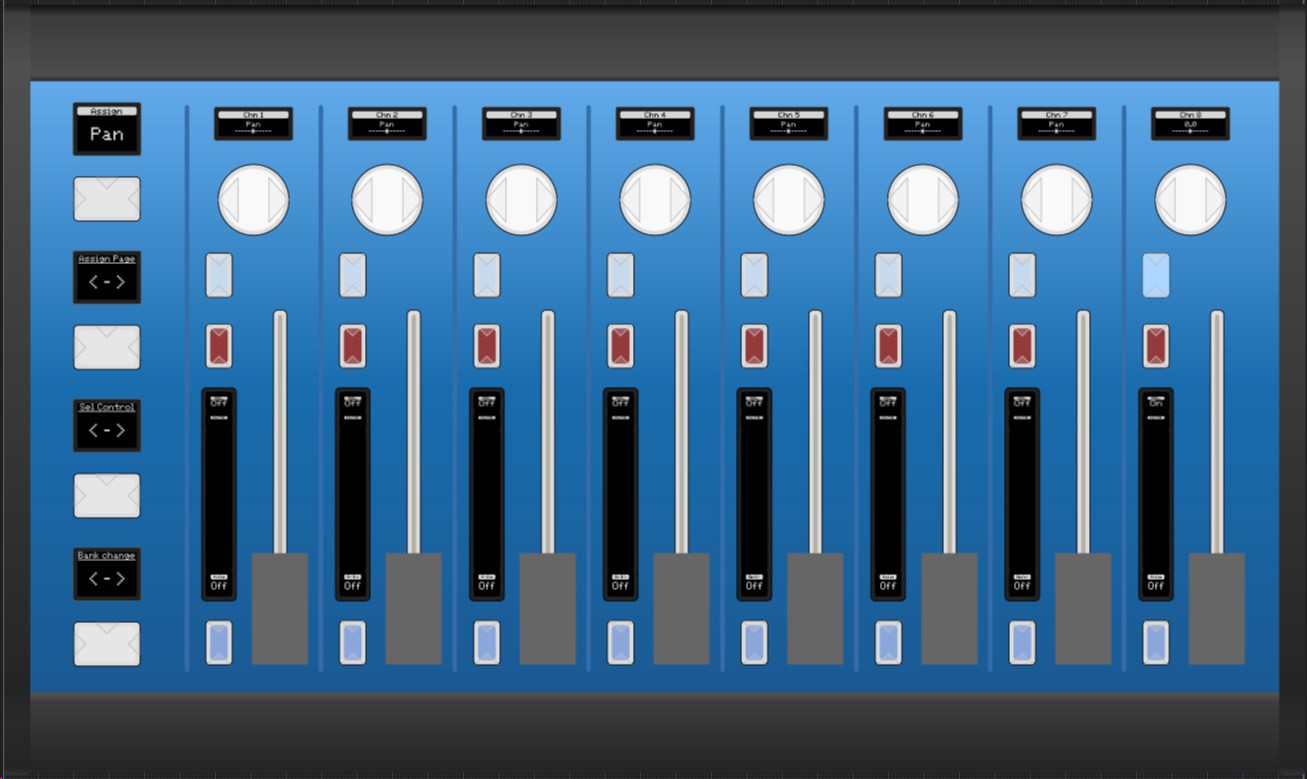
Waves Cloud MX
This guide will show you how to connect a Skaarhoj Waveboard to the Waves Cloud MX mixing platform.
On your Cloud MX instance, install the rtpMIDI driver. This will be used to establish a midi connection to the Skaarhoj device.
Once installed, open the rtpMIDI program, and add a new session: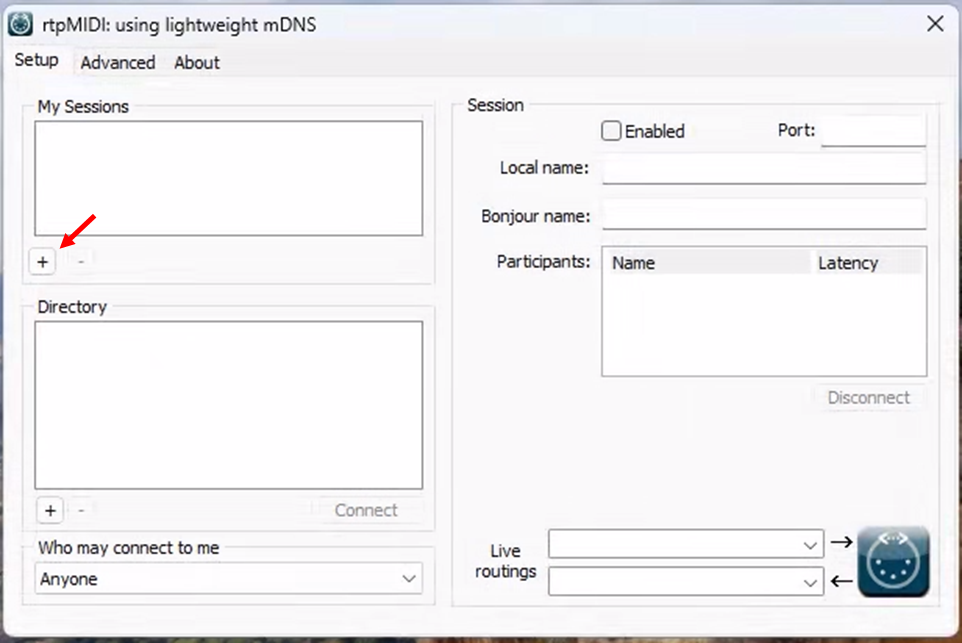
Give the session a name, and press enabled. Make sure that the 'Who may connect to me' setting is set to 'Anyone'. 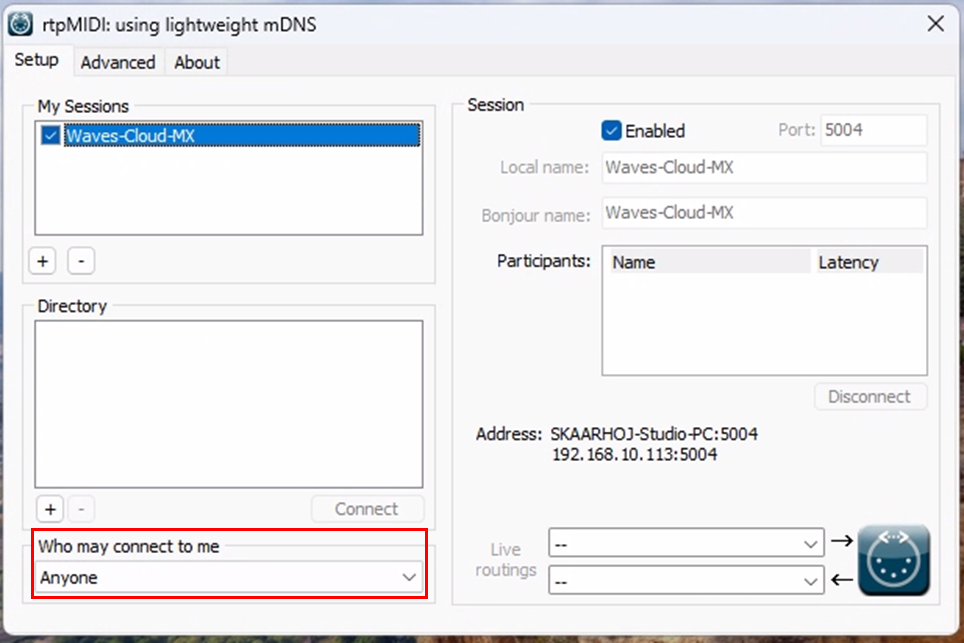
Open the Cloud MX software, and go to the 'Setup' menu. Add a new Mackie controller. And open its settings window.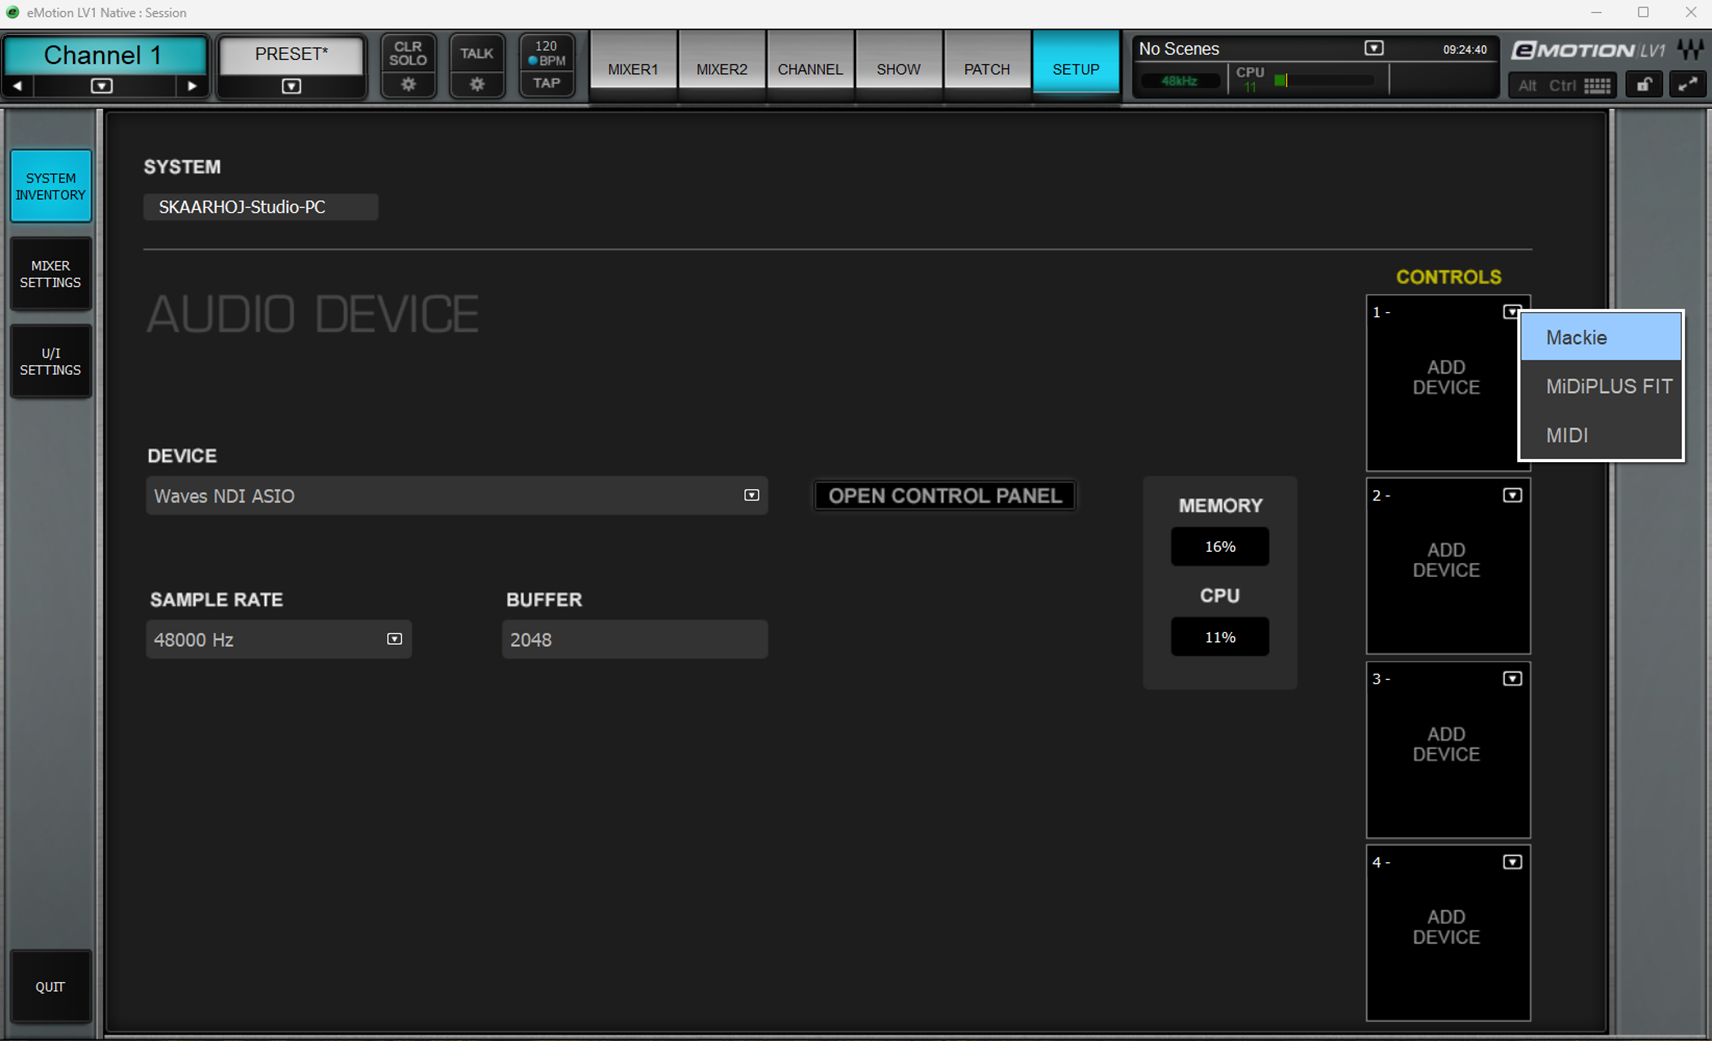
Set the input and output port on Device 1 to match the newly created rtpMIDI session. Enable the 'Jog Wheel Adjust Selected Controls' setting, and if wanted, the 'Follow Aux-Sends' flip.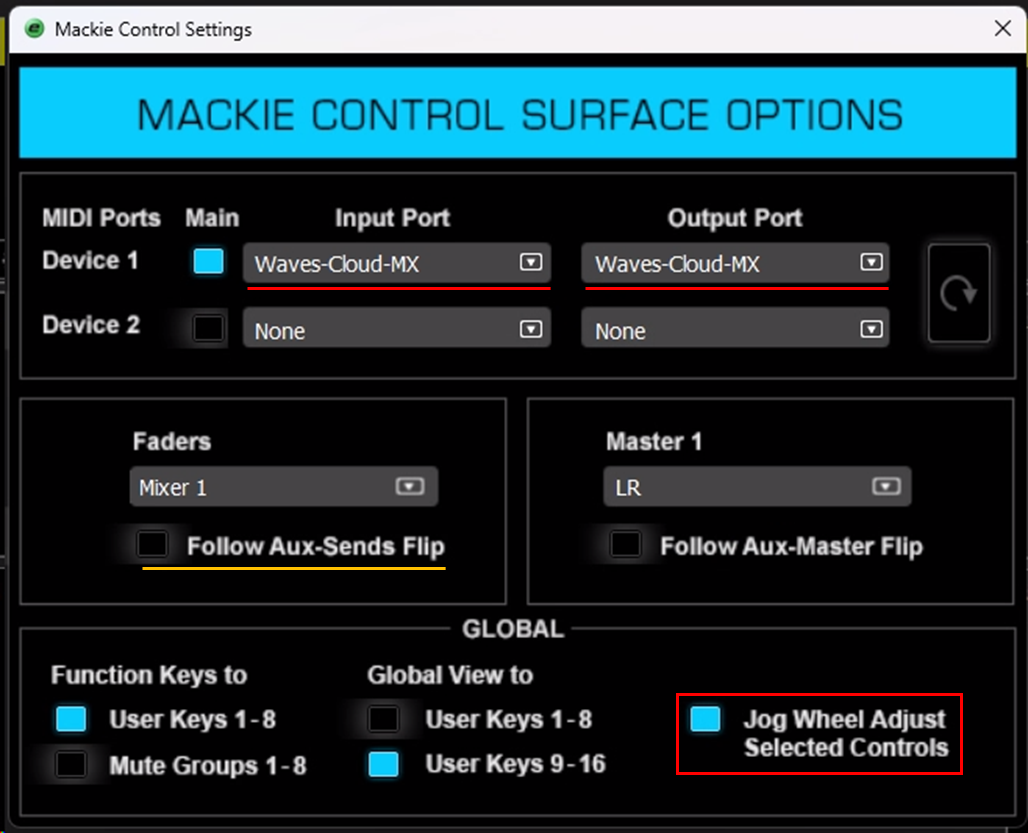
Open reactor on your Skaarhoj device. On the home screen, click the 'Add Device' button on the right side of the screen. 
Go to the 'Add Manually' tap and search for 'Waves'. If nothing shows up, enable the 'Show Concepts' setting. Select the Waves Cloud MX device.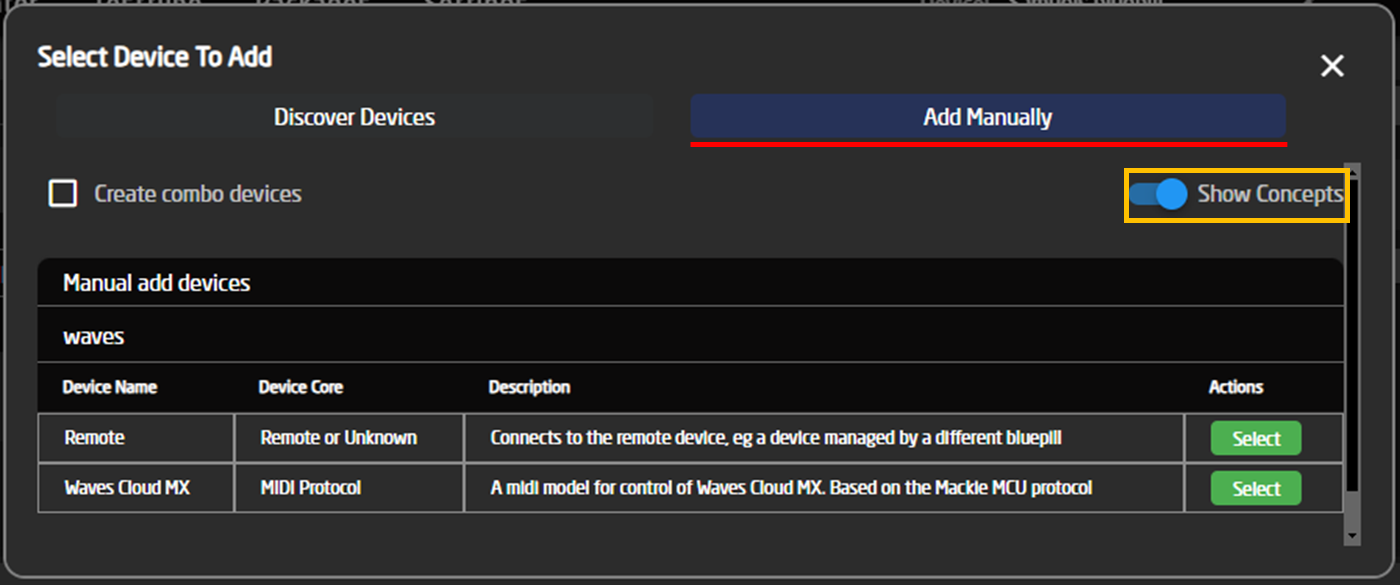
Enter the public IP of your Waves Cloud MX instance, and check that the Remote Port matches the port of the RTP midi session created earlier. In most cases, the default port of 5004 is correct.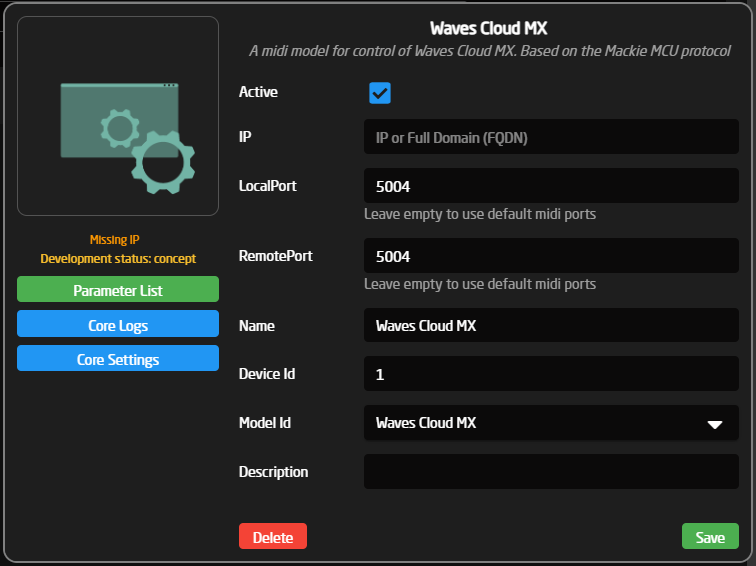
Confirm that the device is connected. If not, check that the IP and port is set correctly, and that your Skaarhoj device is connected to the internet.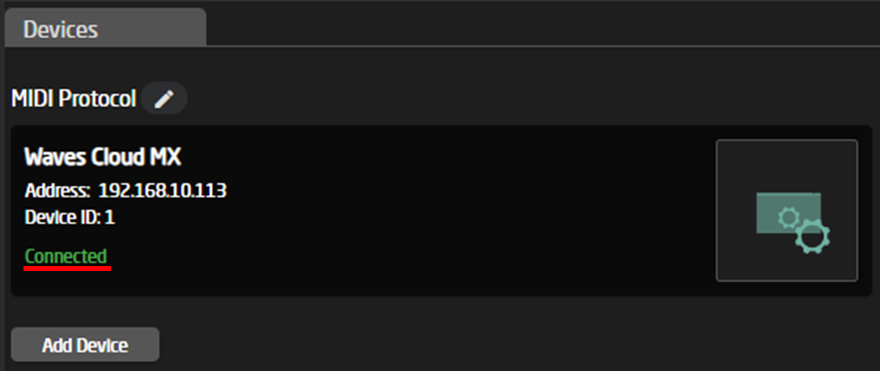
On your Waveboard, select the 'Waves Cloud MX' configuration.
Now you should be all set to use your Waveboard with Waves Cloud MX.
Using two Waveboards together
To use two Waveboards at once, you need to add an extra rtpMIDI session. Notice the new port number on the second session.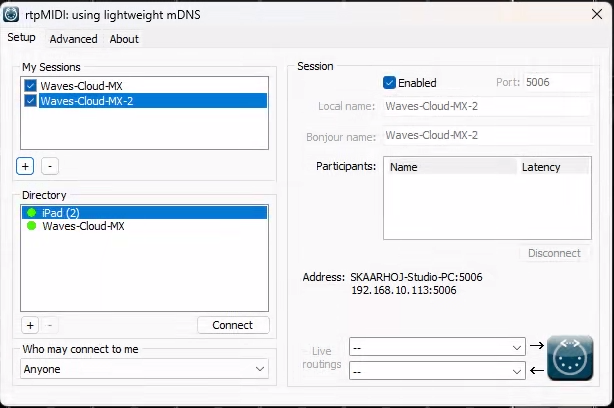
Go to the Mackie Control Settings, and add the new rtpMIDI session as Device 2. Make sure Device 1 is still set as the main device.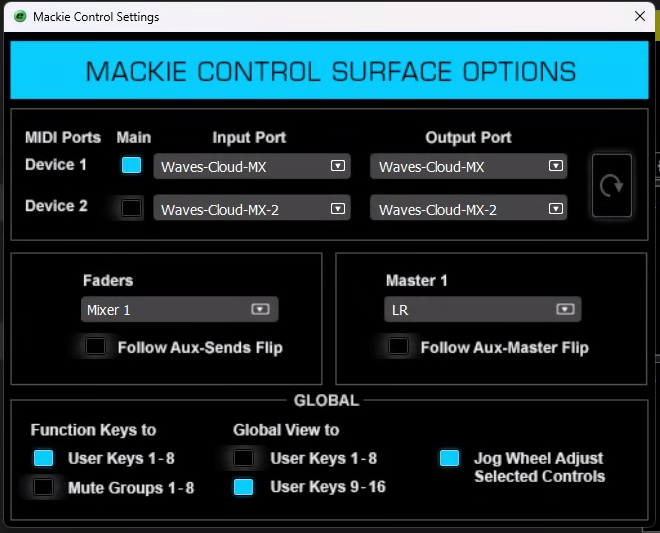
Add an extra Cloud MX device in Reactor on your first WaveBoard. Set the local and remote port to the new rtpMIDI sessions port.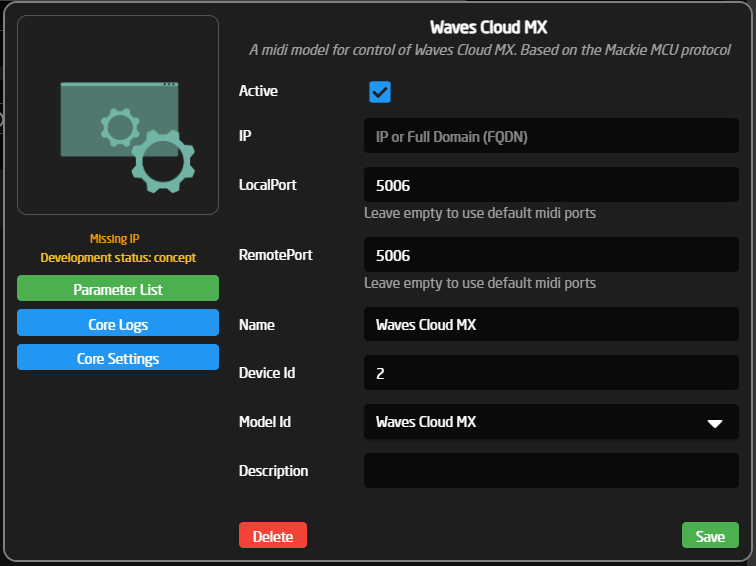
Make sure that the 2 devices are set with device ID 1 and 2: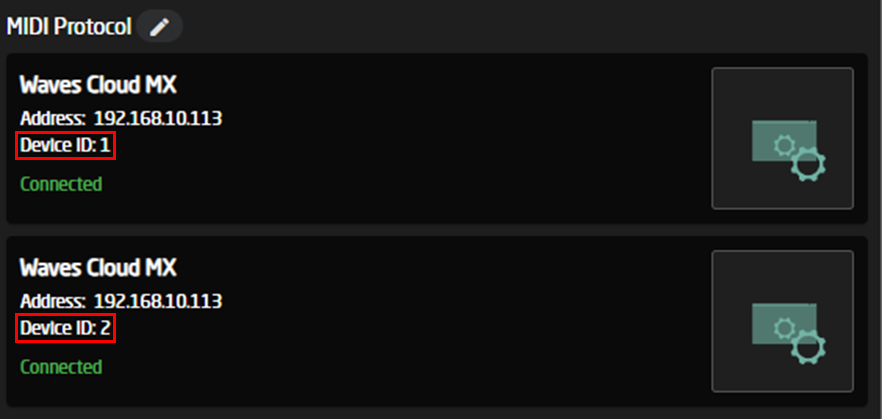
On your second WaveBoard, go to the settings menu, and make sure it is set to 'RawPanel Mode'.
On your first Waveboard, select the '2x WaveBoard V2 - Waves Cloud MX' configuration.
Press the 'Select missing panel' and 'Add new panel'. In the 'Discover Panels' menu, your second WaveBoard should be shown now, otherwise add it manually.
Now you should have 16 channels of control over the 2 WaveBoards.


