Zoom OSC with XPoint24
How to set up Zoom OSC
ZoomOSC is used to managed zoom calls, here is how to set it up
Getting ZoomOSC
Go to the website: https://www.liminalet.com/zoomosc
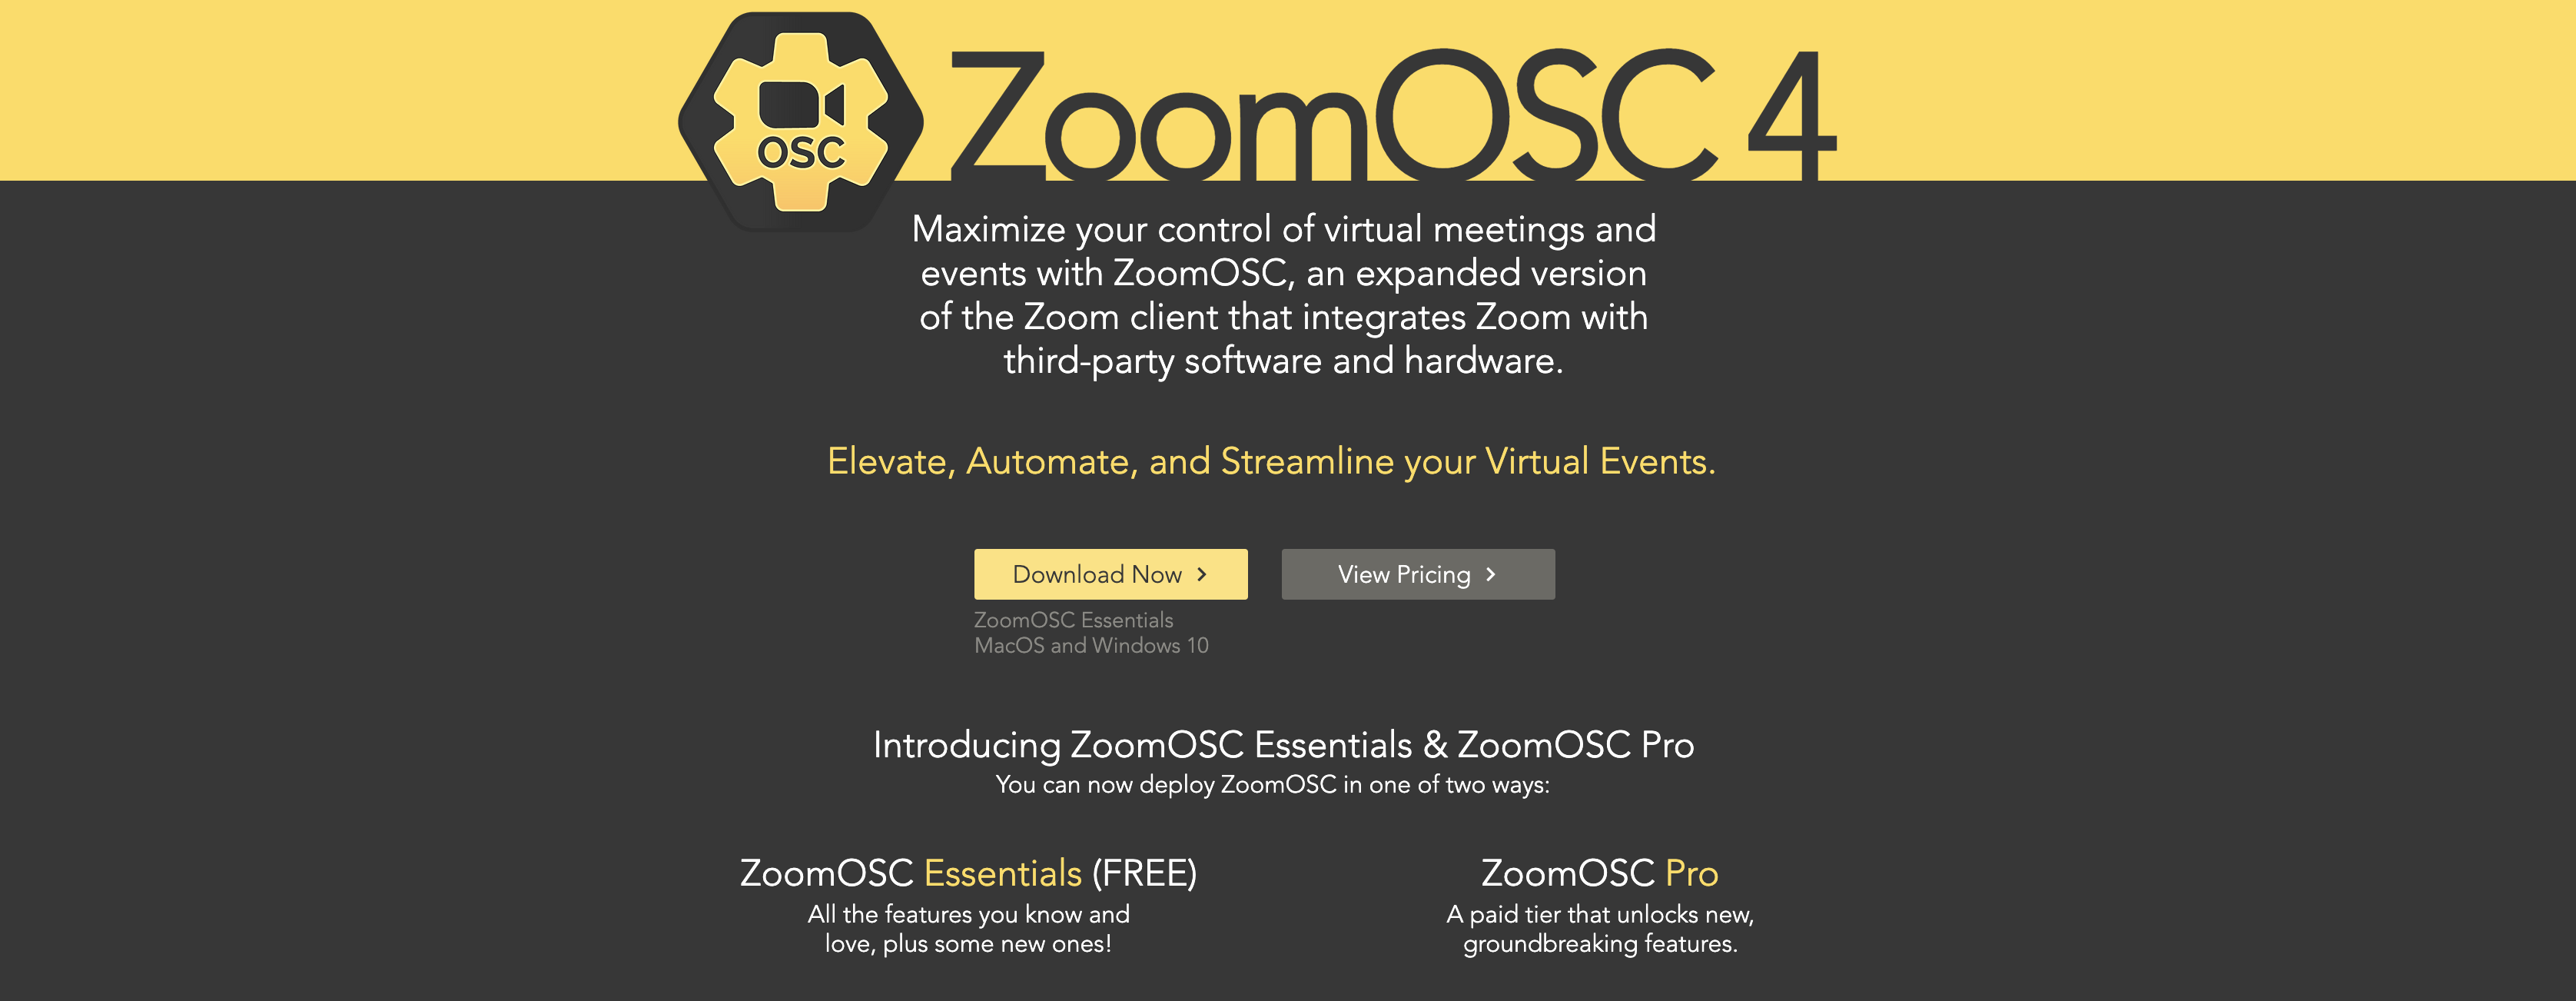
From here you can press Download Now It will take you to a form you can fill out, and then you will receive an Email with link to download the Essentials version.
After installing and running the program you will see 2 separate windows.
Window 1:
Settings window will show you status updates, and allow you to adjust your settings.
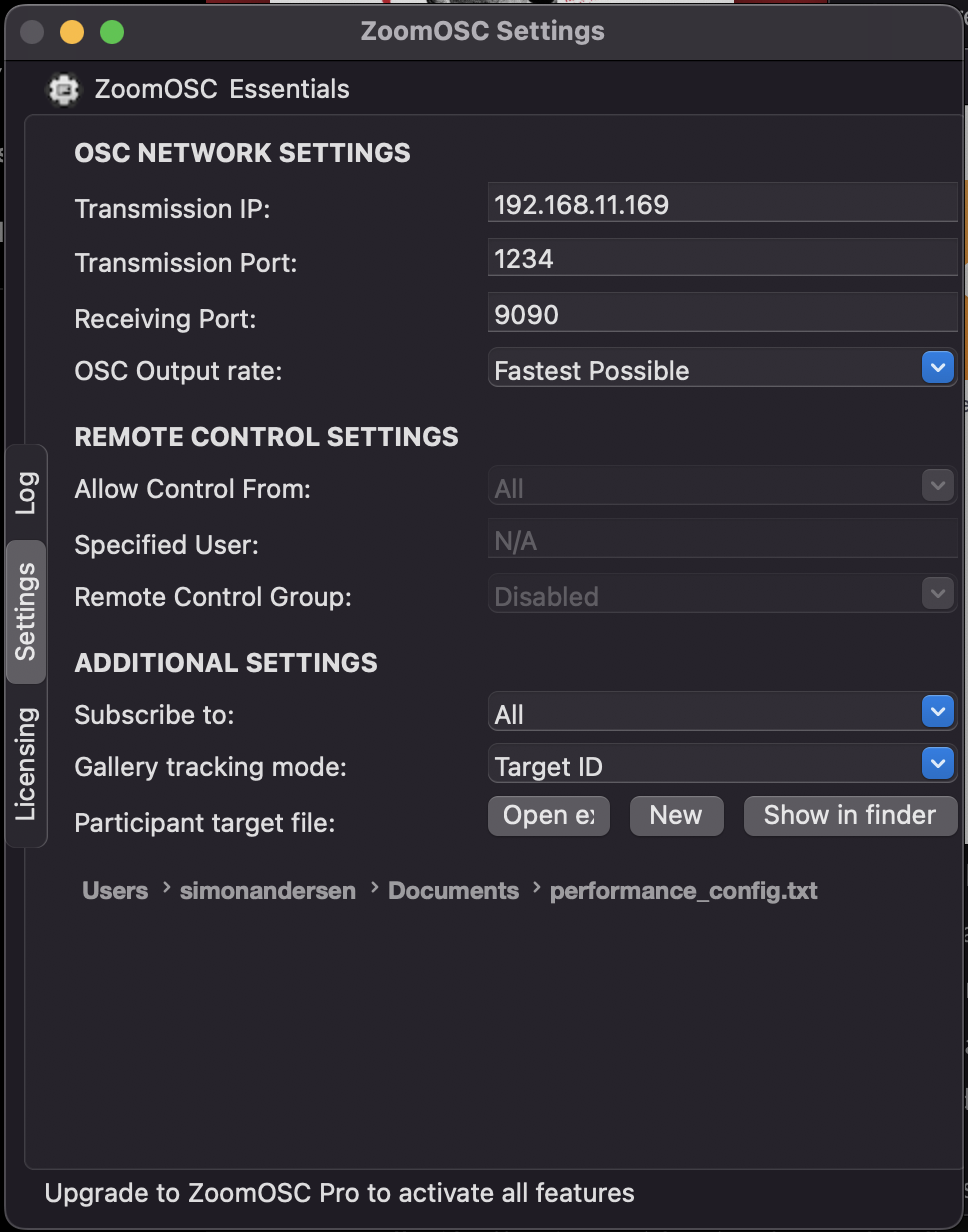
It is in the Settings tab you find Network Settings. Here it's important that you find
Transmission IP (IP where Zoom OSC will send messages to)
This should be the Bluepill IP address
- Transmission Port (port where Zoom OSC will send messages to)
This value is used by Reactor to receive information from Zoom OSC
- Receiving Port (port where Zoom OSC will listen for messages)
This value is used by Reactor to send information from Zoom OSC
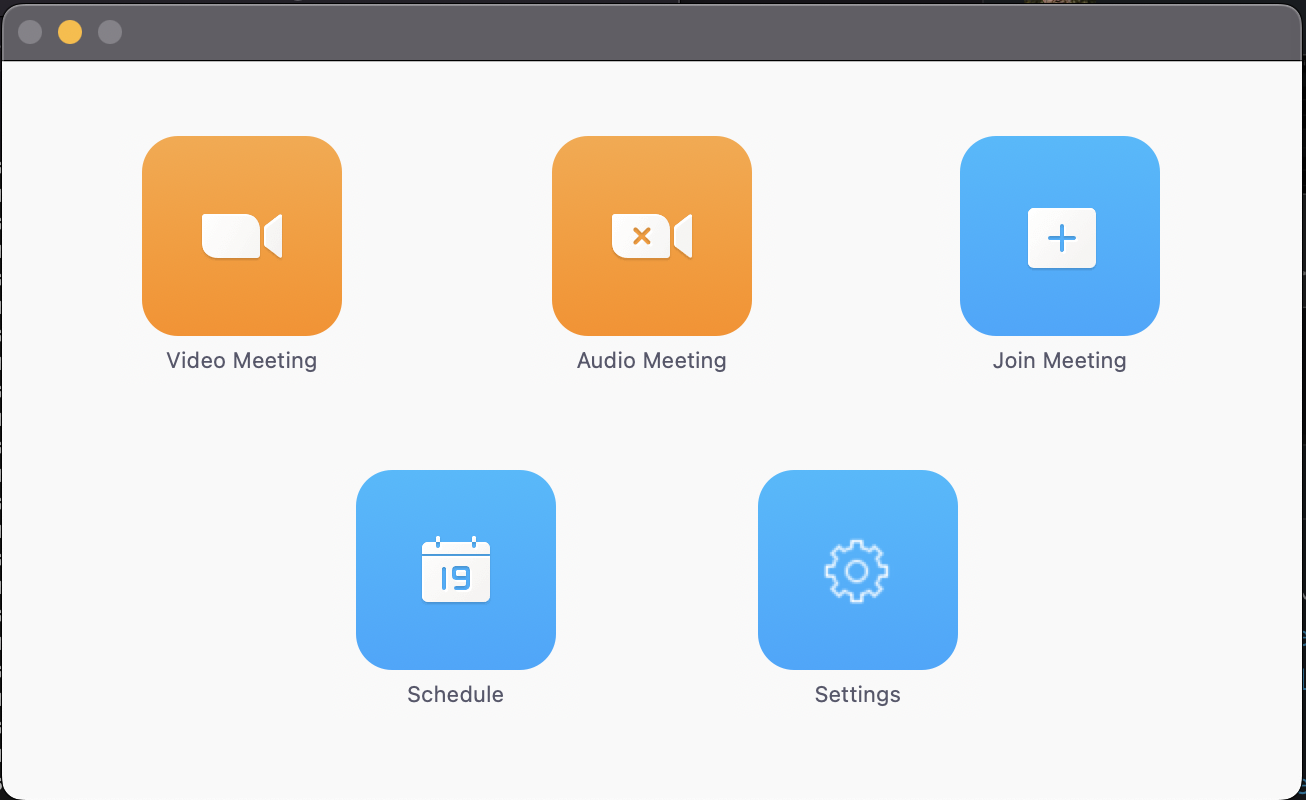
Window 2:
The other window will allow you to join a Zoom meeting or webinar.
Setup - Zoom OSC with XP24
Zoom OSC with XP24:
Use Zoom OSC with our XP24 to have everything at your fingertips
We have created a Zoom OSC configuration for our XP24 panel. This means that everything is taken care of. By standard it's set up to auto populate, meaning that as users join the call they will be assigned a button, and from there you have full individual control and can toggle mute, video, and if the attendee is in spotlight or pinned.
We have made it easy to change settings for all your attendees by making dynamic user commands.
Step-by-step
|
Step 1 |
Install Zoom OSC |
If you haven't already now is the time to download and install the Zoom OSC software https://www.liminalet.com/zoomosc Works on MacOS and Windows 10 |
|
Step 2 |
Install package |
To control Zoom OSC from a Skaarhoj controller go to your bluepill via reactor. Navigate to the Packages tab and search for “ZoomOSC” |
|
Step 3 |
Add Device |
When the devicecore is installed correctly you can now search for “ZoomOSC” in the Device tab from Home. Difference for ZoomOSC Essentials
ZoomOSC Pro
ZoomOSC Pro Advanced
|
| Step 4 |
Setting up the device |
IP address: This IP address should be the PC running Zoom OSC Receiving Port & Transmission Port: Find ports in Zoom OSC Networking Settings The value Transmission Port in Zoom OSC should be the Receiving in Reactor |
| Step 5 | Adding Panel & choosing the right configuration |
Make sure the XP24 is turned on. Now it should say “Waiting for raw panel”, and display its IP address In Reactor you can now press Add Panel. Search or find your XP24 panel. If it's not automatically detected you can choose to manually add it. Go to the tab “Add Panel Manually” When added you can make sure the configuration is set to ZoomOSC And now the panel will display one message “Meeting OFF”, meaning that is has connection to Zoom OSC on your computer and waiting for you to start a video meeting |
Control - Zoom-OSC from XPoint24
How to run Zoom-OSC from XPoint24
Here is a run-through of the standard configuration for Xpoint24
Global Settings
The first thing you will see when you start the meeting is global settings in the top row, and a user row on the bottom.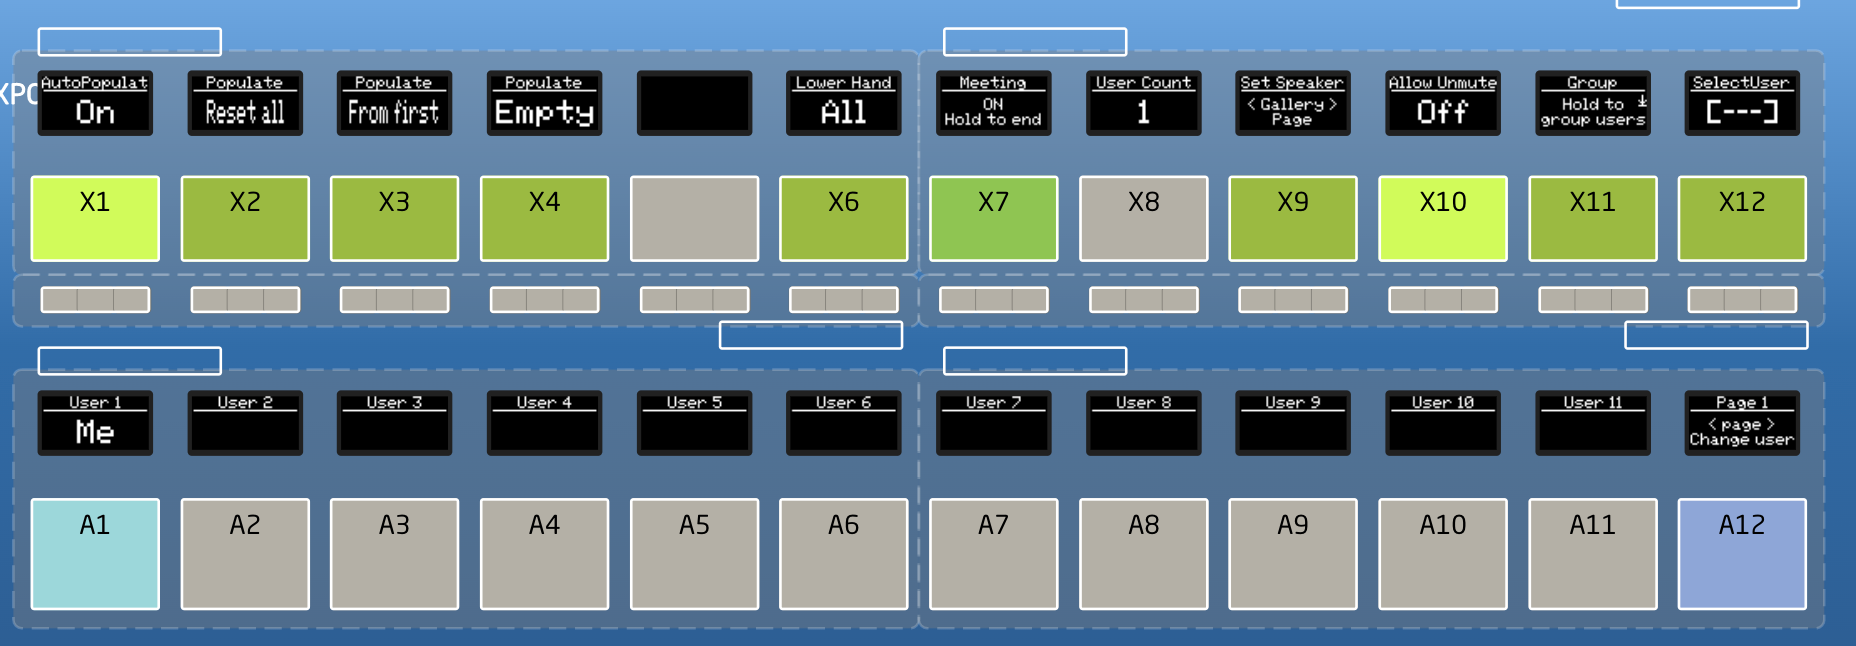
- Auto Populate
This is on by default, and therefore the Host user has been assigned slot User 1. When Auto populate is active, attendees will automatically get assigned a button from the lower row - Reset all
- From first
- Empty
- Lower hand All
This gives the ability to lower all raised hands from one button - Meeting - Hold to end
Hold for X seconds, and the meeting ends for all user - User Count
Here you can see how many attendees is in the meeting - Set Speaker
- Allow Unmute
Toggle if attendees should be able to unmute themselves - Group
Grouping attendees can give you the same individual control of users (See Attendee settings), just for a group of attendees - Select User
This comes in handy when you want to ha
Attendee settings
Choose an attendee and now you can toggle settings for that individual
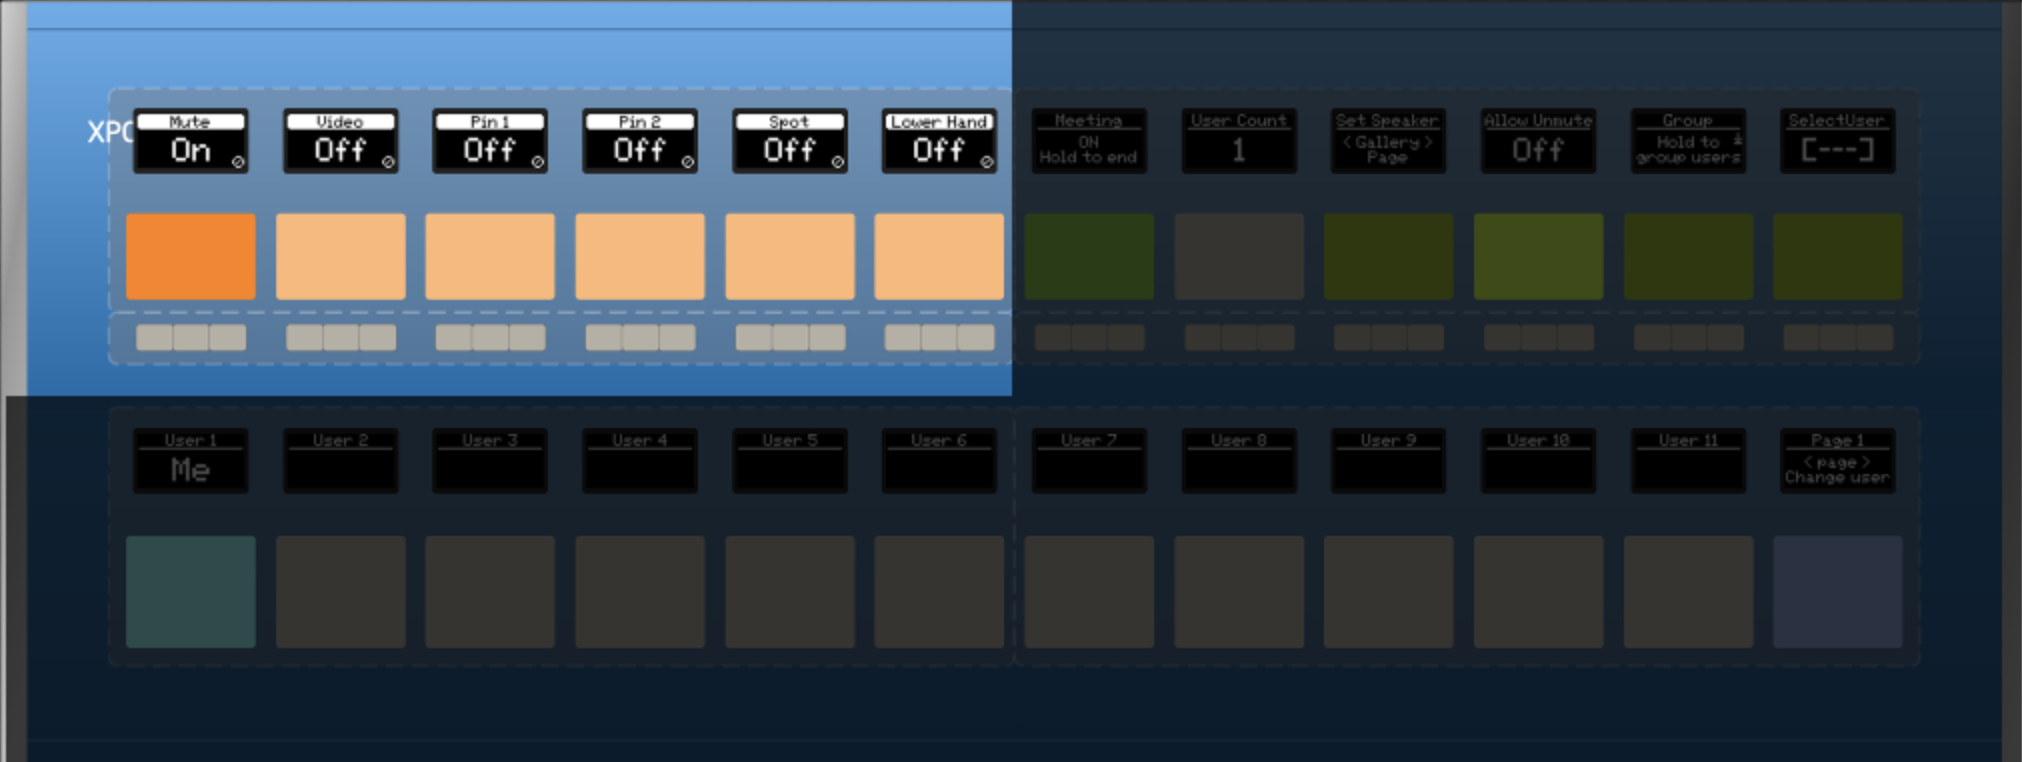
- Mute
Toggle Mute for the Attendee (If the Attendee has muted themselves they will get a popup saying the Host has asked them to unmute) - Video
Toggle Video for the Attendee (If the Attendee has turn off video themselves they will get a popup saying the Host has asked them to turn on video) - Pin 1 & 2
Host can pin Attendees. This pin will only be visible for the Host - Spot
Host can spot Attendees. This pin will only be visible for the Host - Lower Hand
If the Attendee has used the function Raise Hand. The Host has the ability to lower the hand again