Using Densitron UReady 1U and UReady 2U Displays for with Raw Panel
The SKAARHOJ xpanel-touch package allows users to create browser-accessible software UIs, appearing on the local network as Raw Panel devices.
Densitron presents compelling touch screen options for use with xpanel-touch. Their rack-mountable designs are notable. Additionally, certain screens come equipped with an internal computer, enabling direct web browser operation on the screen without requiring an external driving computer.

Options include:
-
For a 1RU, 2RU, or 4RU Densitron touch display connected to any computer as a screen: This guide does not cover this setup. Essentially, you will need to launch a web browser in kiosk mode (full screen) directed to the SKAARHOJ Blue Pill device hosting the xpanel-touch webserver.
- A 2RU or 4RU unit with an integrated computer, running Lubuntu: We cover this setup below with instructions on autostarting the web browser.
- Build a compact "rack" style touch panel using a 1RU USB display and a Raspberry Pi driving it. Covered below as well as a DIY project.
This guide will assist in quickly setting up such configurations.
UReady 2U (with built-in x86) setup
The UReady 2U displays, and likely the 4U versions as well, are available with HDMI like a regular monitor or with a built-in computer. This setup guide focuses on the latter.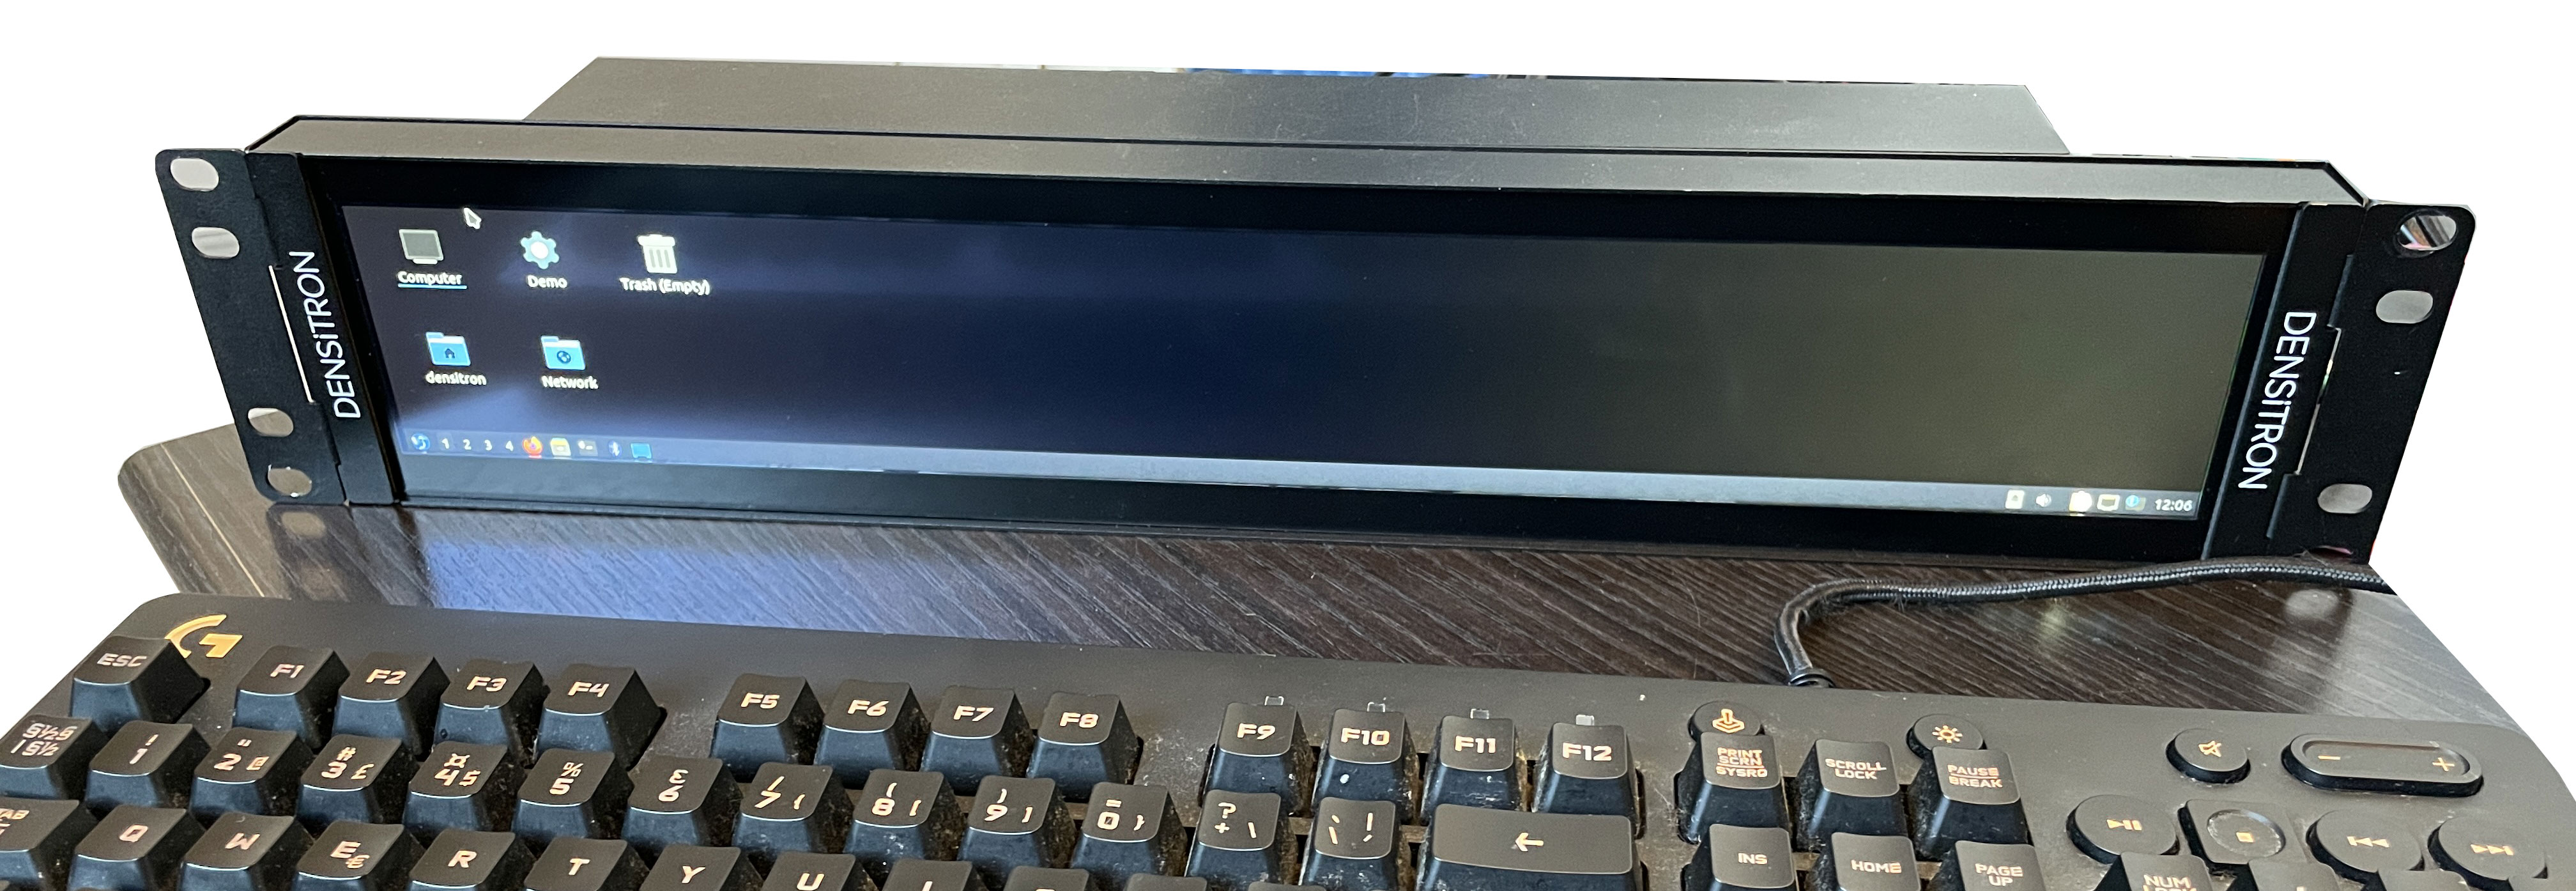
Initial Setup:
-
Out-of-the-Box Functionality:
- The units come pre-installed with the Lubuntu distribution, which should work immediately upon setup. This simplifies the process, requiring only the setup of an autostart sequence to open the browser in full-screen mode.
-
Preparing for Setup:
- Since our unit did not have an SSH server installed, you will need a keyboard and, preferably, a mouse.
- The default username and password are "densitron/densitron."
-
Physical Setup:
- Connect your keyboard and mouse to the unit.
- Power on the unit.
-
Access Terminal:
- After the device boots, locate the terminal icon on the taskbar and open it.
-
Create Autostart Entry:
-
To create a new autostart entry, type the following command in the terminal:
-
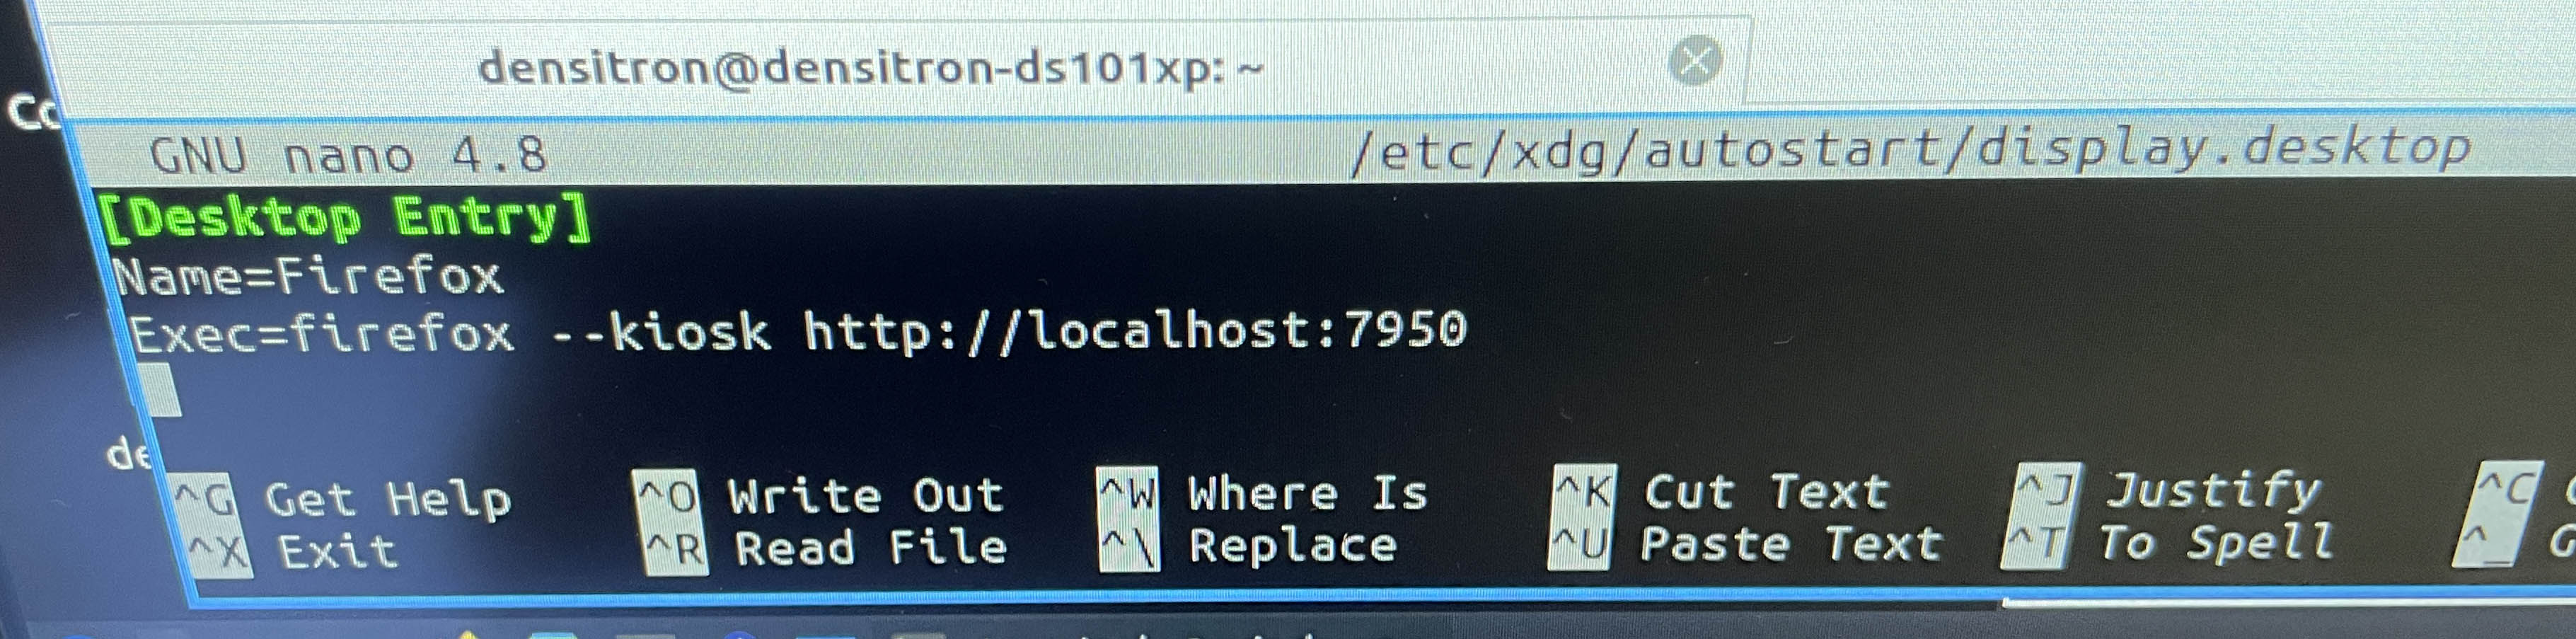
sudo nano /etc/xdg/autostart/display.desktopIf prompted, enter the password. This action will open an empty file for editing.
Lubuntu comes with the Firefox Browser pre-installed, which you'll use for this setup.
You will need to edit the content of the file to suit your needs. The content should resemble the following template, but you'll need to replace it with the IP address and port of your xpanel-touch server:
[Desktop Entry]
Name=Firefox
Exec=firefox --kiosk http://192.168.11.5:7952Save the changes and exit. That's all there is to it! When the panel restarts, Firefox will open in full-screen mode at the address specified in the configuration. If you need to change the IP address later, simply edit the file again.
sudo nano /etc/xdg/autostart/display.desktopTo prevent the browser from automatically starting up, you can follow these steps:
sudo rm /etc/xdg/autostart/display.desktopVariant with embedded version of xpanel-touch
It's possible to run the xpanel-touch application directly on the Densitron panels with built-in computer. This entails:
- Receiving a special xpanel-touch application from SKAARHOJ upon request, licensed to your device.
- Setting it up to start on every boot of the panel
- Pointing the screens web browser to the localhost instead of external IP address.
Running the binary:
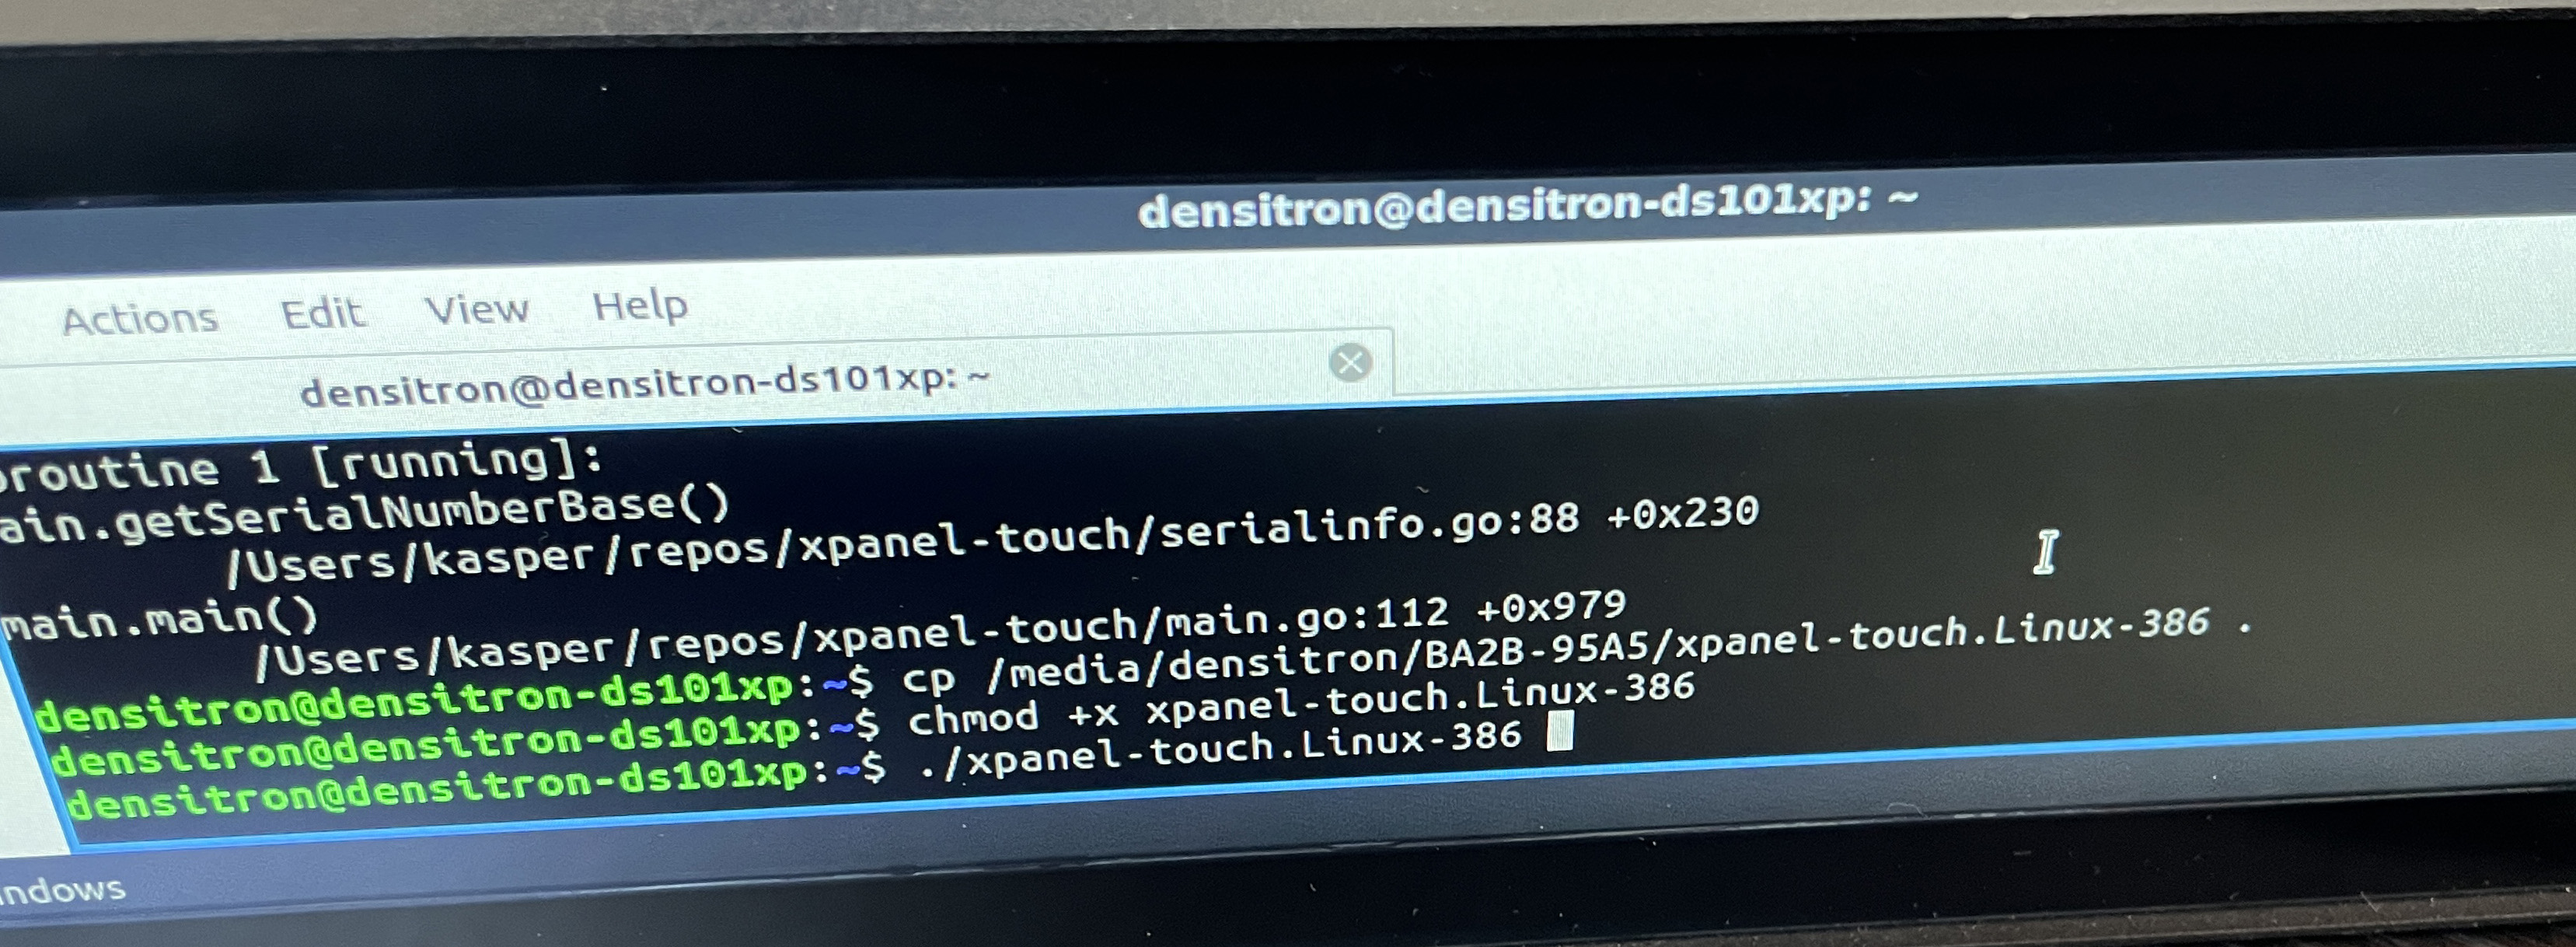
There are likely several methods to transfer the xpanel-touch binary from SKAARHOJ to your Densitron panel. One effective approach is using a USB stick via the USB port. We recommend copying the binary into the home directory of the densitron user, setting execute permissions, and running it from there. Below are examples with the copy command and changing permissions:
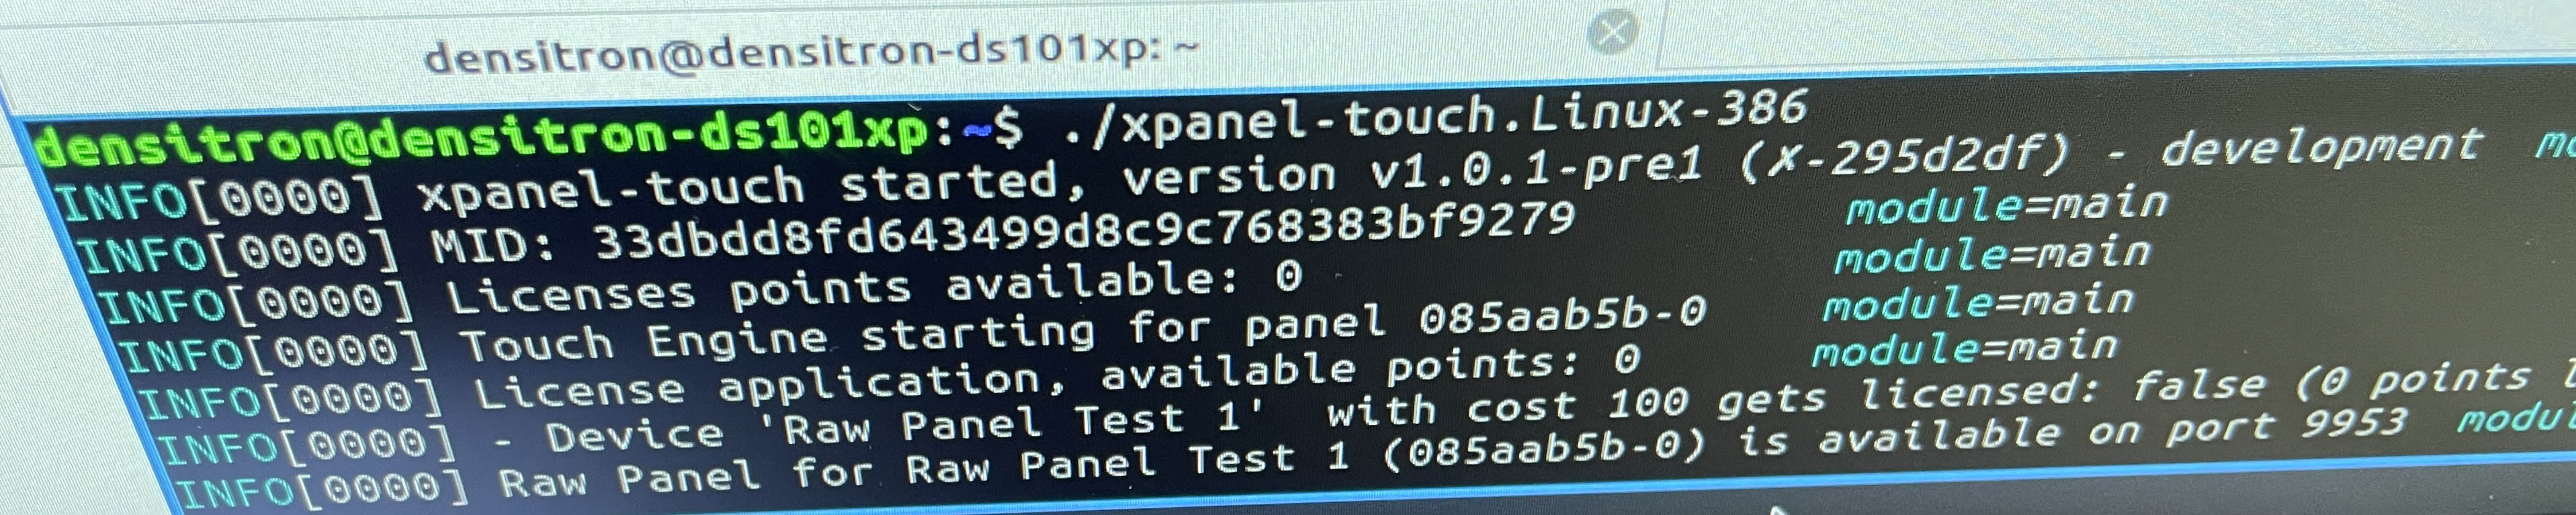
After running it for the first time, two things will happen:
- A config file, xpanel-touch.toml, has been created in the home folder.
- A code, "MID", is shown, please send that to SKAARHOJ to receive your license. In return you will get a new binary which is licensed for your Densitron panel.
Configuration
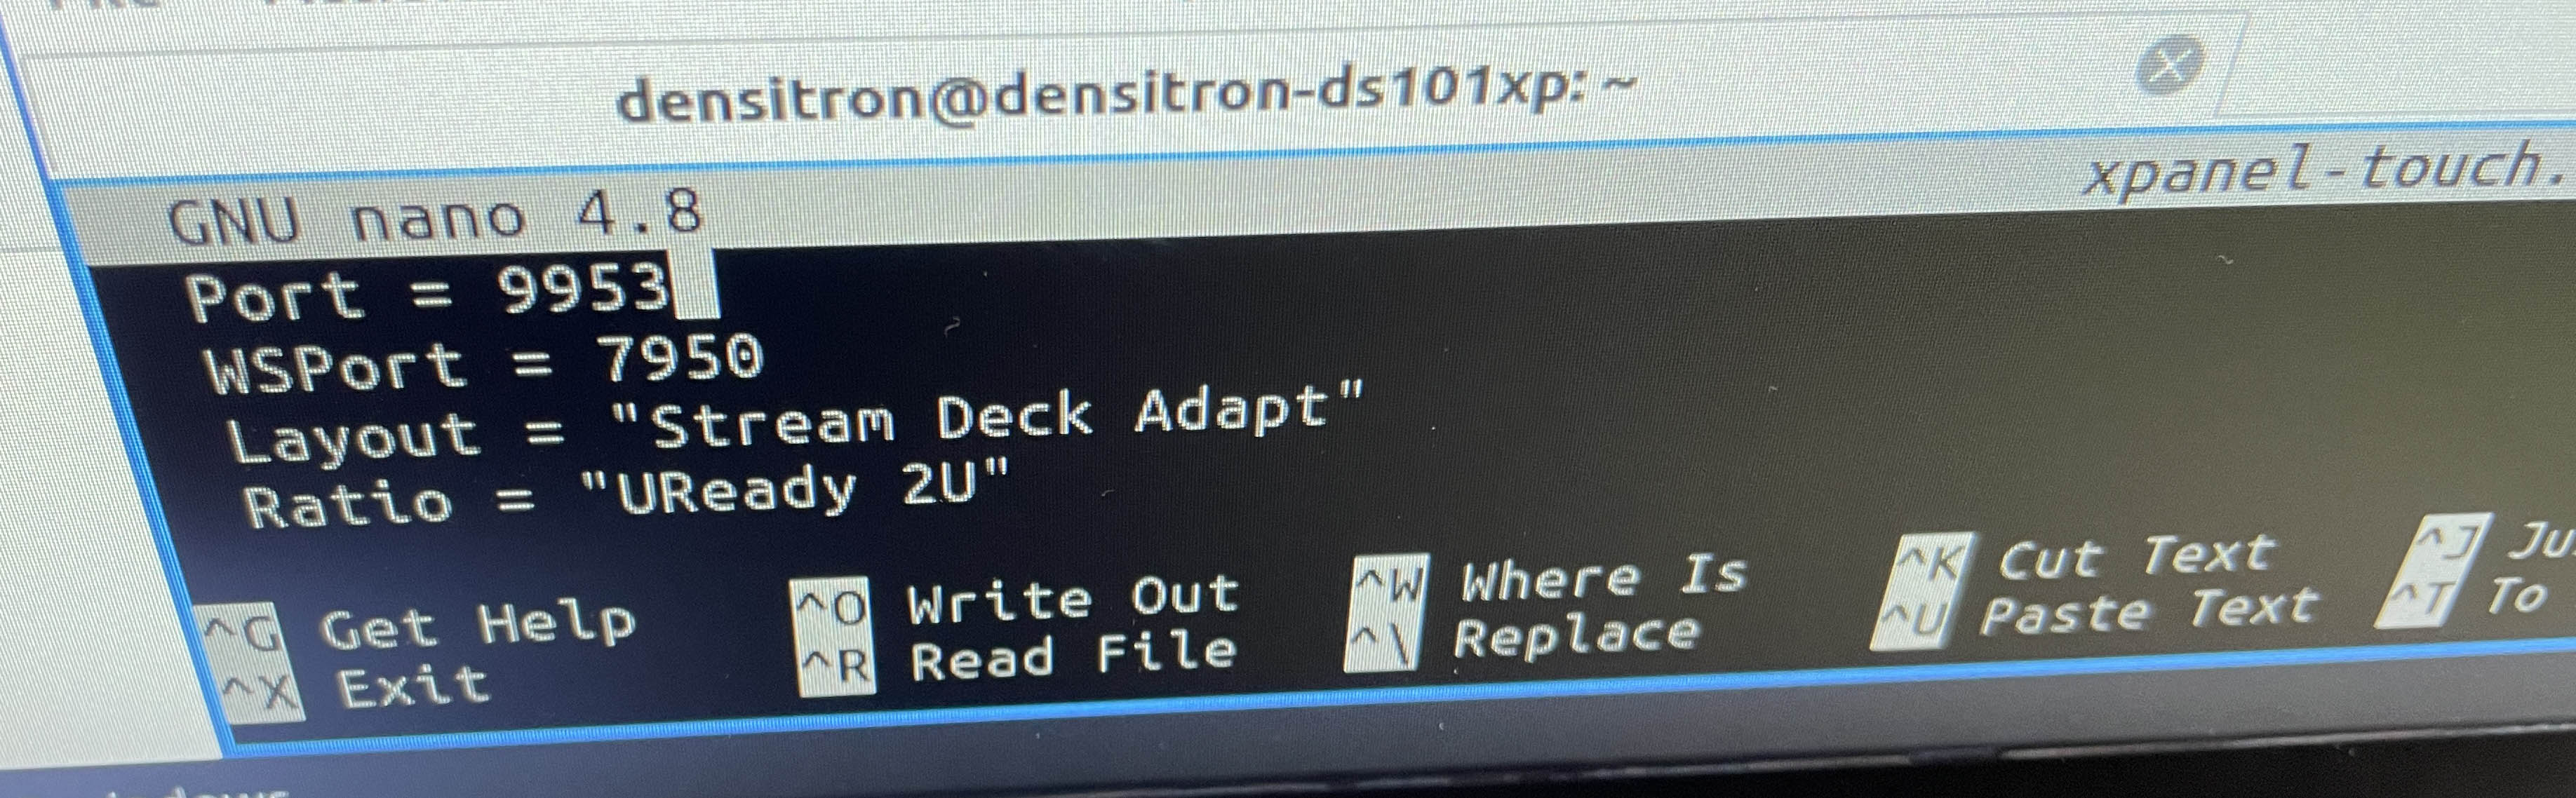
You can use nano to edit the config file:
nano xpanel-touch.toml
This will lead you to an editor where you should modify at least the Ratio and Layout settings, for example to these values:
Ratio = "UReady 2U"
Layout = "Stream Deck Adapt"
The layout can be other options known from the configuration of xpanel-touch.
WSPort set to 7950 would be standard and Port for raw panel is usually set to 9953
Setting up Auto start:
It can be started by systemd creating a config file, rawpanel.service, in /etc/systemd/system/ with the following contents:
[Unit]Description=Raw Panel Server
[Service]ExecStart=/home/densitron/xpanel-touch.Linux-386Restart=alwaysUser=densitronGroup=densitronWorkingDirectory=/home/densitron
[Install]WantedBy=multi-user.target
After creating this file, you must reload systemd and set it to auto start on every boot:
sudo systemctl daemon-reload
sudo systemctl enable rawpanel.service
Restart if needed with this:
sudo systemctl restart rawpanel.service
Check status like this:
sudo systemctl status rawpanel.service
Changing the URL for Firefox
Finally, change the URL for Firefox to localhost on port 7950 by editing the file "/etc/xdg/autostart/display.desktop" as per above:
Test
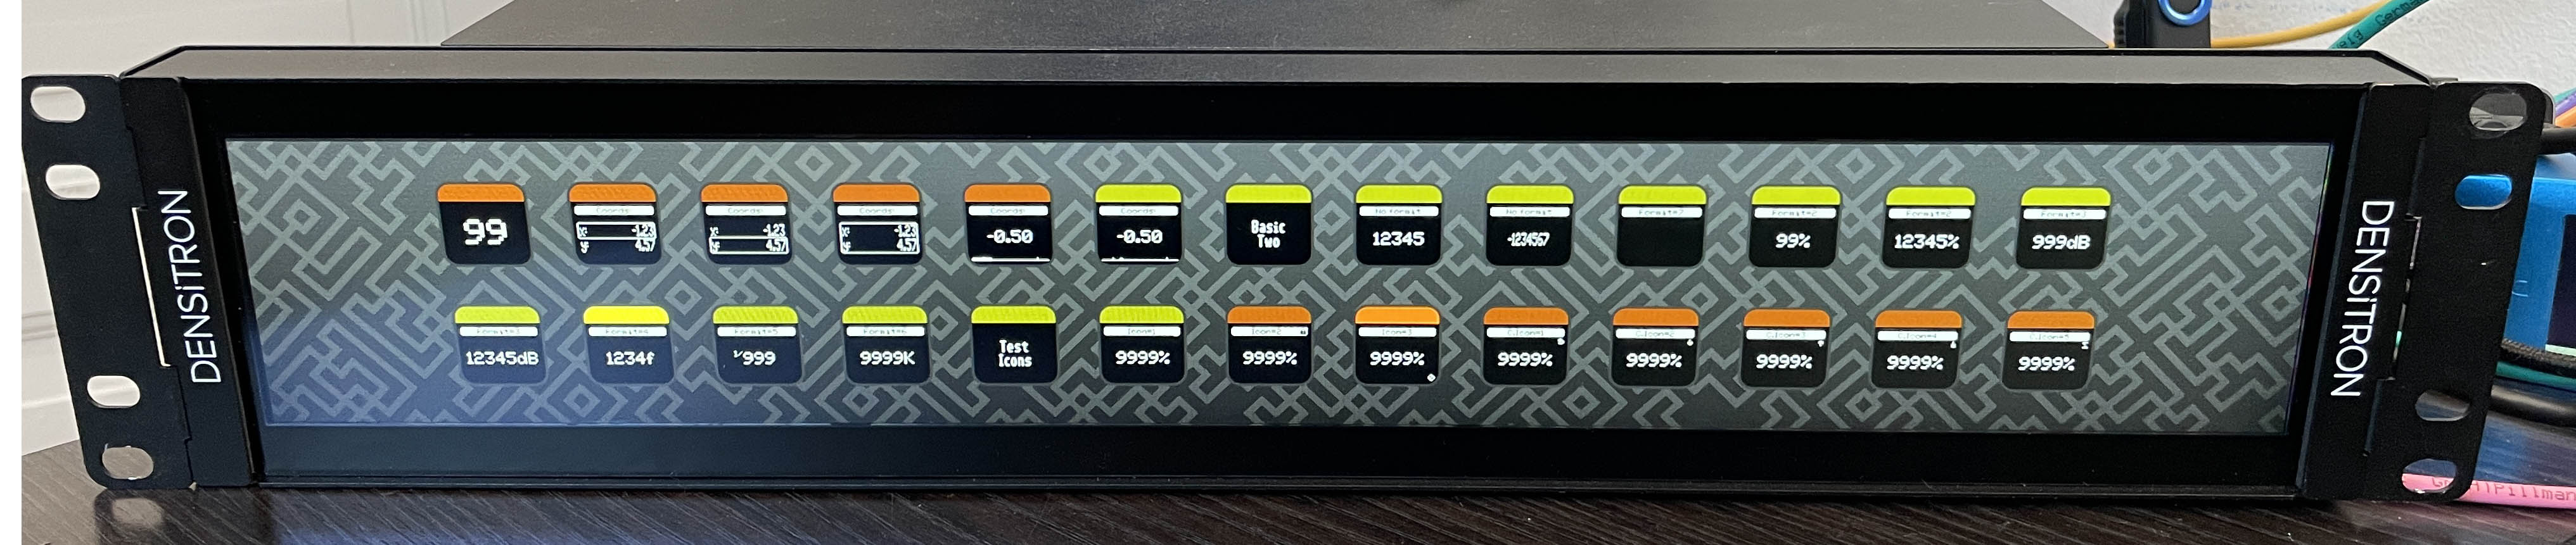
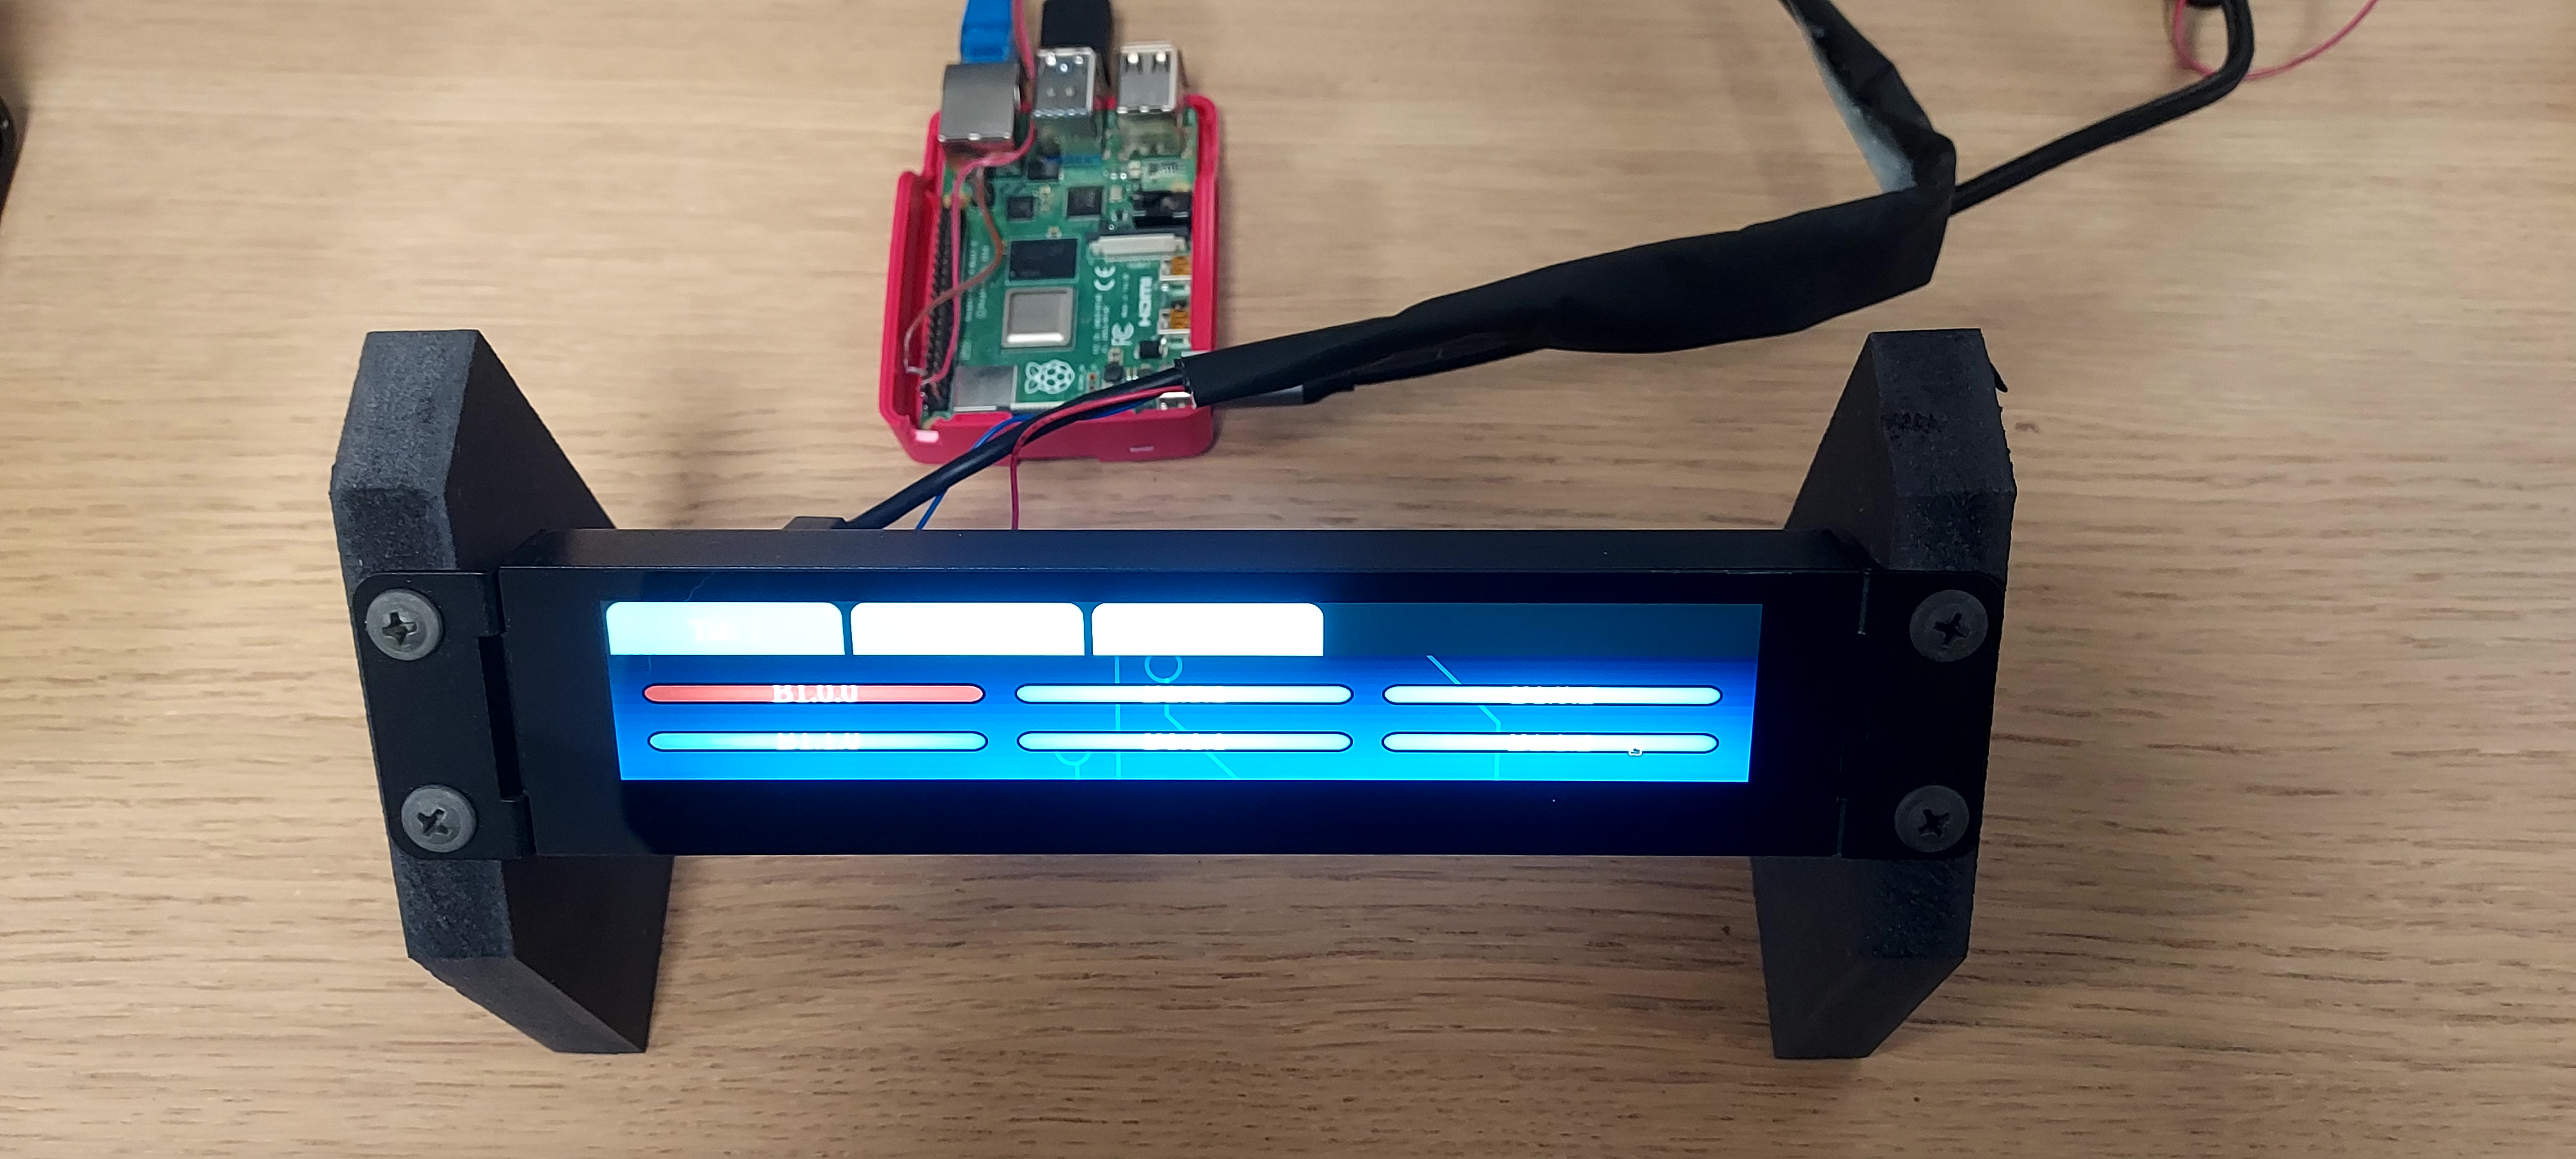
Reboot the panel. Upon booting, you should see the touch UI displayed, similar to the image below (note that in the image, a Raw Panel client is connected, populating the buttons with content).
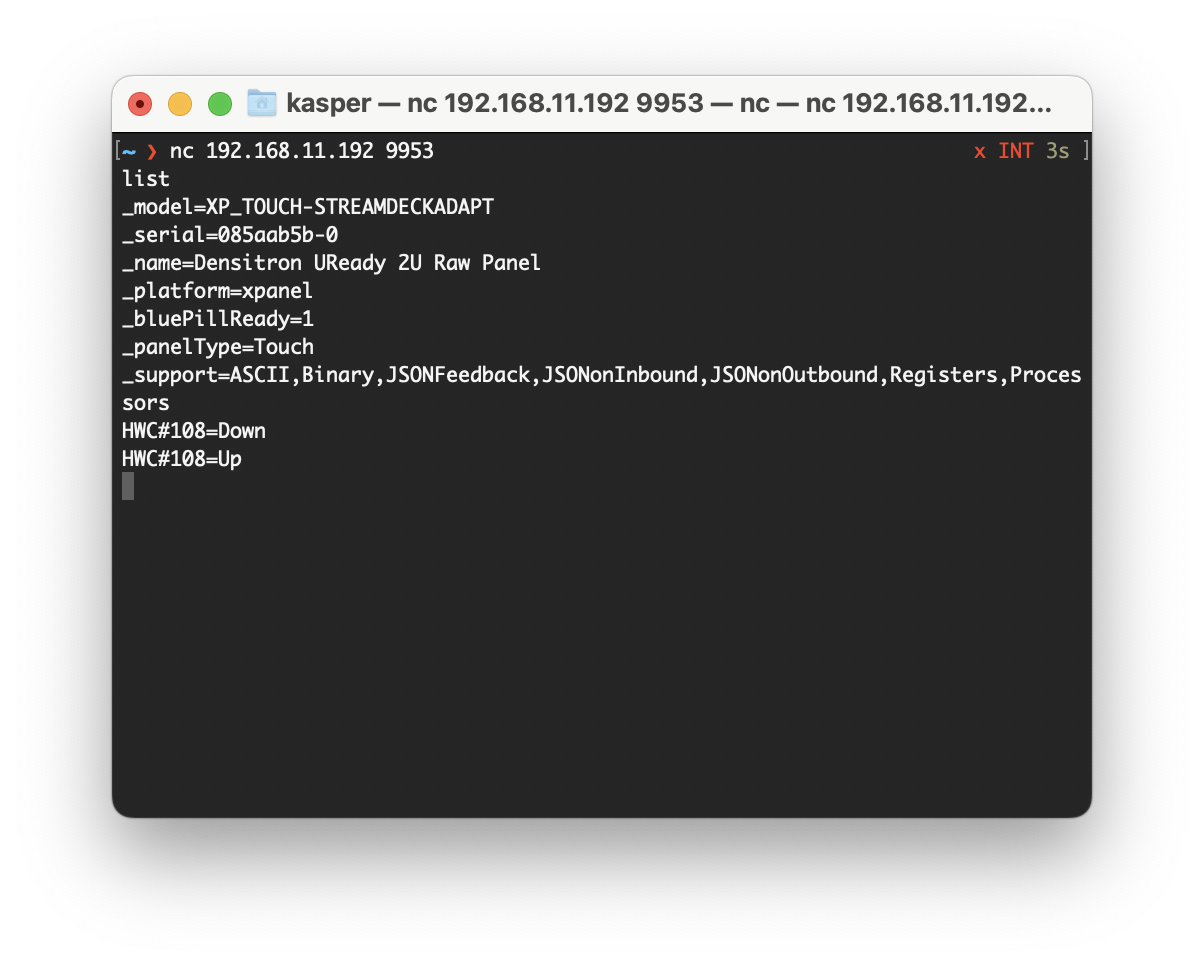
To test the connection, you can use a telnet client. For Mac users, you can use the command 'nc [IP address of panel] 9953' in the terminal. After connecting, type 'list', and you should see an output resembling this:
 Note: During our tests, we observed that the Raw Panel server operating on the Densitron panel did not announce itself on the network via mDNS. The reason for this is unclear, but it may be addressed in future updates.
UReady 1U + Raspberry Pi 4/5 setup (Easy Setup, Recommended)
This guide will help you to set up an off-the-shelf Raspberry Pi 4 or 5 to drive the UReady 1U screen via USB
Prerequisites
- DM-066GN-OPUR01 UReady 1U Single Monitor
- Raspberry Pi 4 or 5 (with proper power supply (Pi4: 15W, Pi5: 27W) and optionally casing)
- microSD card for the operating system
- Two USB cables (Micro-USB to USB-A)
- Network cable for access to a wired network with DHCP.
- Monitor + Micro-HDMI / HDMI cable (only needed during initial setup)
Flashing
- Download Raspberry Pi Imager
- Insert the microSD Card into a card reader on your computer
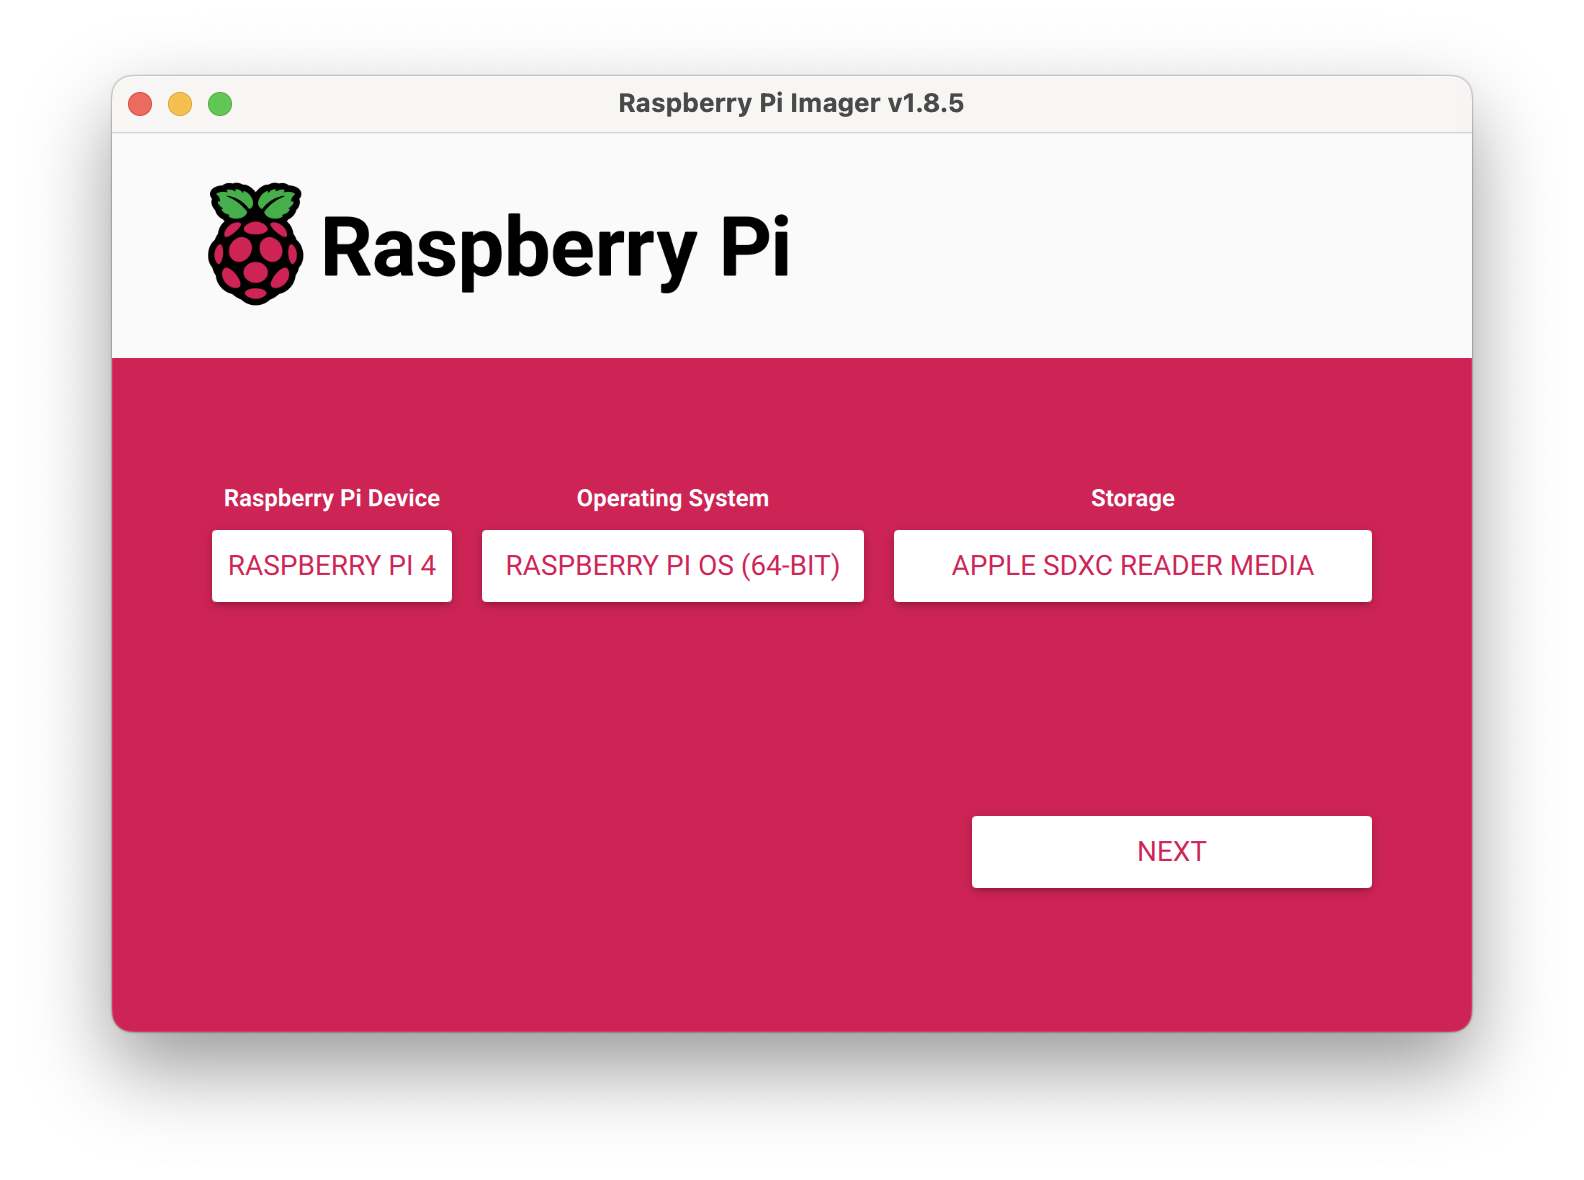
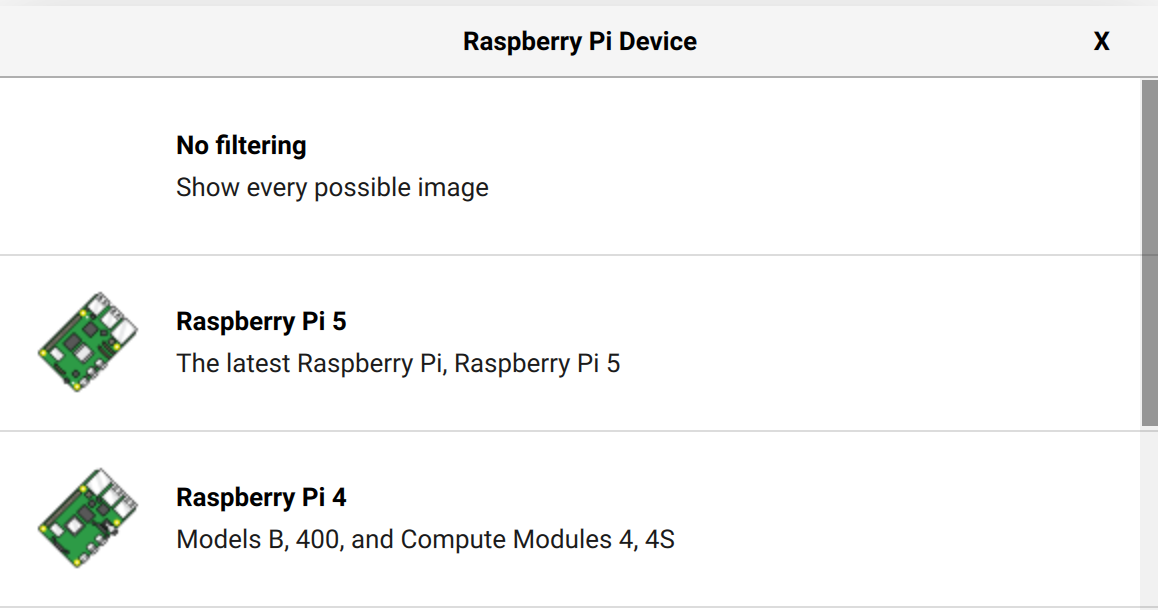
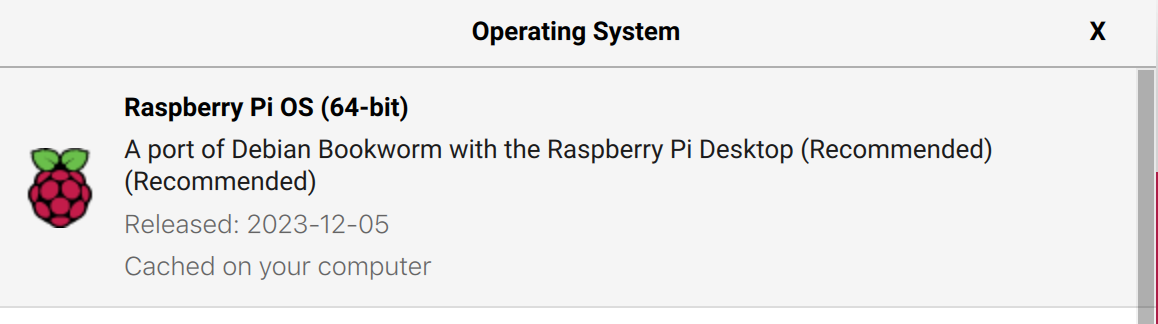
- Start Raspberry Pi Imager and choose Device, OS and Storage:
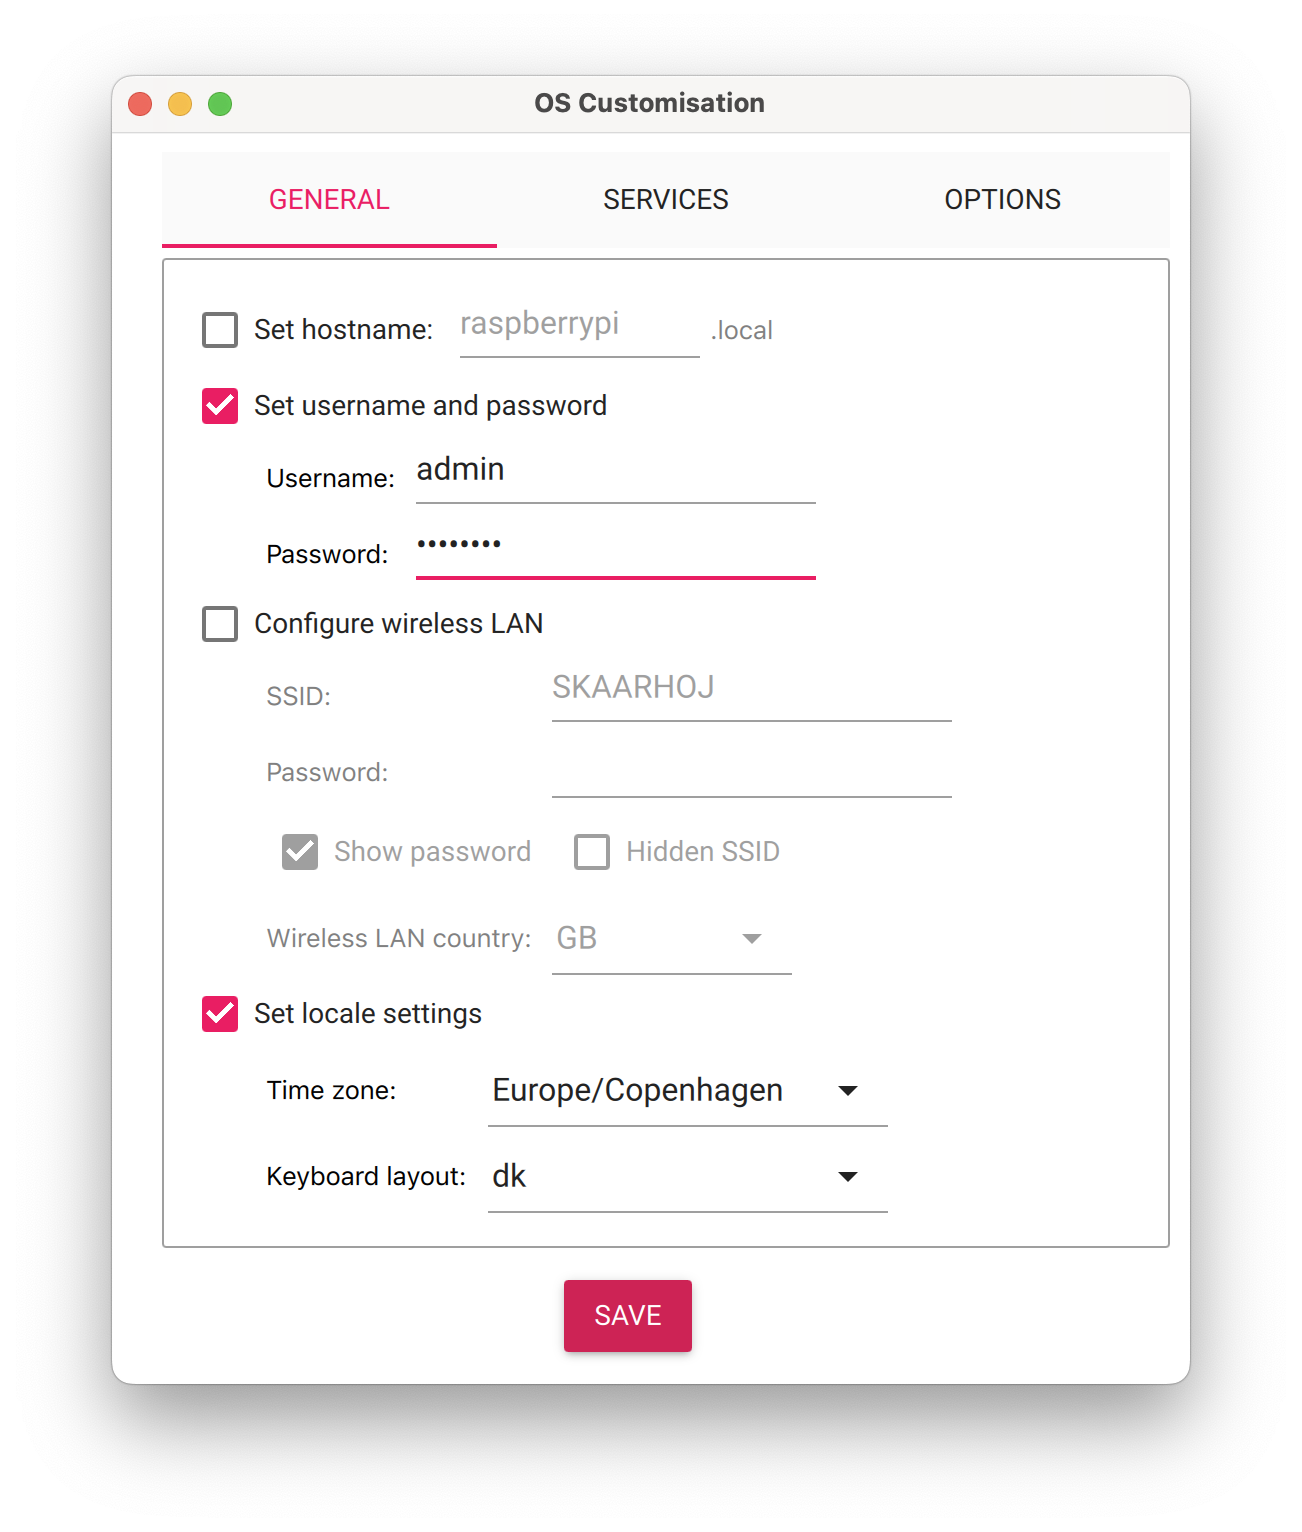
- Next, you will be asked to customize the Operating System. Answer "Edit Settings":

- On the "General" tab, set username and password to your liking:
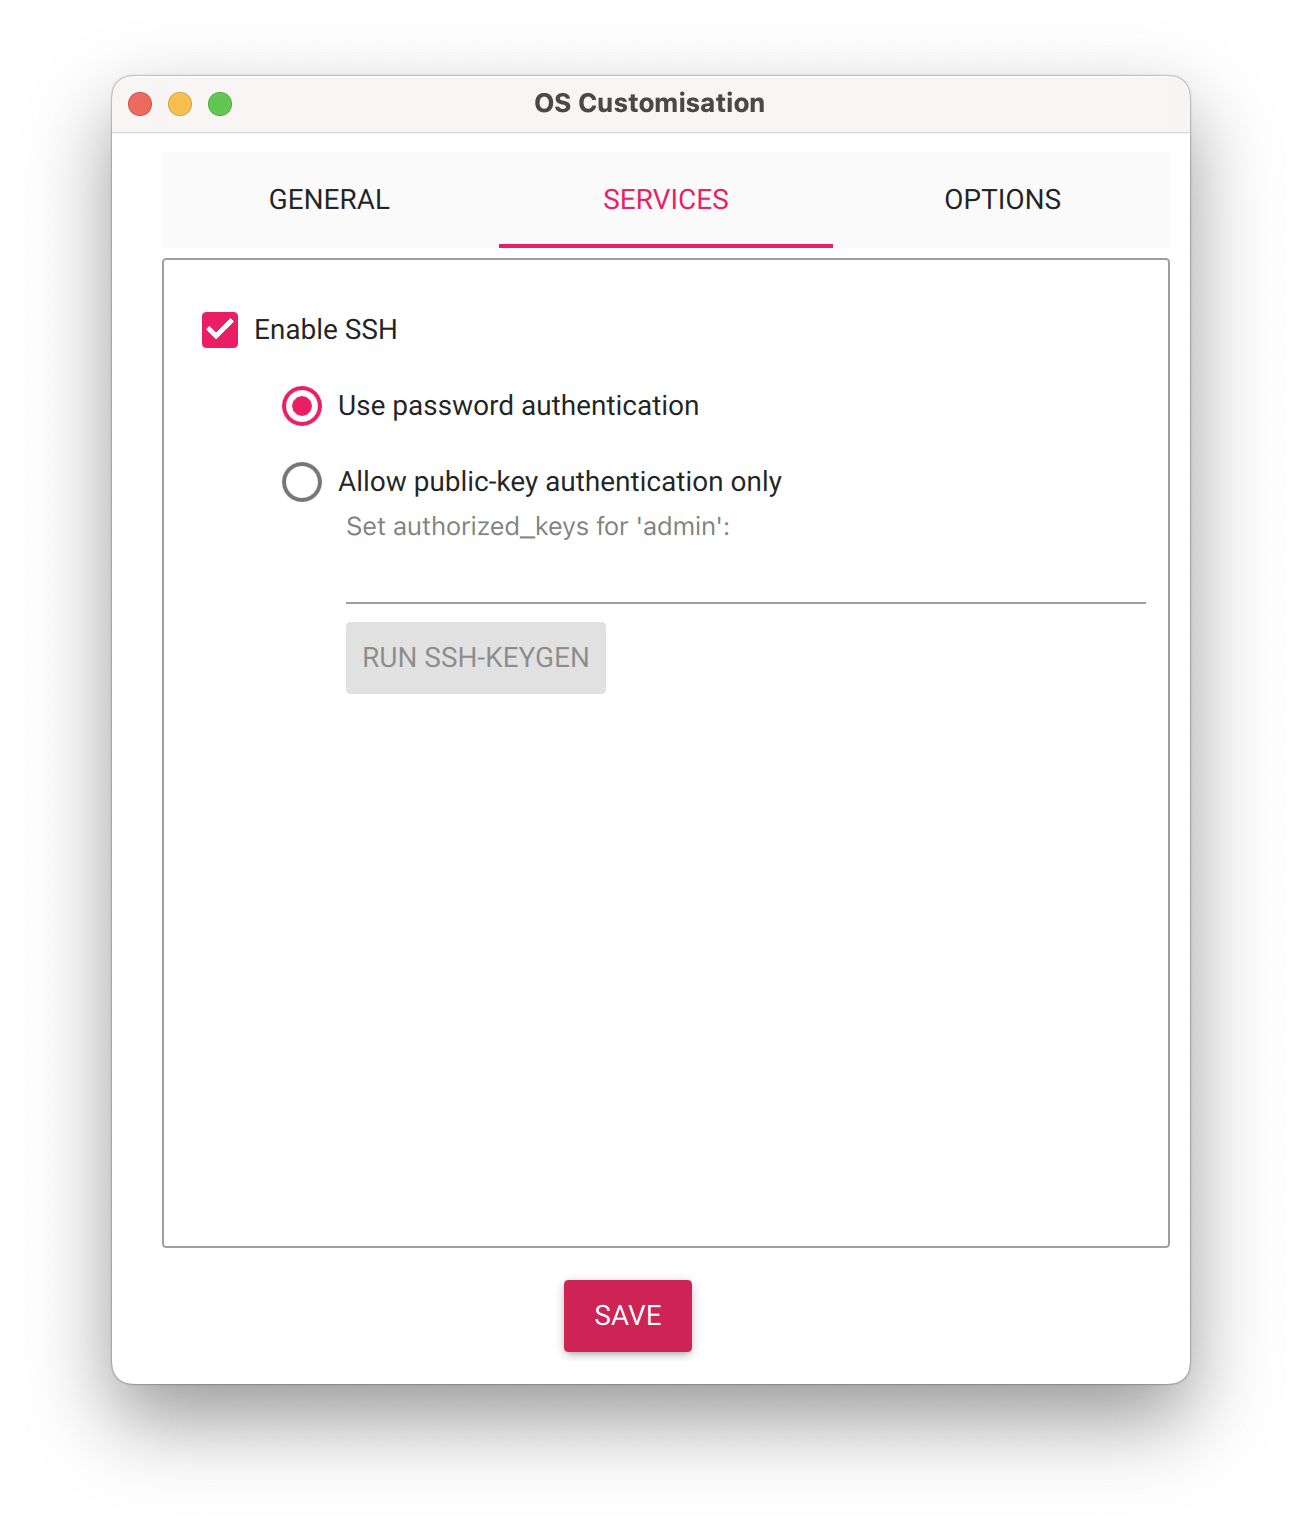
- On the "Services" tab, enable SSH:
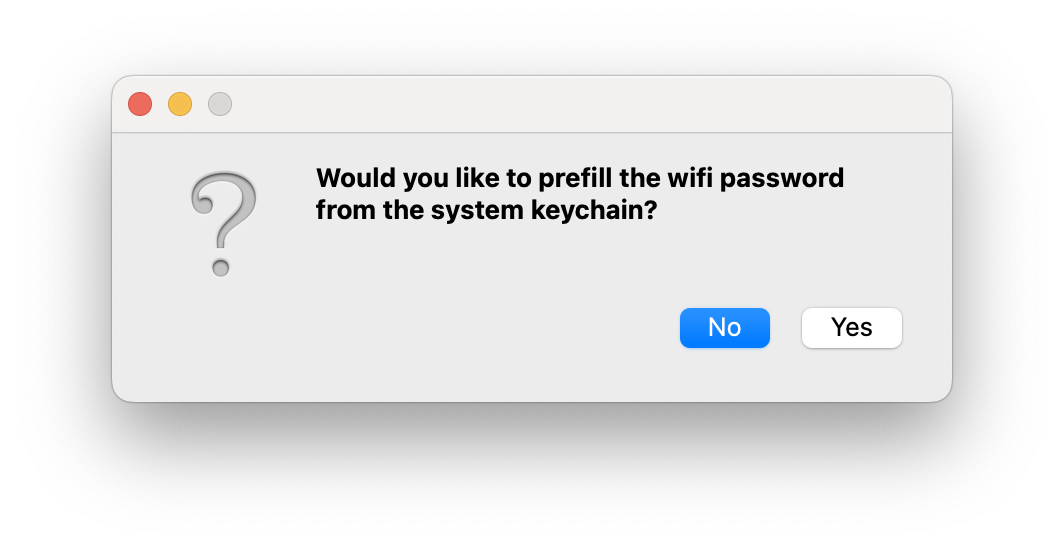
- Press "Save" and when you return, press "Yes" to customize. You will be asked to prefill Wifi password. If this is your preferred way to access the network, feel free to do that:
- Finally, you will be asked to confirm that you want to erase the microSD card:
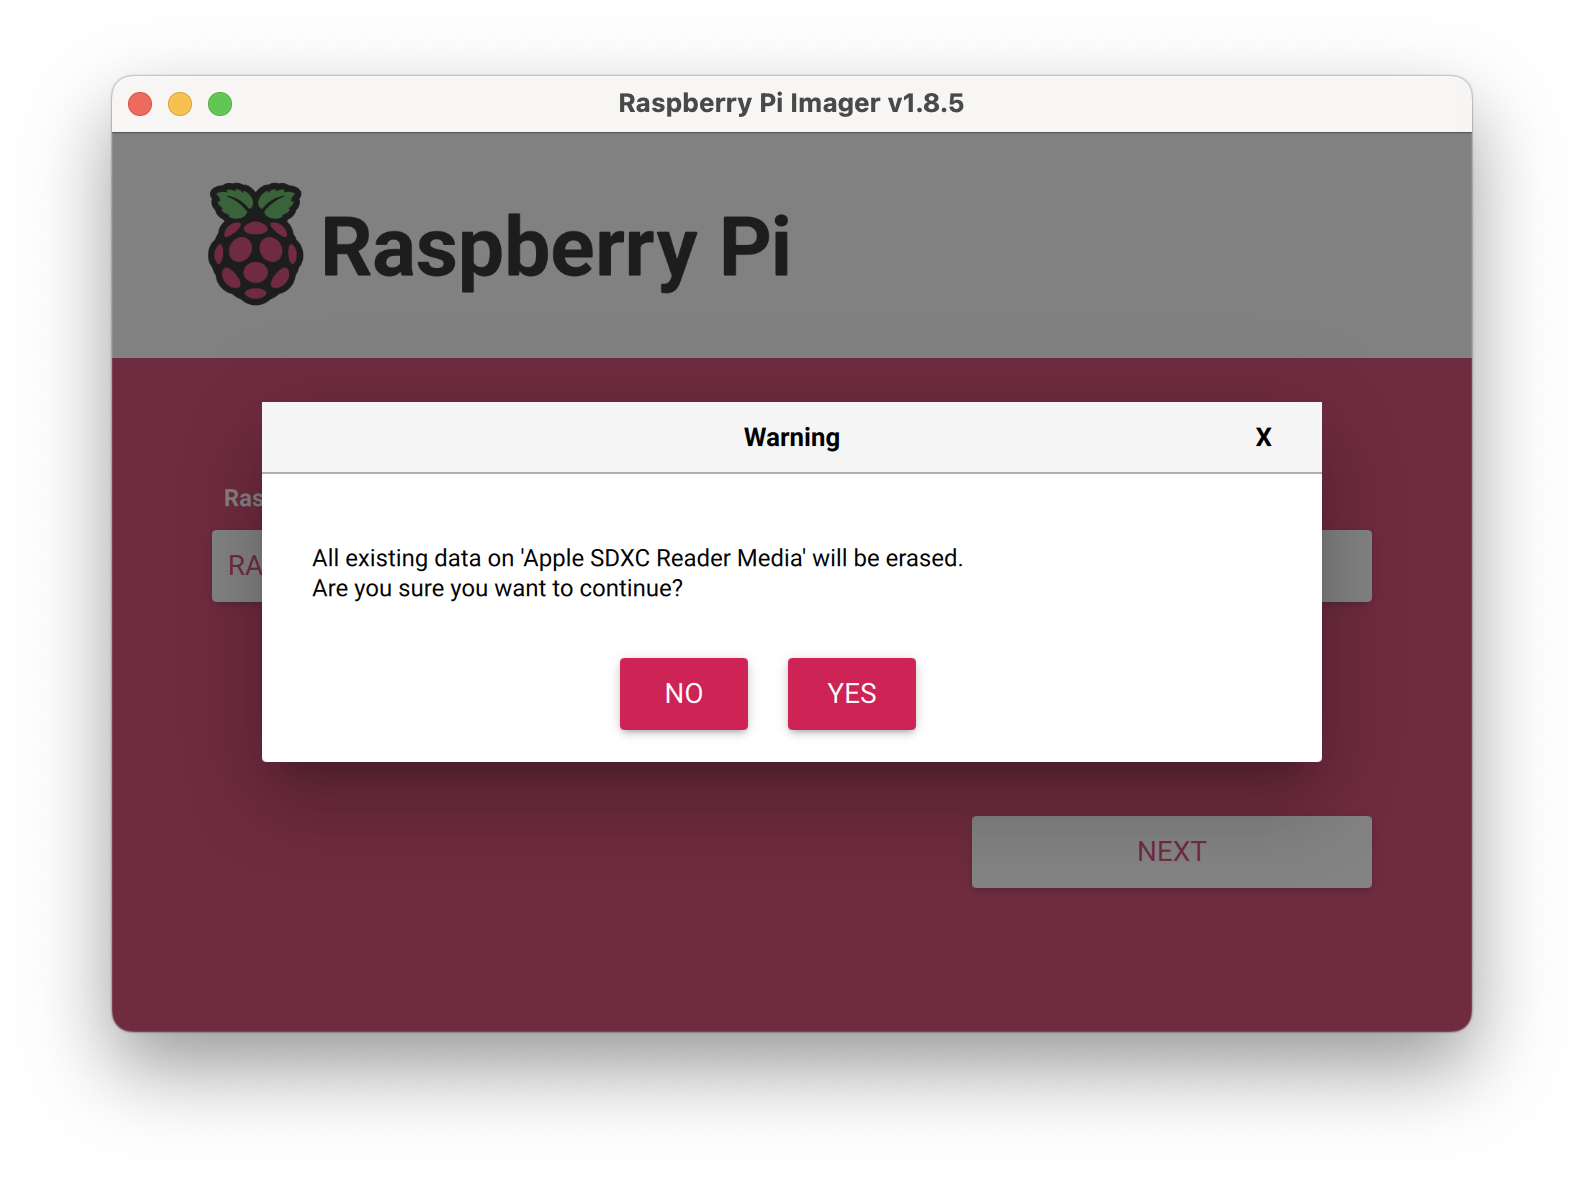
- If you agree to this, press "Yes". Next, it will take a few minutes to write and verify the operating system to the memory card. You may be asked to type in a password to confirm this operation.
Preparing the Operating System to run the Densitron screen over USB
- Insert the microSD card into the Raspberry Pi
- Connect an HDMI monitor to one of the Micro-HDMI plugs on the Pi
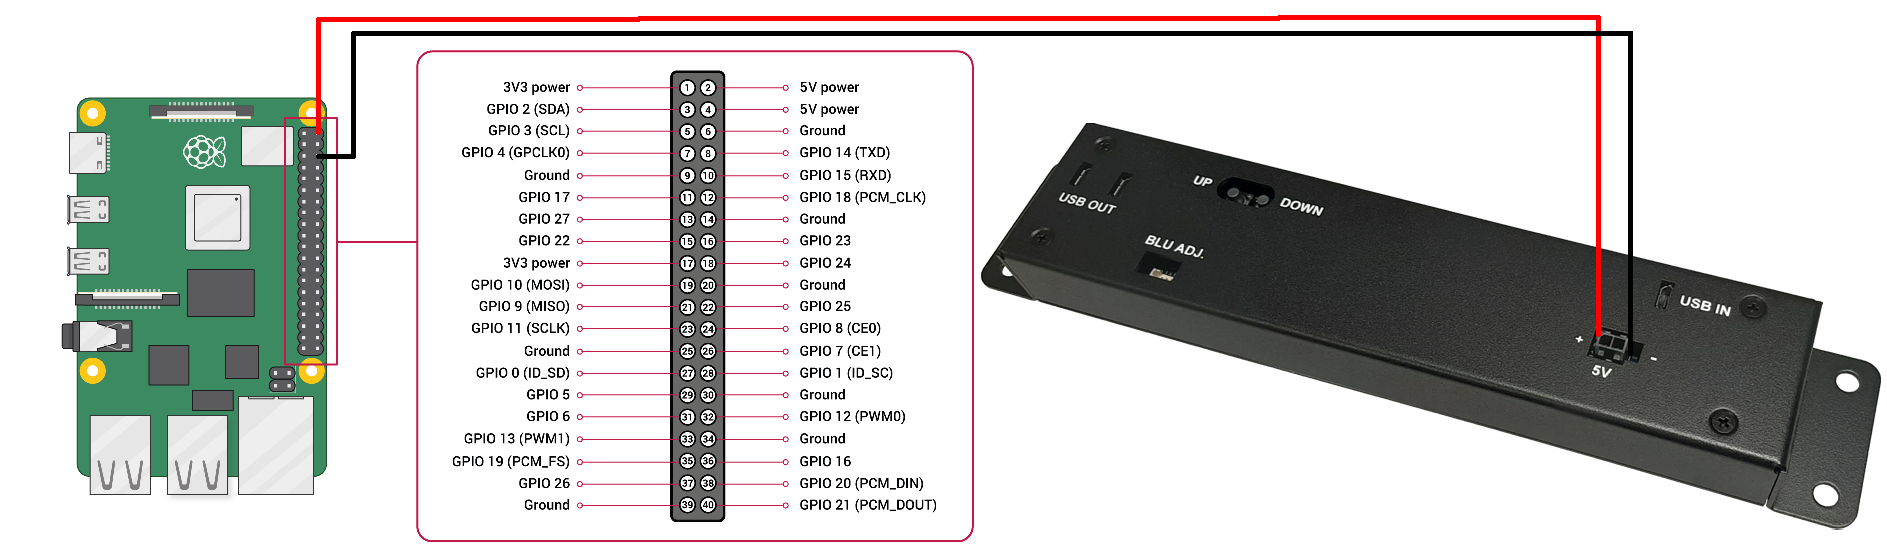
- Connect the Densitron Screen to the Raspberry Pi (any two of the four USB ports can be used) using both USB cables: One cable goes into the USB In (Signal) and another cable goes into one of the two USB Out (additional power)
- Connect the Ethernet jack to your network
- Connect your power supply to boot it up.
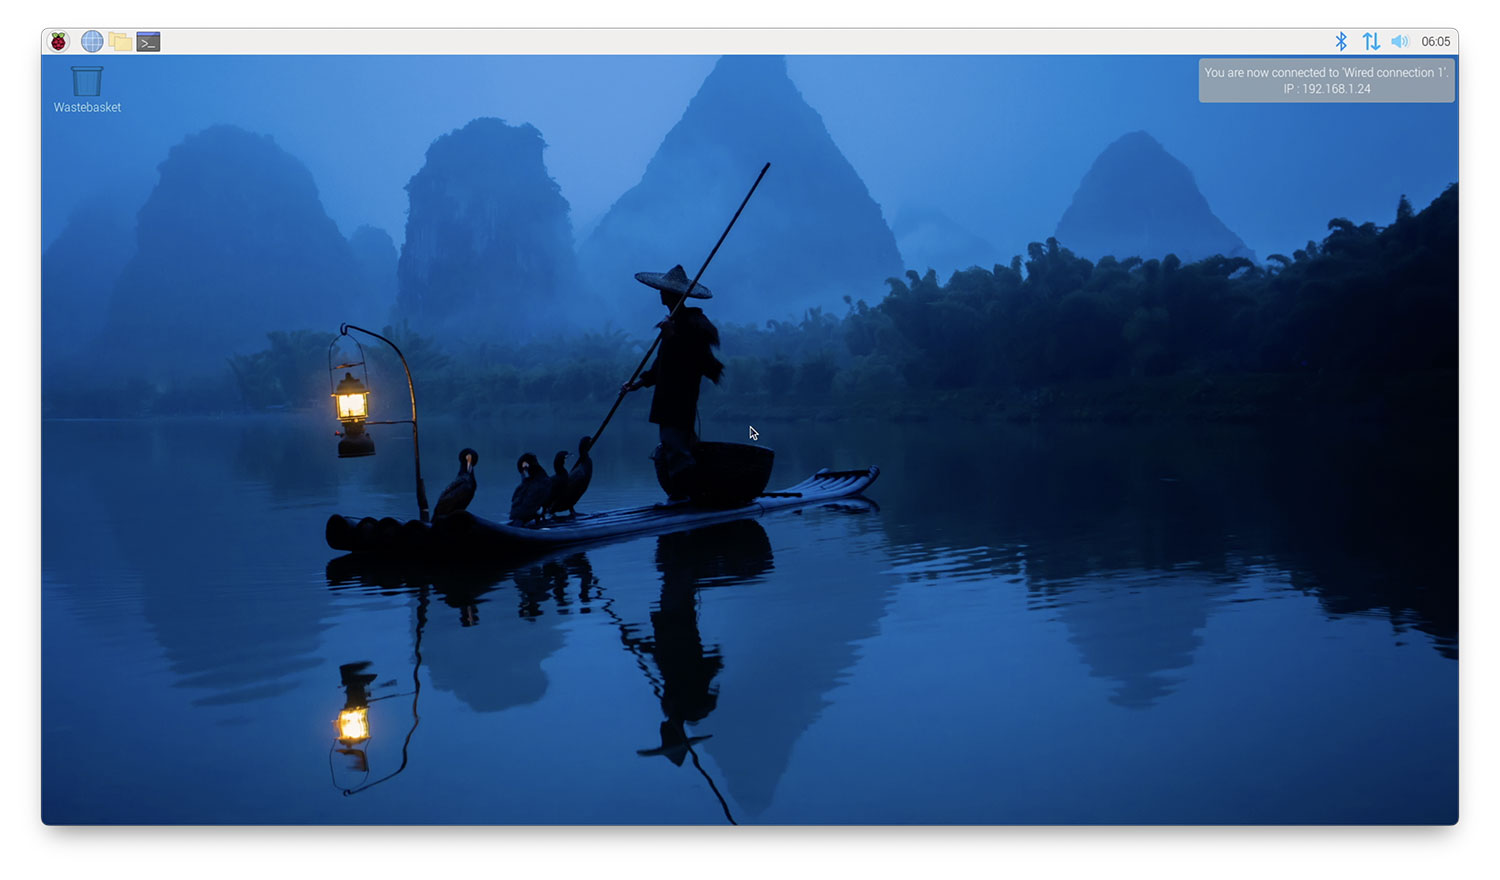
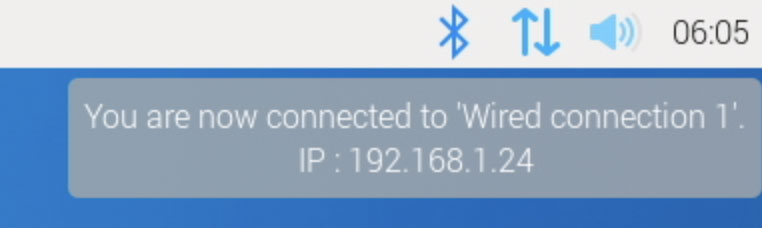
You should see it boot up on the HDMI monitor. It will automatically reboot a few times before it finally settles with a standard desktop. It's important to stay alert because on the final desktop you will see the DHCP provided IP address shown in the upper right corner. You need that in the next step.
- On your computer, open a terminal (such as Putty on Windows) to connect with SSH to the Pi. On a Mac it would look like this:
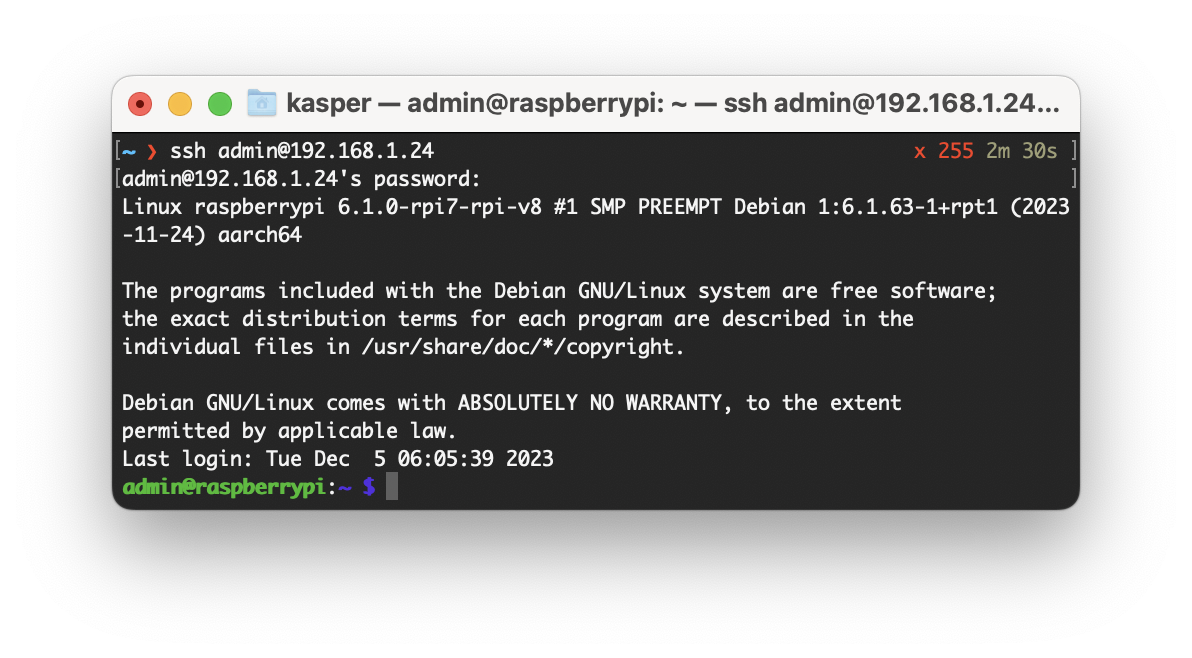
- Here, you need to use the username ("admin" in this case) and password that you selected when customizing the OS earlier. If you have issues with logging in, you may need to attach a mouse and keyboard to your Pi and change password using the UI (Preferences > Raspberry Pi Configuration)
-
In the terminal, run the following command to download the script:
curl -O https://raw.githubusercontent.com/SKAARHOJ/Support/master/Files/Densitron/patch.tar.gz- Next, we need to extract the archive we have just downloaded:
sudo tar -xzf ./patch.tar.gz- Set permission to execute the script:
sudo chmod 777 ./install_all.sh- Now we are ready to execute the script. Execute following command:
sudo sh ./install_all.sh- When prompted, enter the IP address and port of your xpanel-touch web server (the Blue Pill device where it's installed) and then press ENTER.
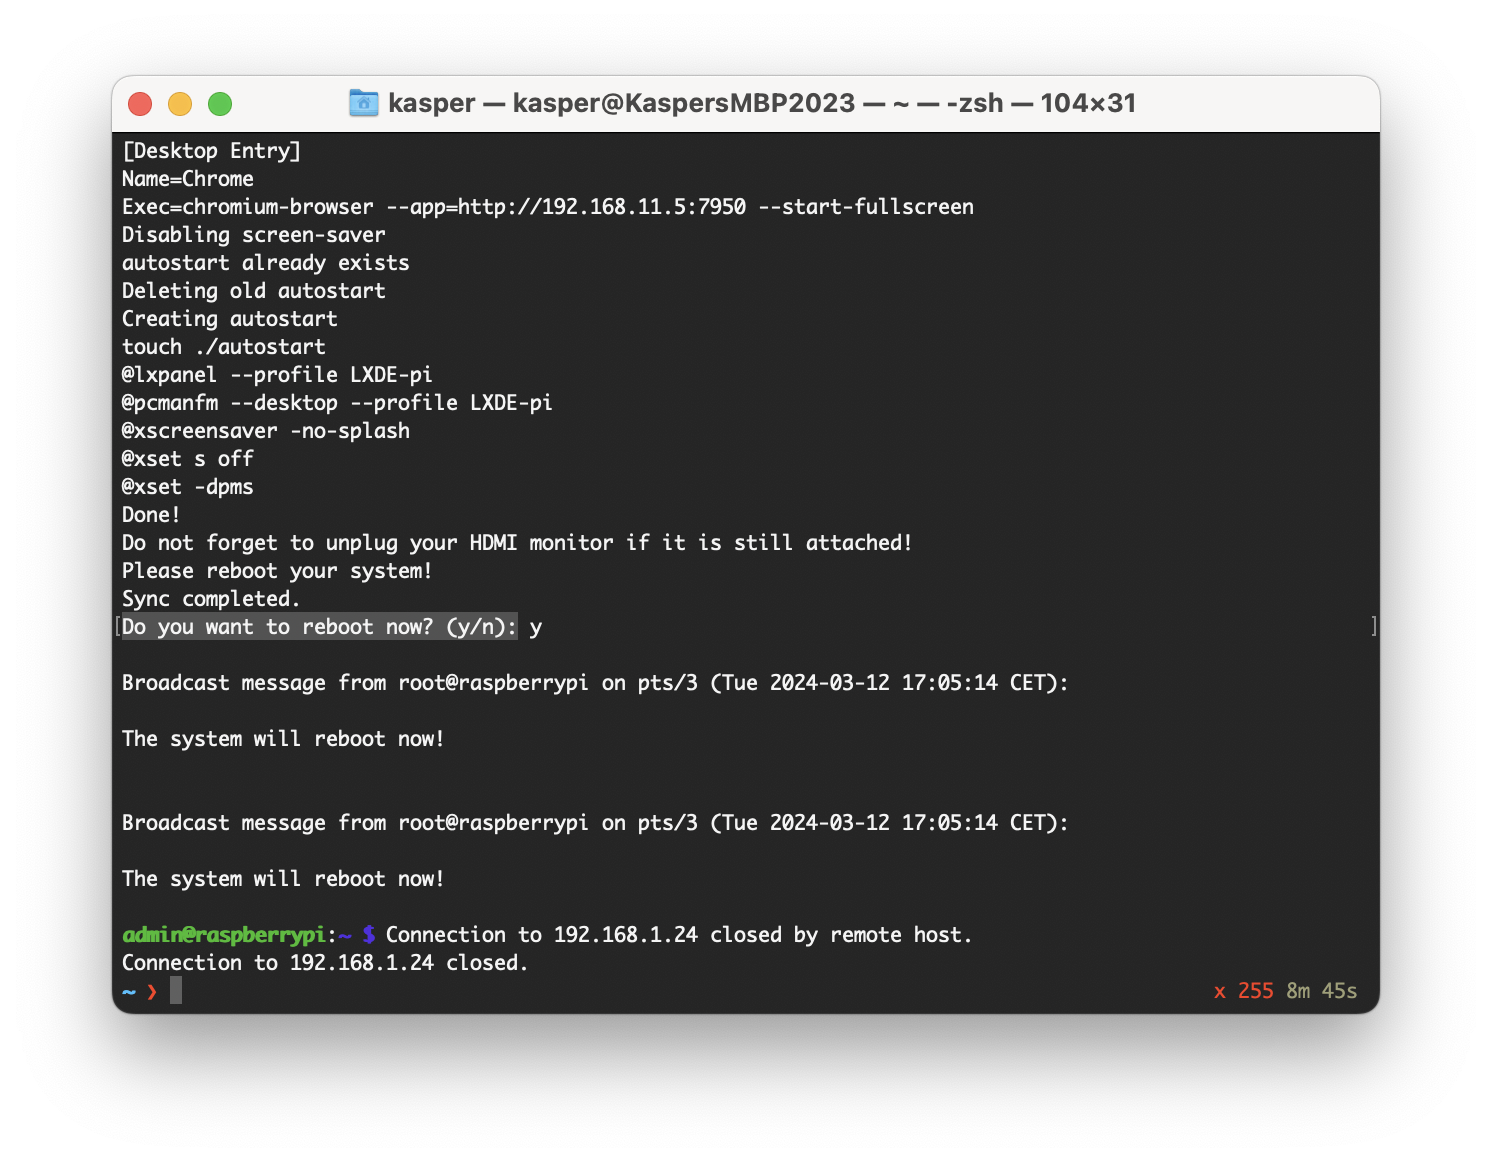
These steps will look like this:

- Finally, you will be asked if you want to reboot. Disconnect the HDMI cable (important!) and select "Yes". The Raspberry Pi will close it's connection to your terminal and reboot.
As the Raspberry Pi reboots, you should experience that the Densitron screen is used as a monitor and that a web browser opens that tries to load page from the IP address and port you specified.
Changing the browser target URL
If you need to change the IP address and port entered during the setup, then follow these steps:
- Log in via ssh, using your username and password
- Edit this file:
sudo nano /etc/xdg/autostart/display.desktop- Edit the URL inside to your liking:
[Desktop Entry]
Name=Chrome
Exec=chromium-browser --app=http://192.168.11.5:7952 --kiosk --app-shell-hosted- Press CTRL+X and answer "Y" to save it.
- Reboot
Variant with embedded version of xpanel-touch
The instructions below are mostly a repetition of the ones given for a Densitron screen with x86 inside above. You will need to request the ARM version of the binary from SKAARHOJ and there are some variations to the config files.
It's possible to run the xpanel-touch application directly on the Raspberry Pi driving your UReady 1U. This entails:
- Receiving a special xpanel-touch application from SKAARHOJ upon request, licensed to your Pi.
- Setting it up to start on every boot of the panel.
- Pointing the web browser to the localhost instead of external IP address.
Running the binary:
There are likely several methods to transfer the xpanel-touch binary from SKAARHOJ to your Raspberry Pi. Since you have already used the terminal and SSH for setup, using SCP may be the easier one:
scp xpanel-touch scp://admin@192.168.1.240IP address should be that of your Raspberry Pi.
After transfer:
- Log in on the Raspberry Pi using SSH
- Set execute permissions on the file on the Pi ("chmod a+x xpanel-touch")
- Run it
After running it for the first time, two things will happen:
- A config file, xpanel-touch.toml, has been created in the home folder.
- A code, "MID", is shown, please send that to SKAARHOJ to receive your license. In return you will get a new binary which is licensed for your Raspberry Pi.
Configuration
You can use nano to edit the config file:
nano xpanel-touch.toml
This will lead you to an editor where you should remove everything existing and substitute with this:
[[TouchApplications]]
Active = true
Name = "UReady #1"
Description = ""
Port = 9923
ProtocolMode = ""
MaxClients = 0
LockToIPs = ""
WSPort = 7950
Layout = "Stream Deck Custom (RxC)"
Ratio = "UReady 1U"
ConfigFile = "RxC=1x7"
Cursor = "Hidden"The layout can be other options known from the configuration of xpanel-touch.
WSPort set to 7950 would be standard and Port for raw panel is usually set to 9923
Setting up Auto start:
It can be started by systemd creating a config file, rawpanel.service, in /etc/systemd/system/ with the following contents:
sudo nano /etc/systemd/system/rawpanel.service
[Unit]
Description=Raw Panel Server
[Service]
ExecStart=/home/admin/xpanel-touch.arm64
Restart=always
User=admin
Group=admin
WorkingDirectory=/home/admin
[Install]
WantedBy=multi-user.targetThe above config assumes you named your user "admin" and keep the binary in the home directory.
After creating this file, you must reload systemd and set it to auto start on every boot:
sudo systemctl daemon-reload
sudo systemctl enable rawpanel.service
Restart if needed with this:
sudo systemctl restart rawpanel.service
Check status like this:
sudo systemctl status rawpanel.service
Follow log messages from the service like this:
journalctl -u rawpanel.service -f
Changing the URL for the browser
- Edit this file:
sudo nano /etc/xdg/autostart/display.desktop- Edit the URL inside to localhost so it loads the UI of itself:
[Desktop Entry]
Name=Chrome
Exec=chromium-browser --app=http://localhost:7950 --kiosk --app-shell-hosted(--app-shell-hosted will avoid certain browser pop-ups you don't like in kiosk full screen mode)
- Press CTRL+X and answer "Y" to save it.
- Reboot
Test
Reboot the panel. Upon booting, you should see the touch UI displayed.
To test the connection, you can use a telnet client. For Mac users, you can use the command 'nc [IP address of panel] 9923' in the terminal. After connecting, type 'list', and you should see an output resembling this:
[LEGACY] UReady 1U + Raspberry Pi 4/5 setup (Alternative Instructions)
The instructions in this section include additional details and reference an older version of Raspbian. They are provided for historical context and may offer useful insights.
Prerequisites
- Raspberry Pi 4 or 5
- 5V/3A PSU with USB Type C cable
- DM-066GN-OPUR01 UReady 1U Single Monitor
- microSD card for the operating system
- USB keyboard/mouse (only needed during initial setup)
- Monitor (only needed during initial setup)
- USB FlashDrive (optional, only needed during initial setup)
Extra Power for Densitron Screen
The Densitron UReady 1U screen requires additional 5V power. There are two recommended methods to provide this power:
-
Using a MicroUSB Cable
- Connect an additional microUSB cable from one of the two "USB Out" ports on the screen to another USB port on the Raspberry Pi or to an external power supply. This is probably the easiest.
-
Using a 5V Power Plug:
- Alternatively, you can use the 5V Power Plug, which is compatible with a Molex 43025-0200 and 43030 series crimp terminals.
Operating System
- We recommend using the Raspbian OS (Buster) version dated 2020-08-24. It can be downloaded here.*
- We suggest using the Raspberry Pi Imager for flashing the OS. It's available for various operating systems and can be downloaded here.
- If you're unsure about the process at this stage, helpful guidance can be found in this article.
*Apparently newer Raspberry Pi 4 revisions as well as new 5th generation are not supported by suggested version of Raspbian OS. Therefore some extra steps are needed to achieve the same with latest release Raspbian Bookworm 2023-12-05. Please download exactly this release as it is not guaranteed that proposed patch will work on others. Follow instructions from Easy Setup Method ( Raspbian Bookworm 2023-12-05)
Setting Up Your Touch Panel:
-
Initial Setup:
- Insert the pre-flashed SD card into the Raspberry Pi (RPI).
- Connect a HDMI-compatible monitor and the USB keyboard and mouse.
- Connect the Densitron screen to the RPI using a USB-A to microUSB cable (into either USB 2.0 or USB 3.0 port). Note: The Densitron screen won't display anything at this stage.
- Power on the RPI.
-
Complete Raspbian OS Installation:
- Follow the onscreen instructions to complete the installation. This includes setting up the user, time zone, WiFi network, etc.
-
Enable Remote Access:
- To facilitate future adjustments without needing a keyboard and mouse, enable SSH and VNC servers on the RPI.
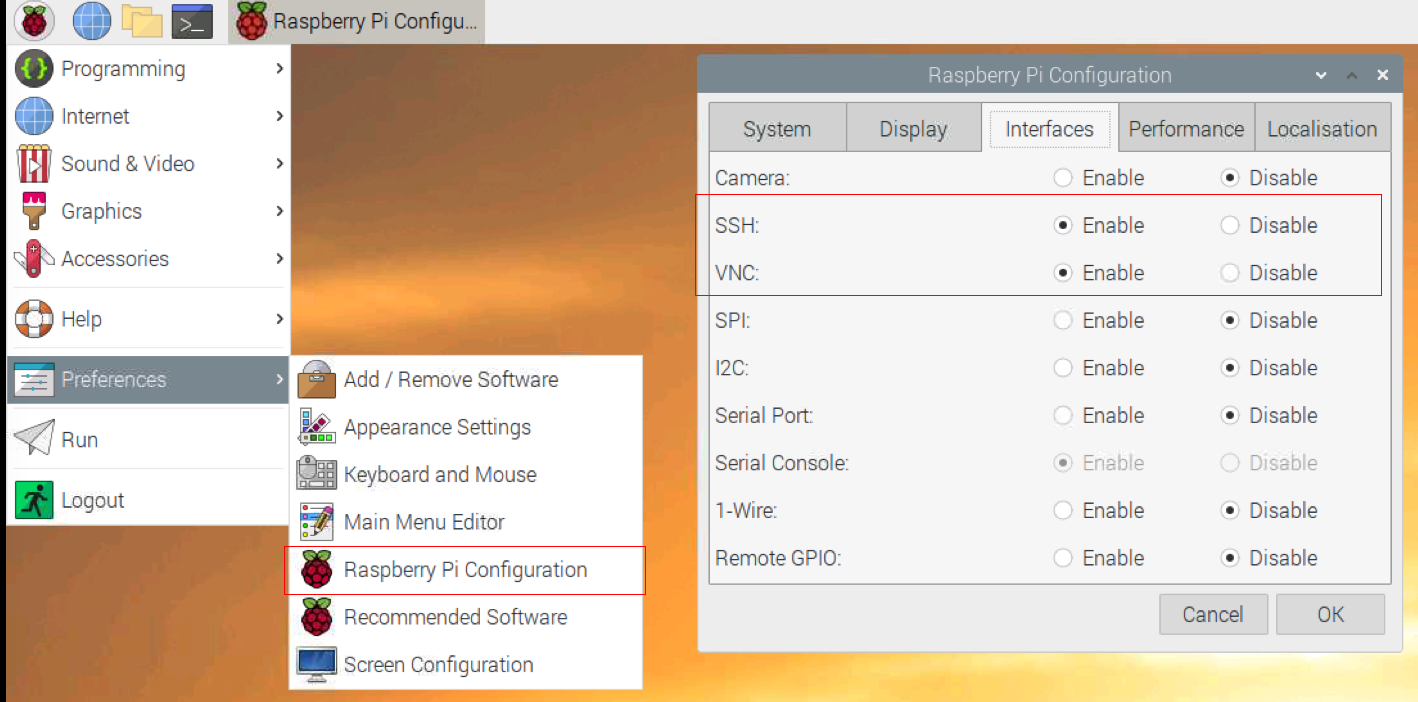
- Click the raspberry icon in the upper left corner of the screen.
- Navigate to Preferences -> Raspberry Pi Configuration.
- In the 'Interfaces' tab, enable SSH and/or VNC.
- Click 'OK' and reboot the RPI.
After rebooting, you should be able to remotely access the RPI via SSH or VNC.
Post-Setup Process
Now, our next steps are to activate the Densitron screen and configure the browser to automatically open at the required URL address. To simplify this process, we have created a small shell script that will automatically make the necessary modifications for you.
Easy Setup Method (Raspbian OS (Buster) version dated 2020-08-24)
- Open the Terminal application on your Raspberry Pi.
- Run the following command to download the script. (If your Raspberry Pi doesn't have internet access, download the file on another machine with internet access and transfer it to your Raspberry Pi using a USB flash drive. Then, continue from step 3.)
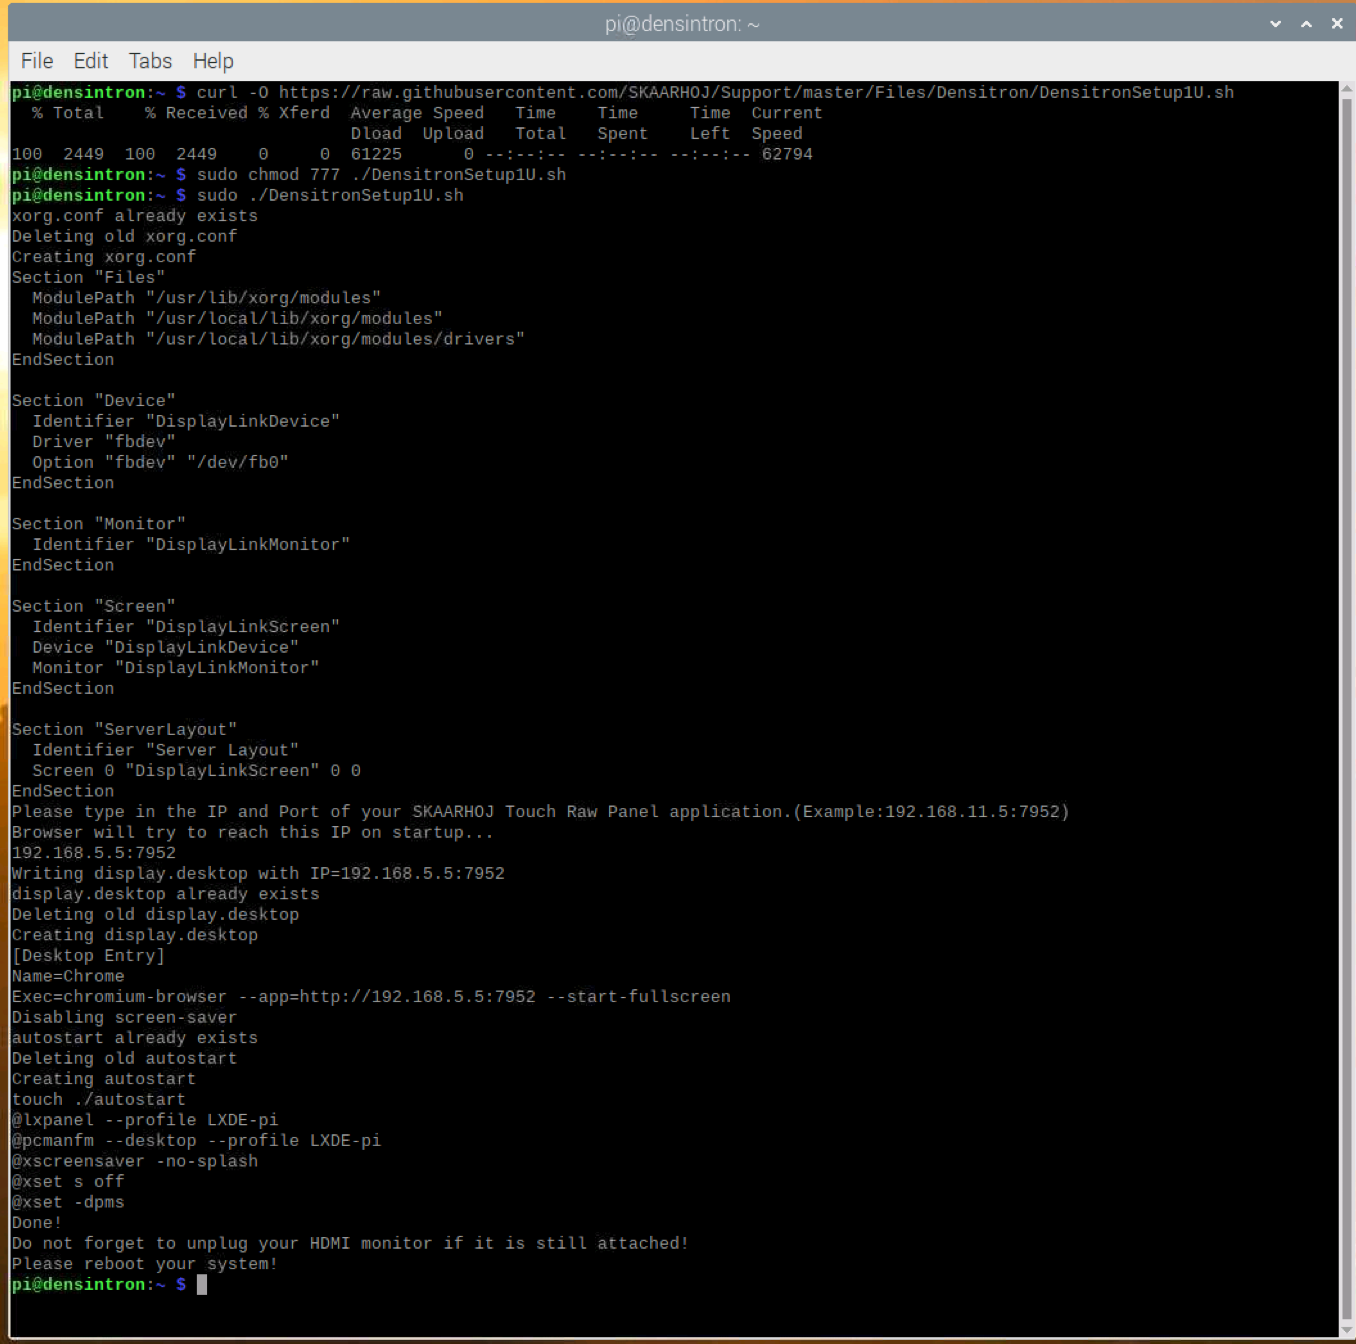
curl -O https://raw.githubusercontent.com/SKAARHOJ/Support/master/Files/Densitron/DensitronSetup1U.sh3. Next we need to give permissions to execute the file we have just downloaded. Execute following command:
sudo chmod 777 ./DensitronSetup1U.sh4. Now we are ready to execute the script. Execute following command:
sudo sh ./DensitronSetup1U.shWhen prompted, enter the IP address and port of your xpanel-touch web server (the Blue Pill device where it's installed) and then press ENTER.
5. That is it, you can now power down your RPI, disconnect keyboard,mouse and HDMI screen. Next time you power it on the browser should open in full screen mode on the Densitron screen.
Easy Setup Method ( Raspbian Bookworm 2023-12-05)
Assuming you have installed that version of OS and configured everything you need. We have to proceed with patching the kernel procedure. To save time we provide a simple script to setup up what is needed.
- Open the Terminal application on your Raspberry Pi.
- Run the following command to download the script. (If your Raspberry Pi doesn't have internet access, download the file on another machine with internet access and transfer it to your Raspberry Pi using a USB flash drive. Then, continue from step 3.)
curl -O https://raw.githubusercontent.com/SKAARHOJ/Support/master/Files/Densitron/patch.tar.gz3. Next we need to extract to execute the file we have just downloaded. Execute following command:
sudo tar -xzf ./patch.tar.gzYou might need to provide permission to execute the script.
sudo chmod 777 ./install_all.sh4. Now we are ready to execute the script. Execute following command:
sudo sh ./install_all.shWhen prompted, enter the IP address and port of your xpanel-touch web server (the Blue Pill device where it's installed) and then press ENTER. You will also so be asked if you want to reboot now or later. Choose later.
5. That is it, you can now power down your RPI, disconnect keyboard,mouse and HDMI screen. Next time you power it on the browser should open in full screen mode on the Densitron screen.
Advanced Setup Method
For advanced users interested in creating a custom setup, such as combining two Densitron screens or pairing a Densitron screen with an HDMI screen, detailed guidance is beyond the scope of this introductory tutorial. However, we will provide some basic hints to get you started:
- Edit or create /etc/X11/xorg.conf - in order to "describe" your multi monitor setup.
- Edit or create /etc/xdg/autostart/display.desktop for browser auto startup "tuning".
- Edit /etc/xdg/lxsession/LXDE-pi/autostart. It is crucial to add the following parameters:
@xset s off
@xset -dpmsIf you don't apply the recommended modifications, you may encounter USB dropouts, where the device disconnects and then reconnects during screen saver activation or wake-up. This issue can result in a 'green' and unresponsive screen. The Light Display Manager doesn't automatically detect this problem. Therefore, you'll need to either manually restart the Light Display Manager or create a udev rule to restart the service automatically when this condition occurs.
***
If you are to do this on newer than Raspbian OS (Buster) version dated 2020-08-24 release without using our script, below are a few things you must know:
- These screens need the udlfb(not udl) driver to work correctly.
- This driver was removed from the "default" kernel build config and substituted with udl instead.
- You will have to build it yourself and patch the kernel.
- Proposed method assumes X11/Xorg is used , these days by default Raspbian works on Wayland and Wayfire as composer for it. You can switch back to X11 using raspi-config command line tool.