Analog Component Calibration (BP Inside Devices)
Calibration
Please make sure you have ibeam-hardwarehardware-manager version 1.0.3-pre15 or higher installed on controller on which you want to adjust calibration values.
Please make sure the computer you will use has some sort of tool to maintain TCP connection to controller
Netcat utility can provide this functionality.
For Microsoft Windows the easiest way is to install Nmap package
For macOS, you can install it using Brew.
Please make sure your computer and controller are on the same network.
Step by step guide:
One has to access the controllers web interface, navigate to packages tab and click on hardware-manager package.
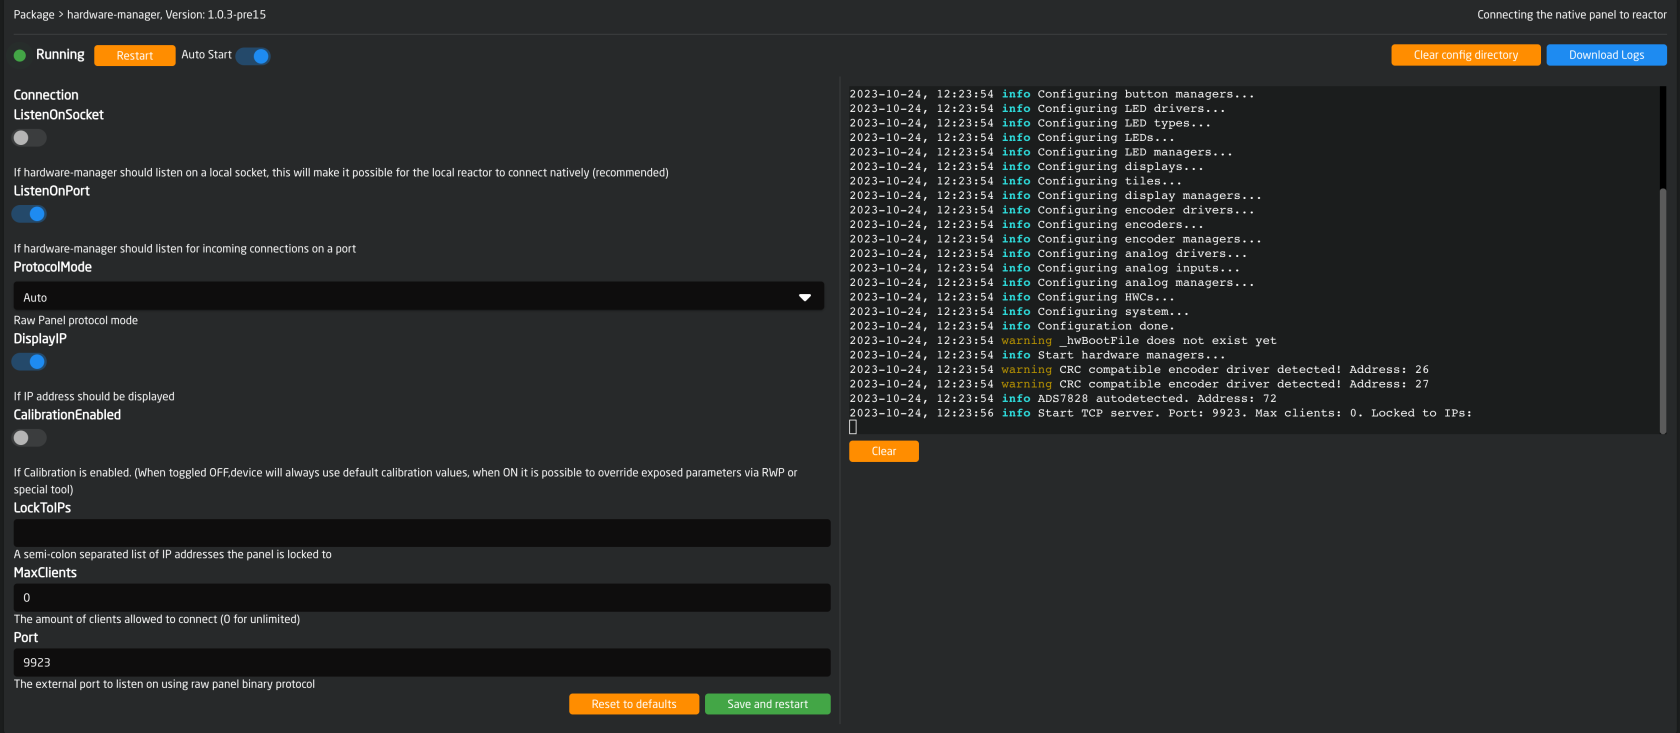
Next you will see hardware-manager settings page.
In order to establish TCP connection to the controller, make sure to enable ListenOnPort option.
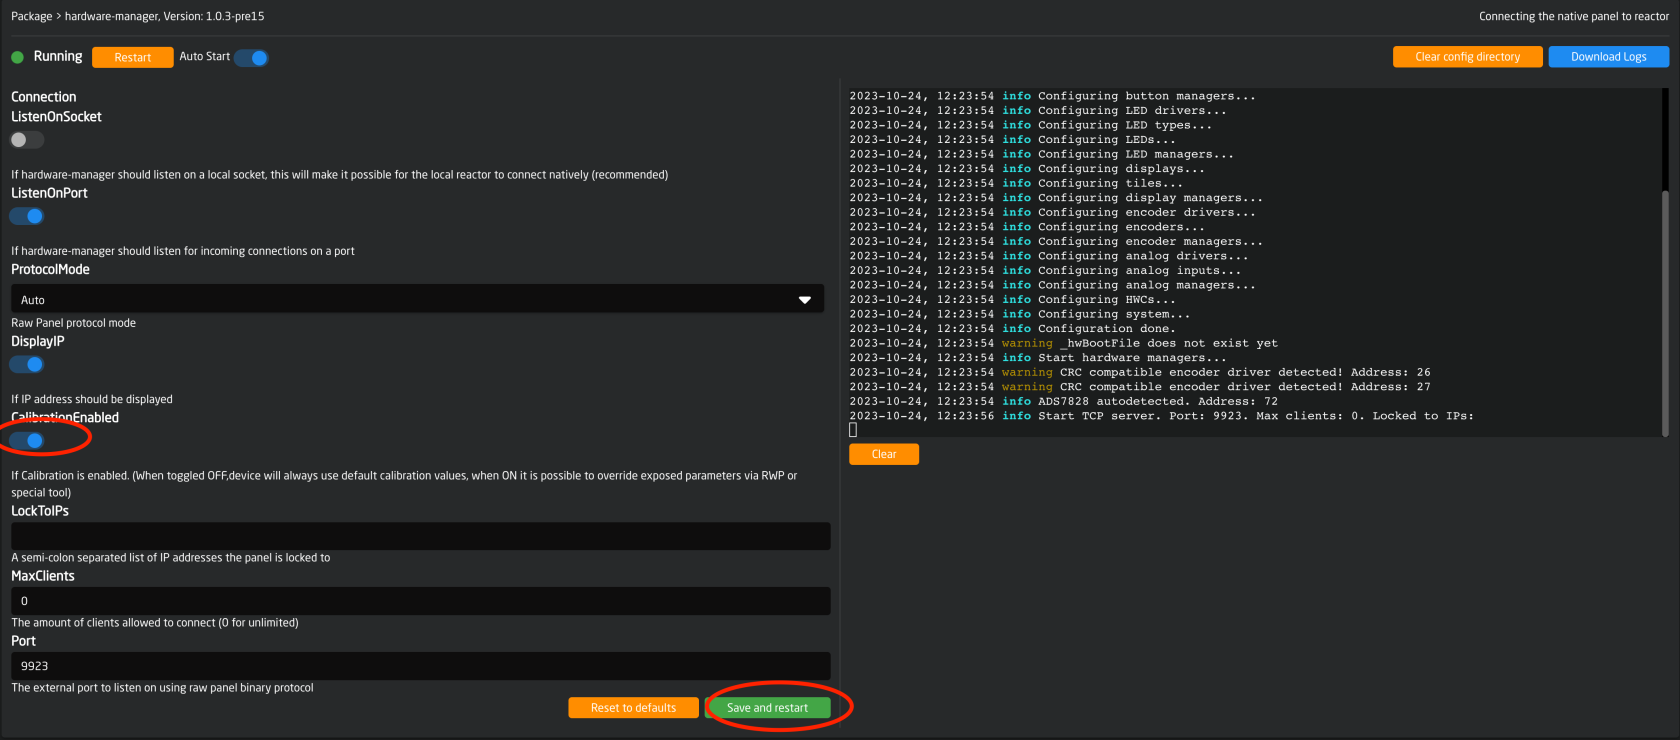
Enable the “CalibrationEnabled” toggle button and click save and restart.
As next step, we can now establish the TCP connection to controller and verify that calibration is enabled.
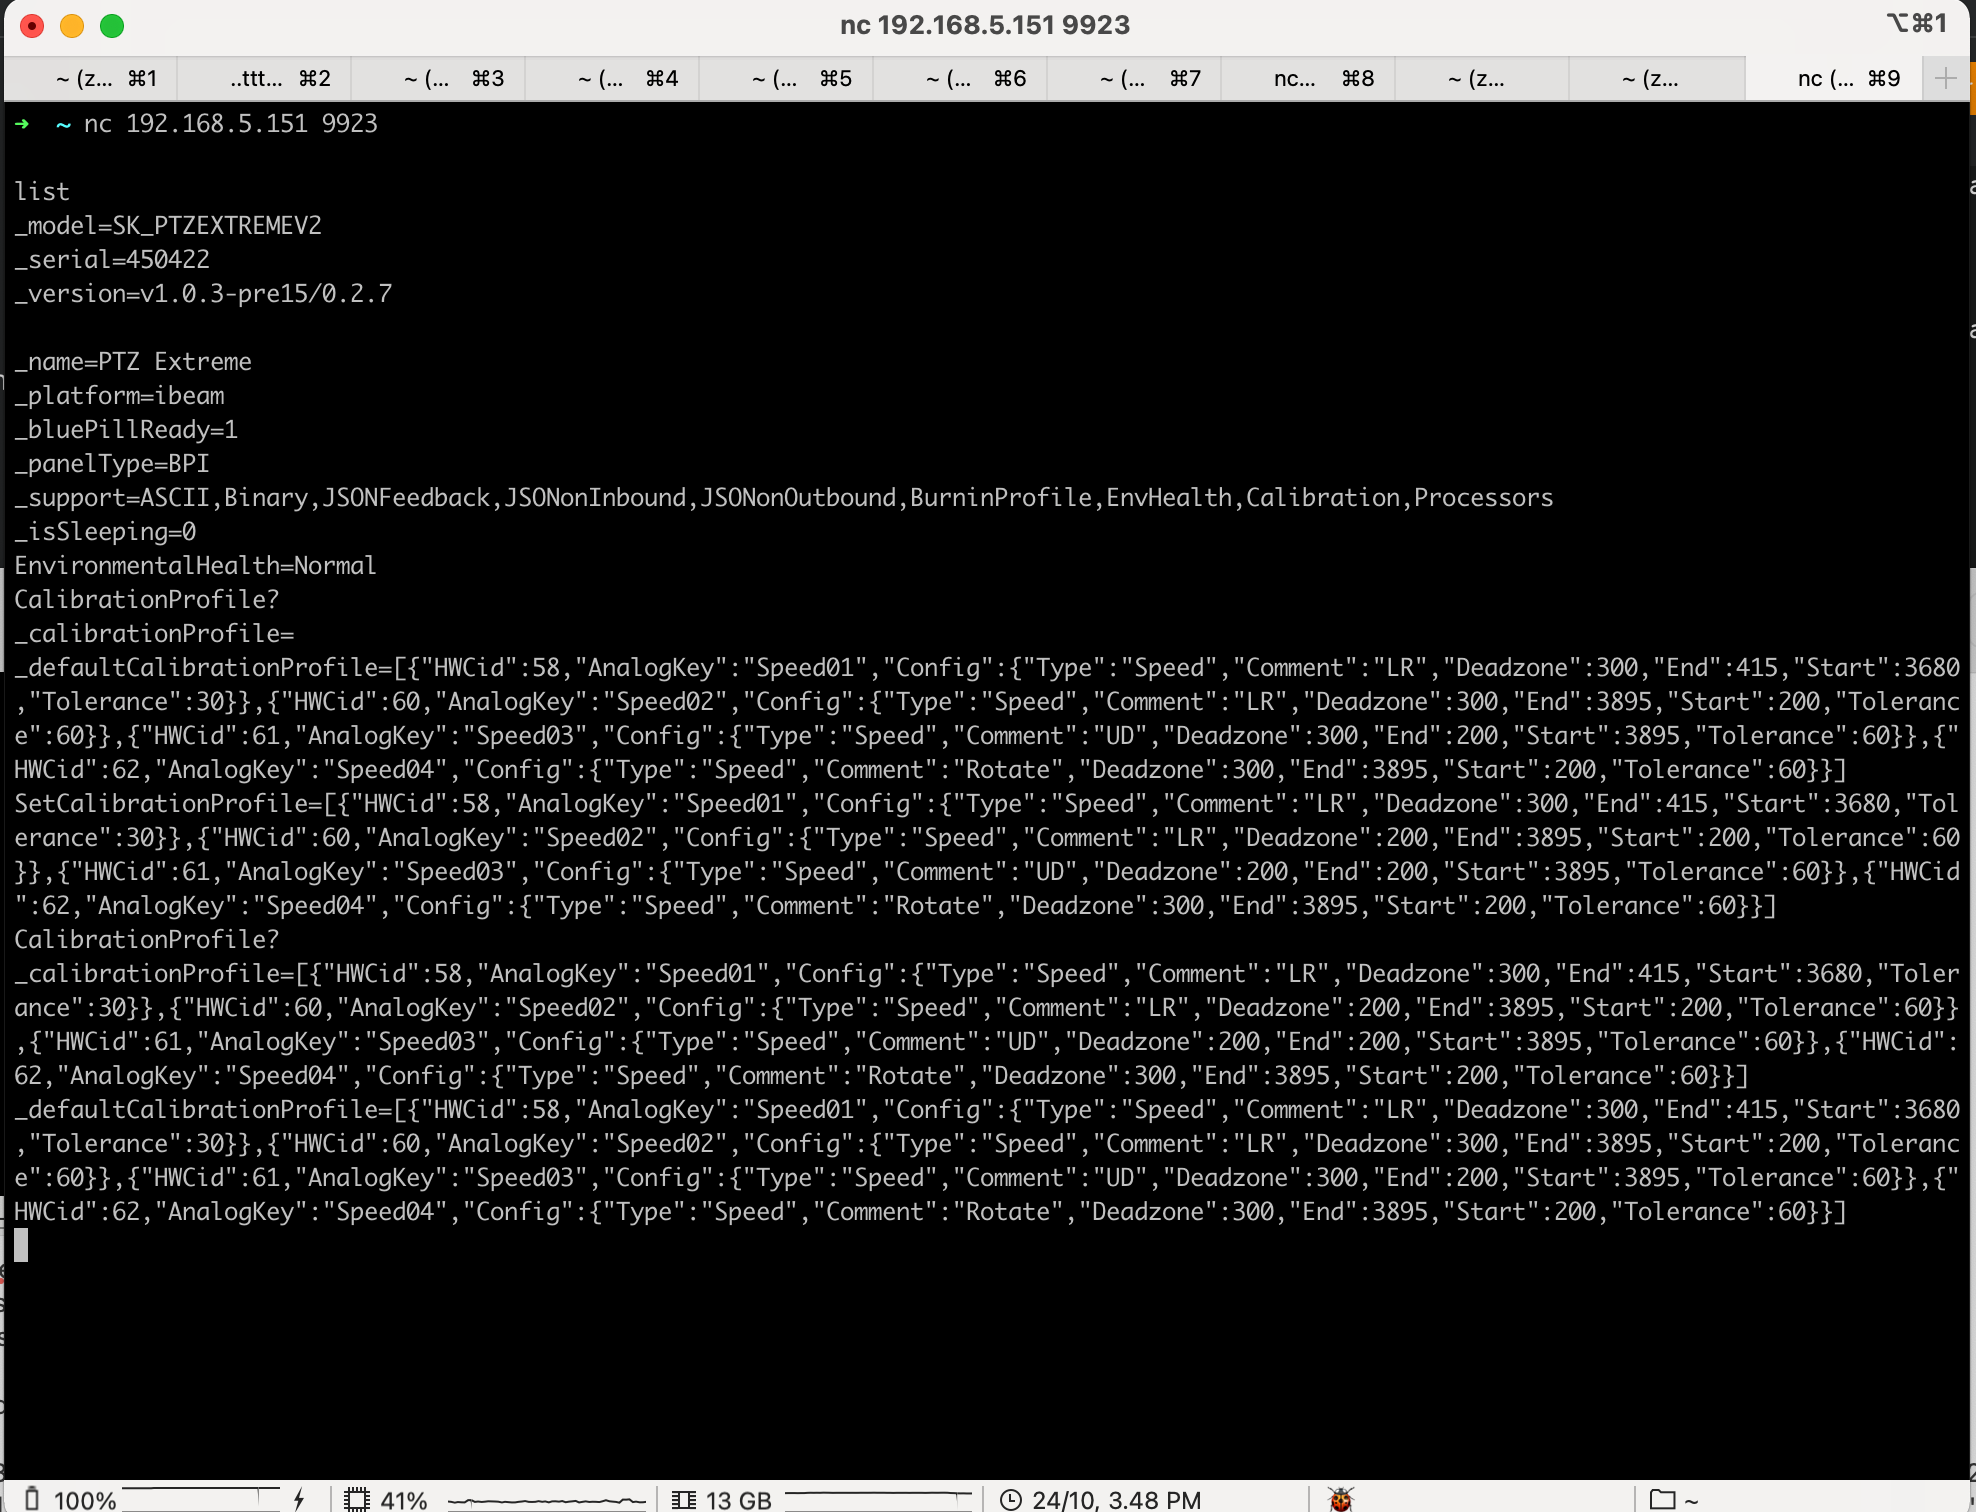
Open your terminal app and run the following command:
nc 192.168.5.151 9923
Of course the ip you use must be the ip of your controller and 9923 is the default port value, unless you have changed it in hardware-manager settings page.
Next send the following command:
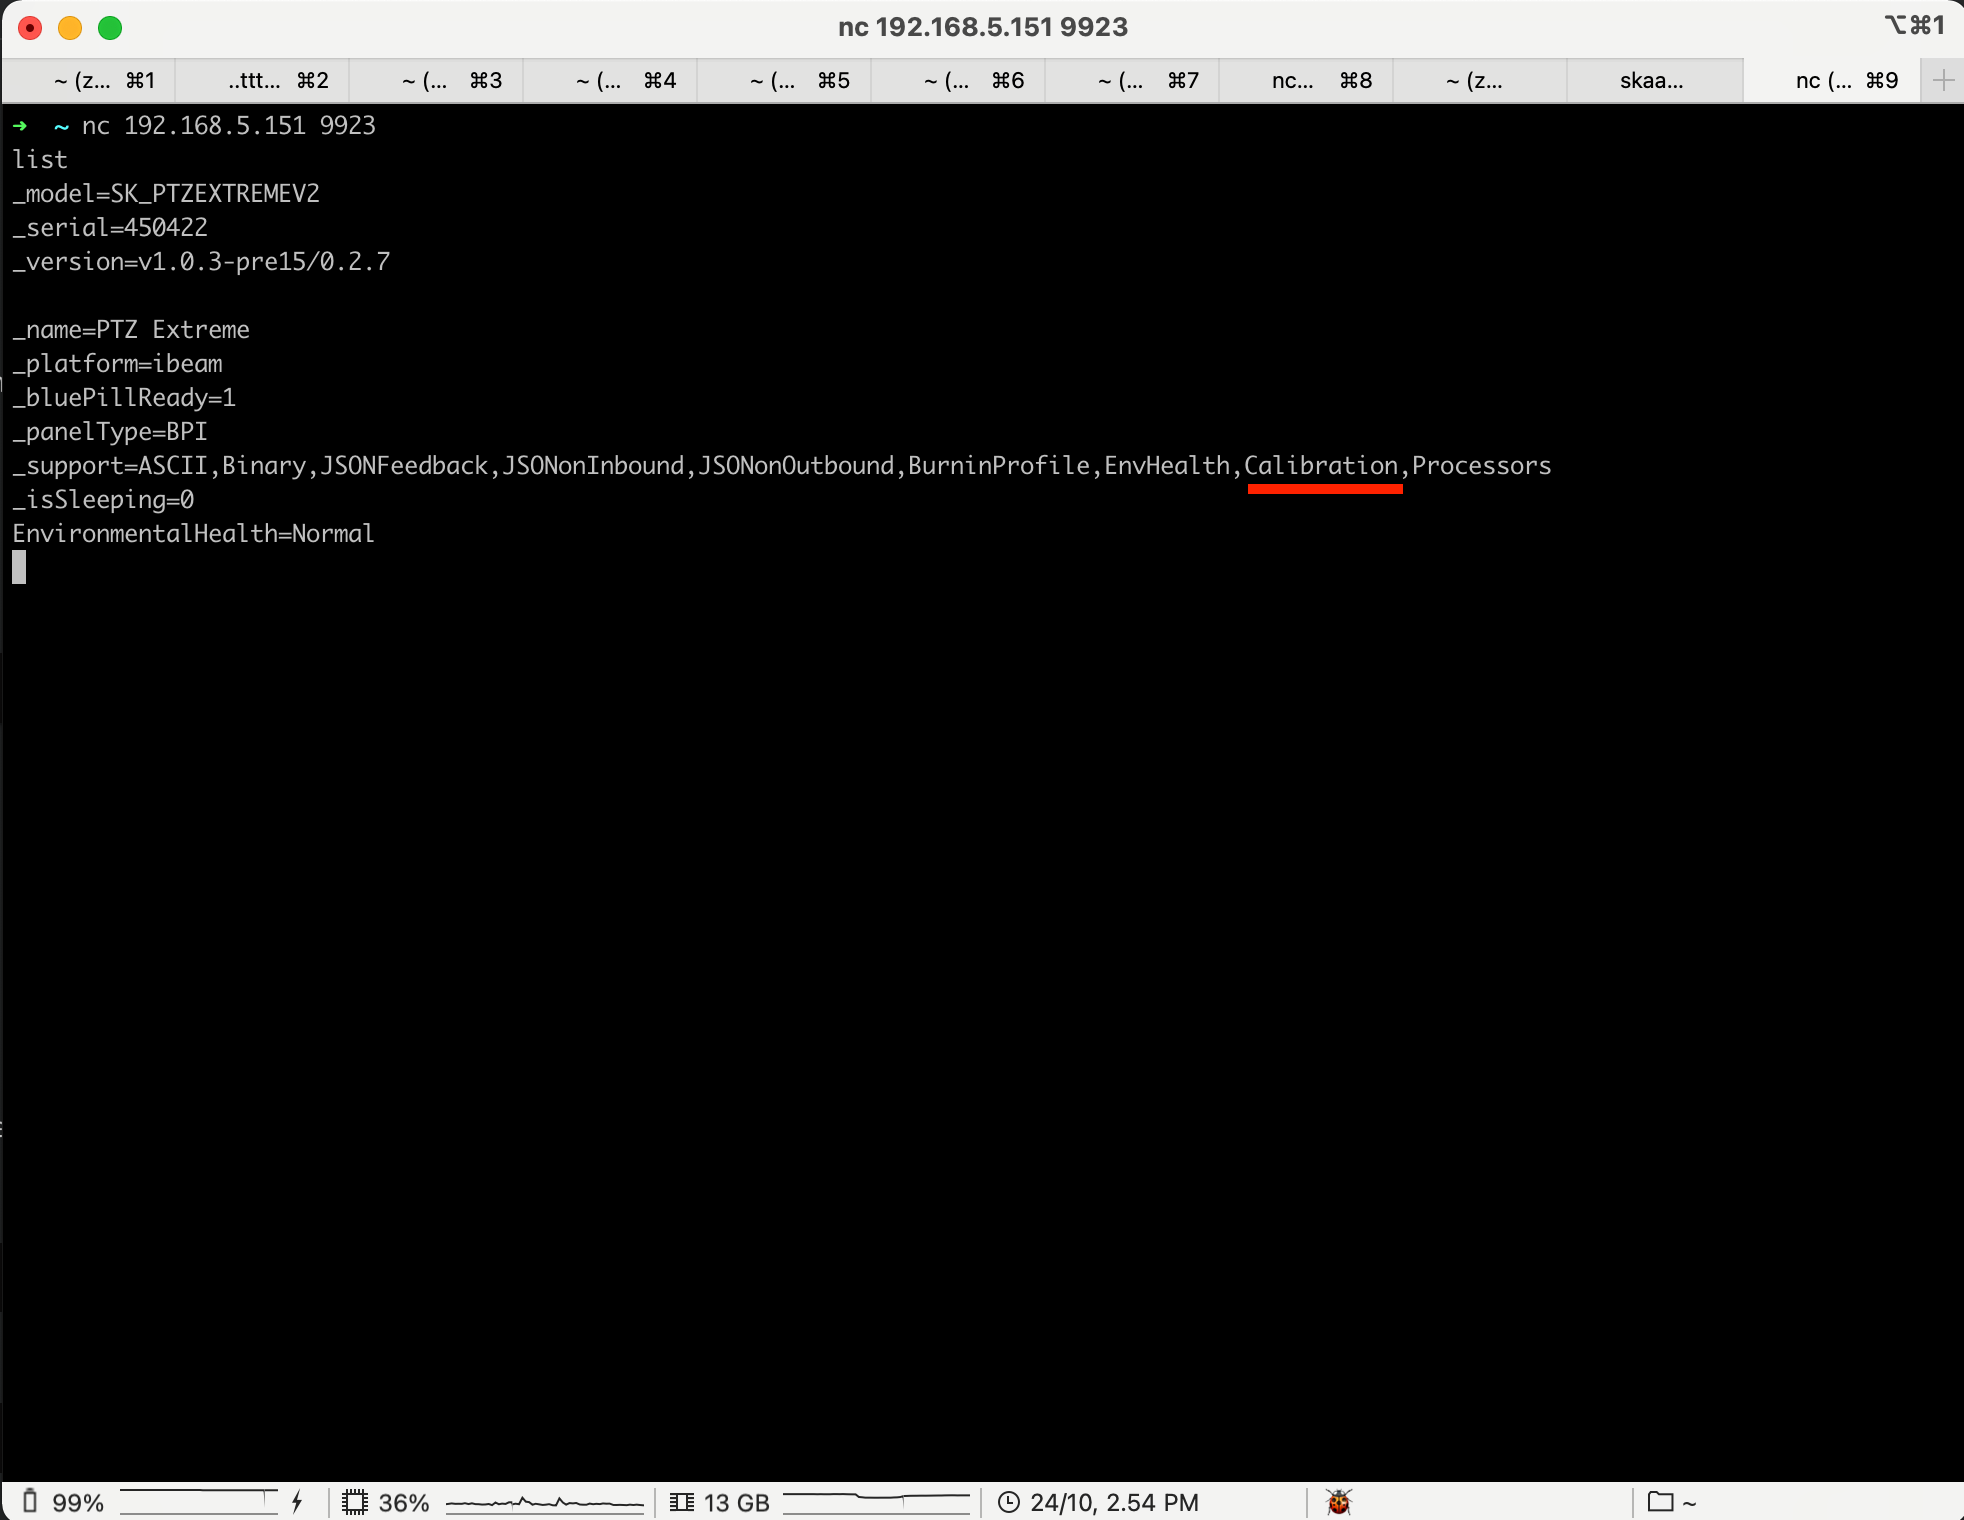
list
Verify that this is the controller you have intended to adjust by comparing model and serial number.
Also please verify you see “Calibration” among other supported features.
Next type the following command:
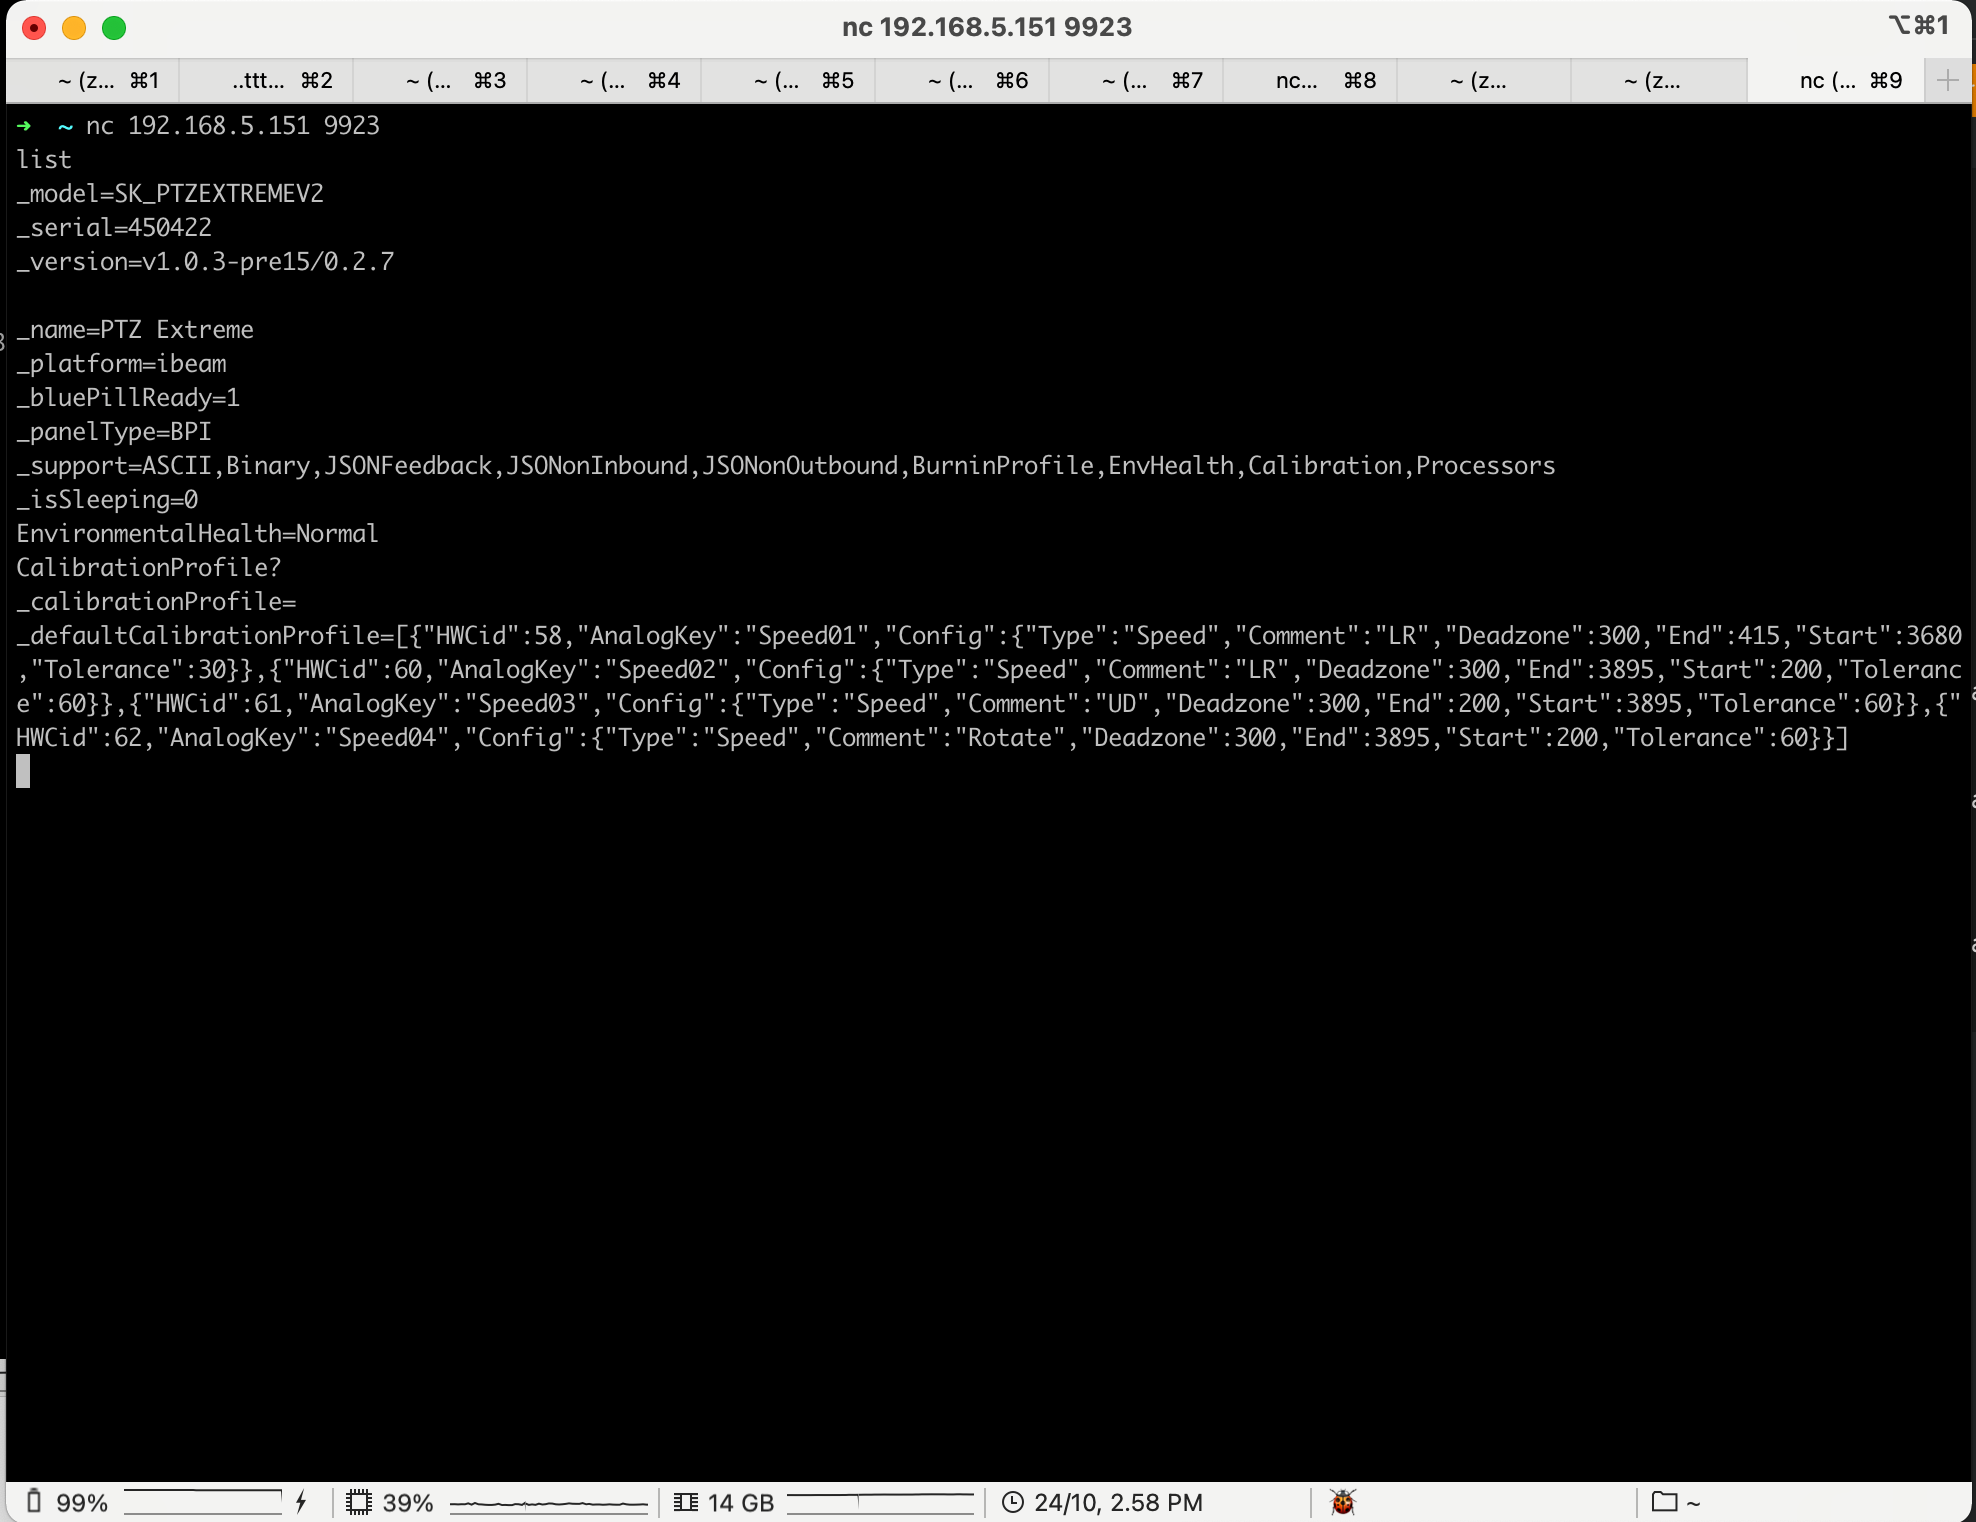
CalibrationProfile?
In response one should see JSON formatted array of analog components parameters allowed to be modified by user.
For example we will modify the deadzone of the joystick on PTZ Extreme Controller.
One can look up the HWC assignments specific per controller on https://devices.skaarhoj.com/panels
In case of PTZ Extreme, HWC ids for joystick : 60- horizontal(LR-left/right), 61-vertical axis(UD-up/down). Please note down the values.
As next step we need to copy the array after the _defaultCalibrationProfile= or the whole thing together.
_defaultCalibrationProfile=[{"HWCid":58,"AnalogKey":"Speed01","Config":{"Type":"Speed","Comment":"LR","Deadzone":300,"End":415,"Start":3680,"Tolerance":30}},{"HWCid":60,"AnalogKey":"Speed02","Config":{"Type":"Speed","Comment":"LR","Deadzone":300,"End":3895,"Start":200,"Tolerance":60}},{"HWCid":61,"AnalogKey":"Speed03","Config":{"Type":"Speed","Comment":"UD","Deadzone":300,"End":200,"Start":3895,"Tolerance":60}},{"HWCid":62,"AnalogKey":"Speed04","Config":{"Type":"Speed","Comment":"Rotate","Deadzone":300,"End":3895,"Start":200,"Tolerance":60}}]
Next we substitute _defaultCalibrationProfile with SetCalibrationProfile and modify the the deadzone of HWCid 60 and 61 to value of 200 for example.
As a result the final command we need to send back should look like below.
SetCalibrationProfile=[{"HWCid":58,"AnalogKey":"Speed01","Config":{"Type":"Speed","Comment":"LR","Deadzone":300,"End":415,"Start":3680,"Tolerance":30}},{"HWCid":60,"AnalogKey":"Speed02","Config":{"Type":"Speed","Comment":"LR","Deadzone":200,"End":3895,"Start":200,"Tolerance":60}},{"HWCid":61,"AnalogKey":"Speed03","Config":{"Type":"Speed","Comment":"UD","Deadzone":200,"End":200,"Start":3895,"Tolerance":60}},{"HWCid":62,"AnalogKey":"Speed04","Config":{"Type":"Speed","Comment":"Rotate","Deadzone":300,"End":3895,"Start":200,"Tolerance":60}}]
If all is fine you should not get any response back. After sending CalibrationProfile? again you should see a similar message as first time, although _calibrationProfile= will have the new parameters you have just set manually.
Additional verification can be found in the logs of hardware manager. If correct calibration profile was sent, you will find confirmation in the log, as seen below.
*If you get “nack” in response , the content of JSON received is not valid.
At this moment the new “parameters” are saved and will take effect next time hardware-manager starts.
So either power cycle the unit or just restart the hardware-manager to test new settings.
You can always "roll-back" to original settings either by simply disabling the "CalibrationEnabled" in the settings and restarting, or copy-pasting values from _defaultCalibrationProfile to SetCalibrationProfile command and restarting.


