Fader custom curve
What is a fader curve
Fader movement from bottom to top has a range from 0-1000, and by default this is a straight line - or linear. But sometimes you want the fader to have more details - or 'throw' - in a certain area,areas, on the cost of less details in other areas. This can be described with points on the line that bends it in different wayways - we call this a fader curve.
See these examples:
|
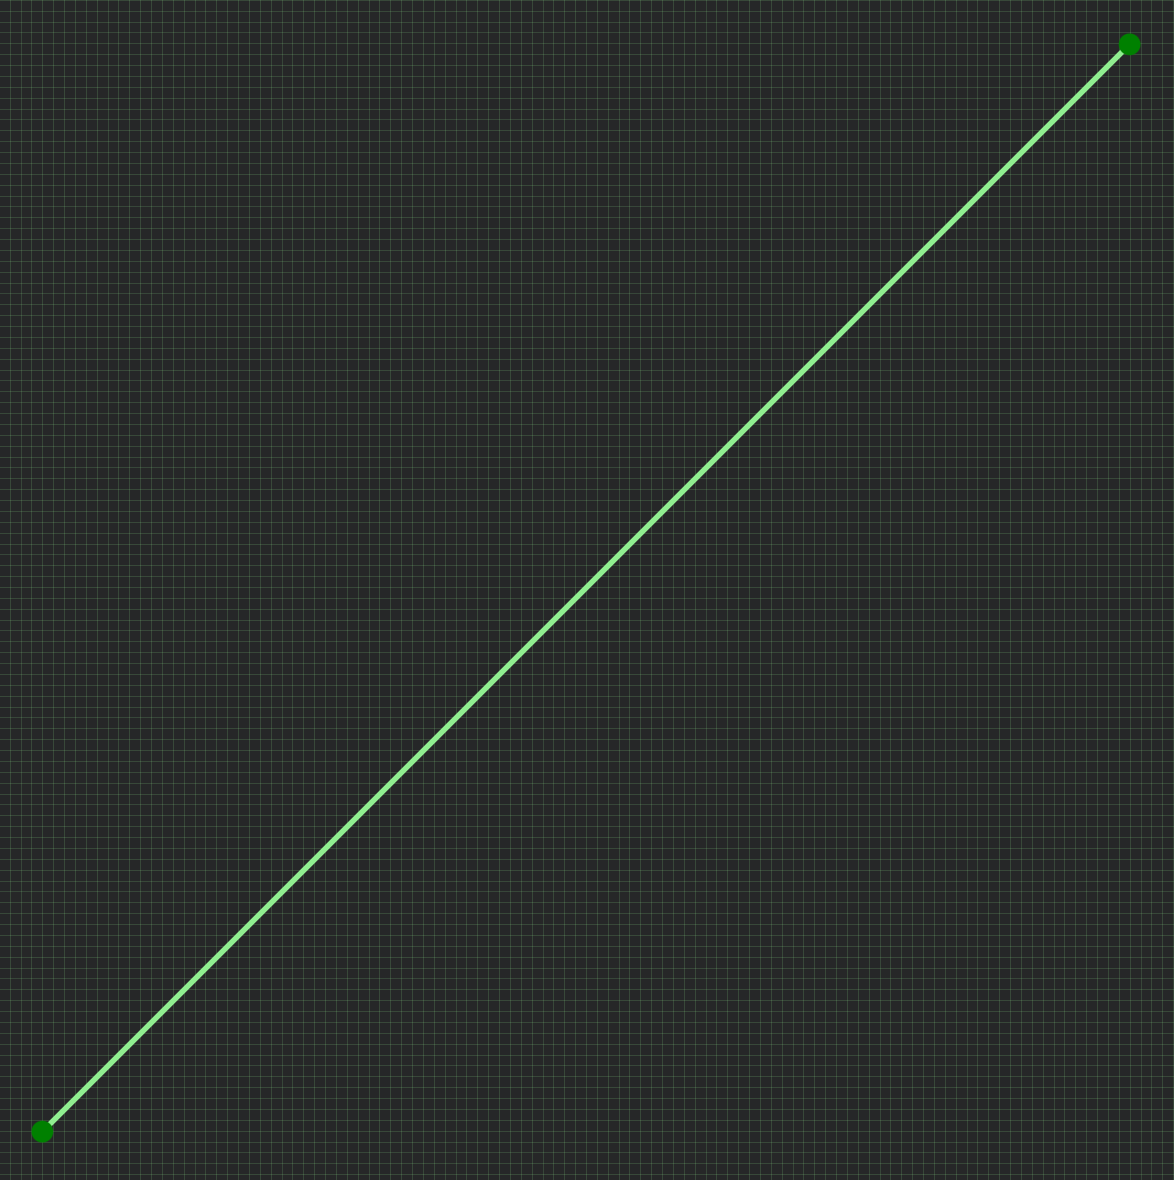
Linear (default) |
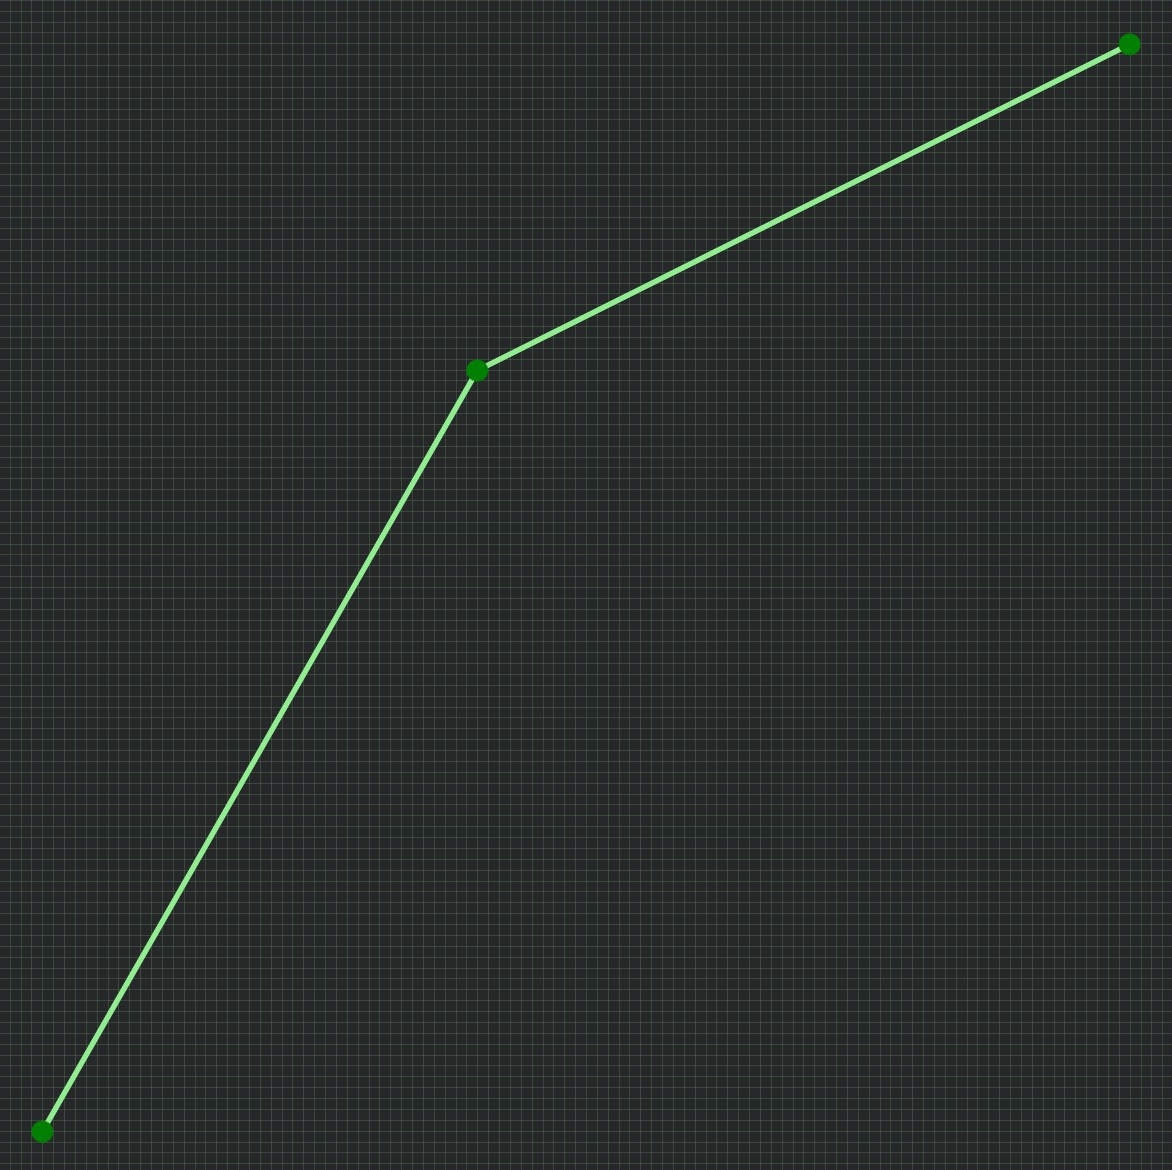
Details in top |
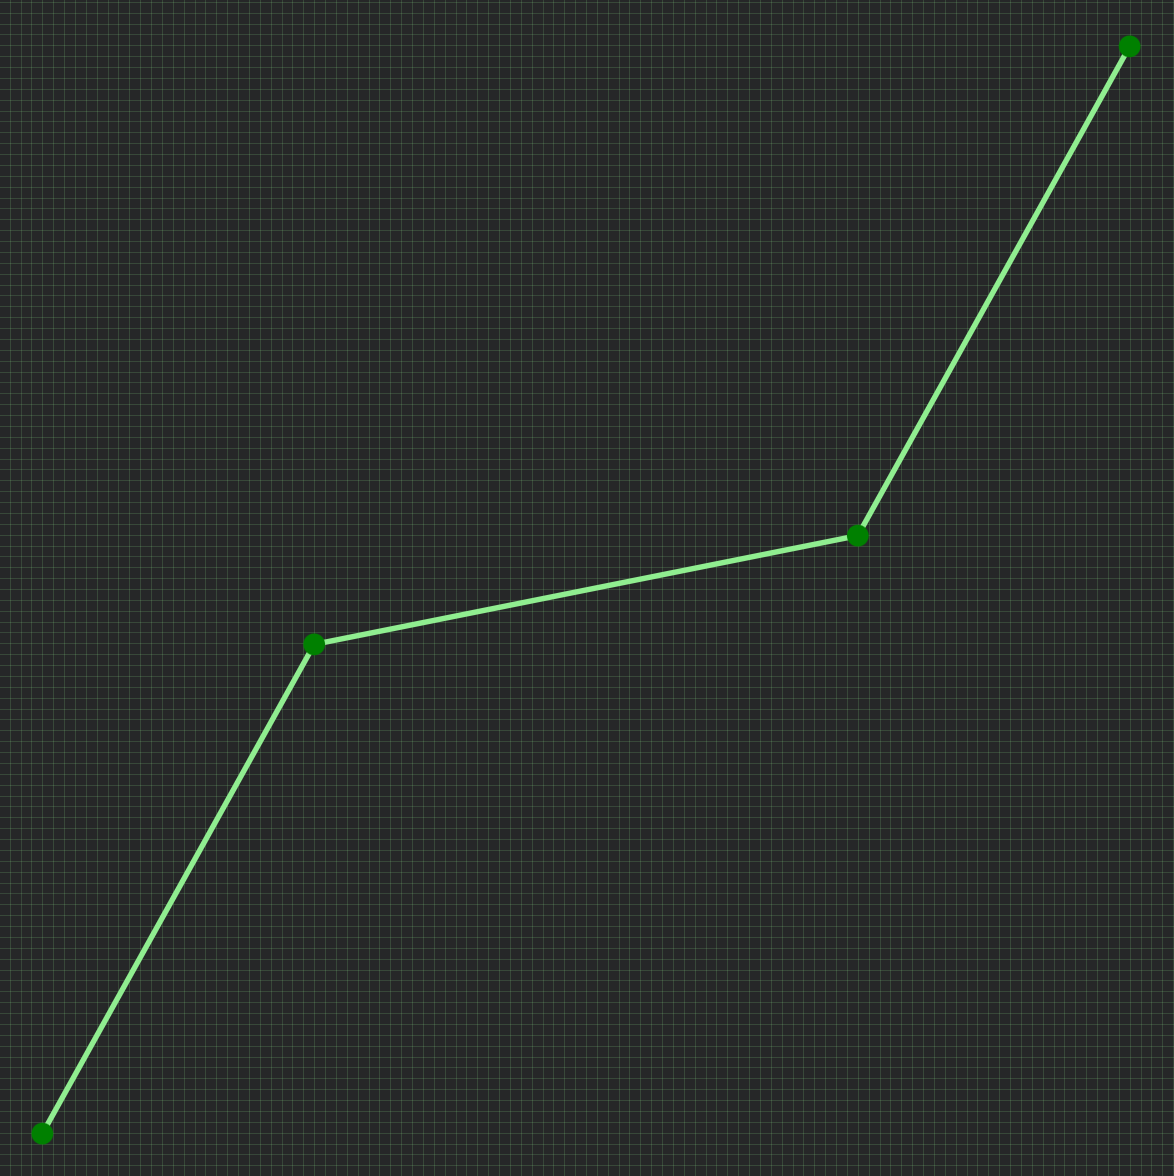
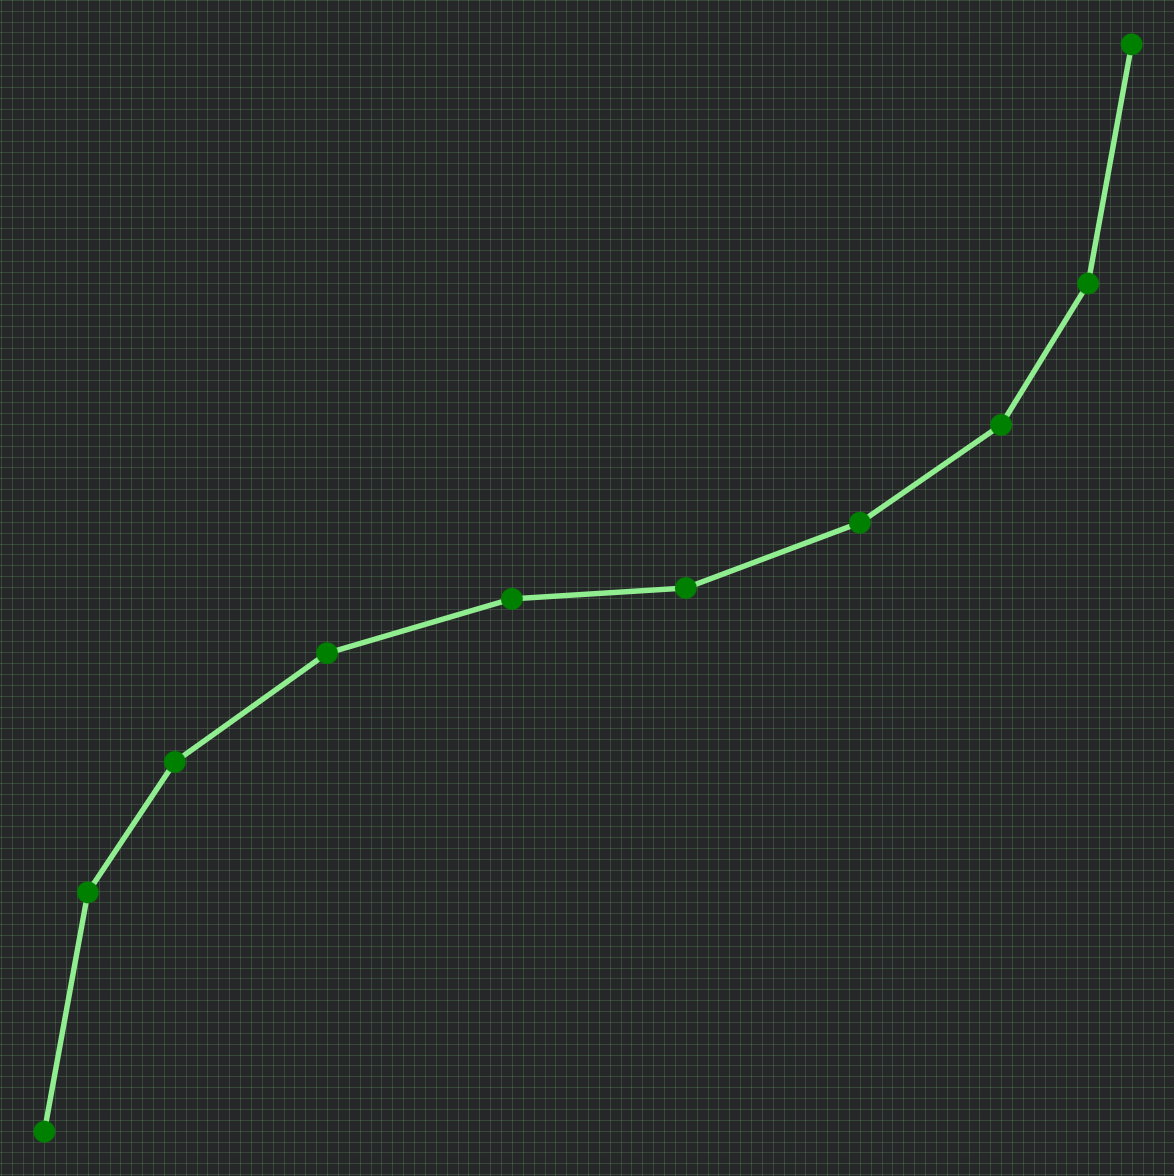
Details in middle |
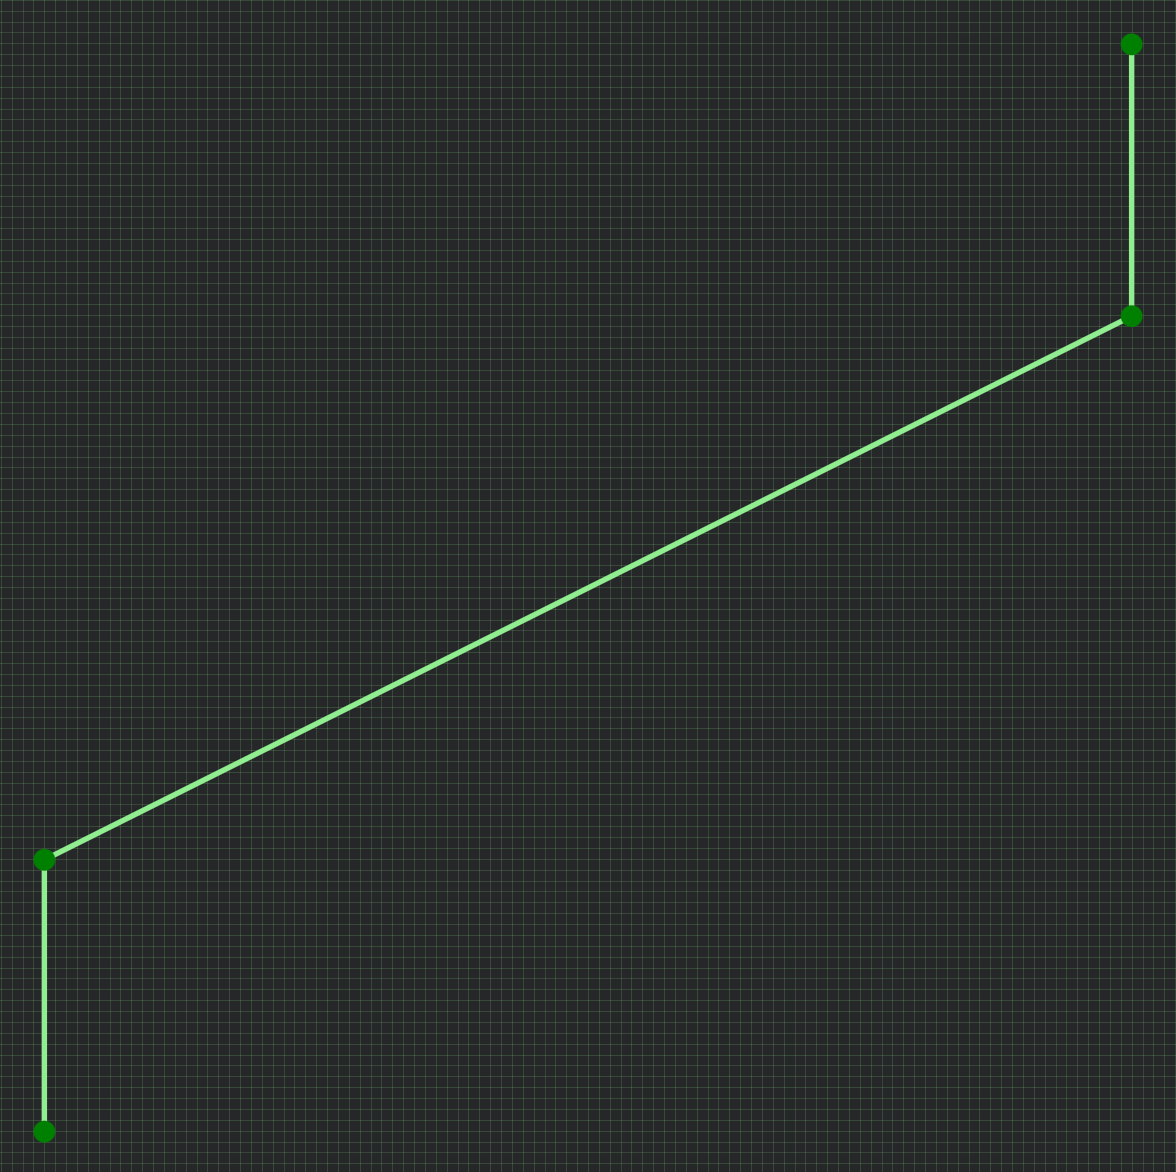
No top/bottom |
More points = smooth |
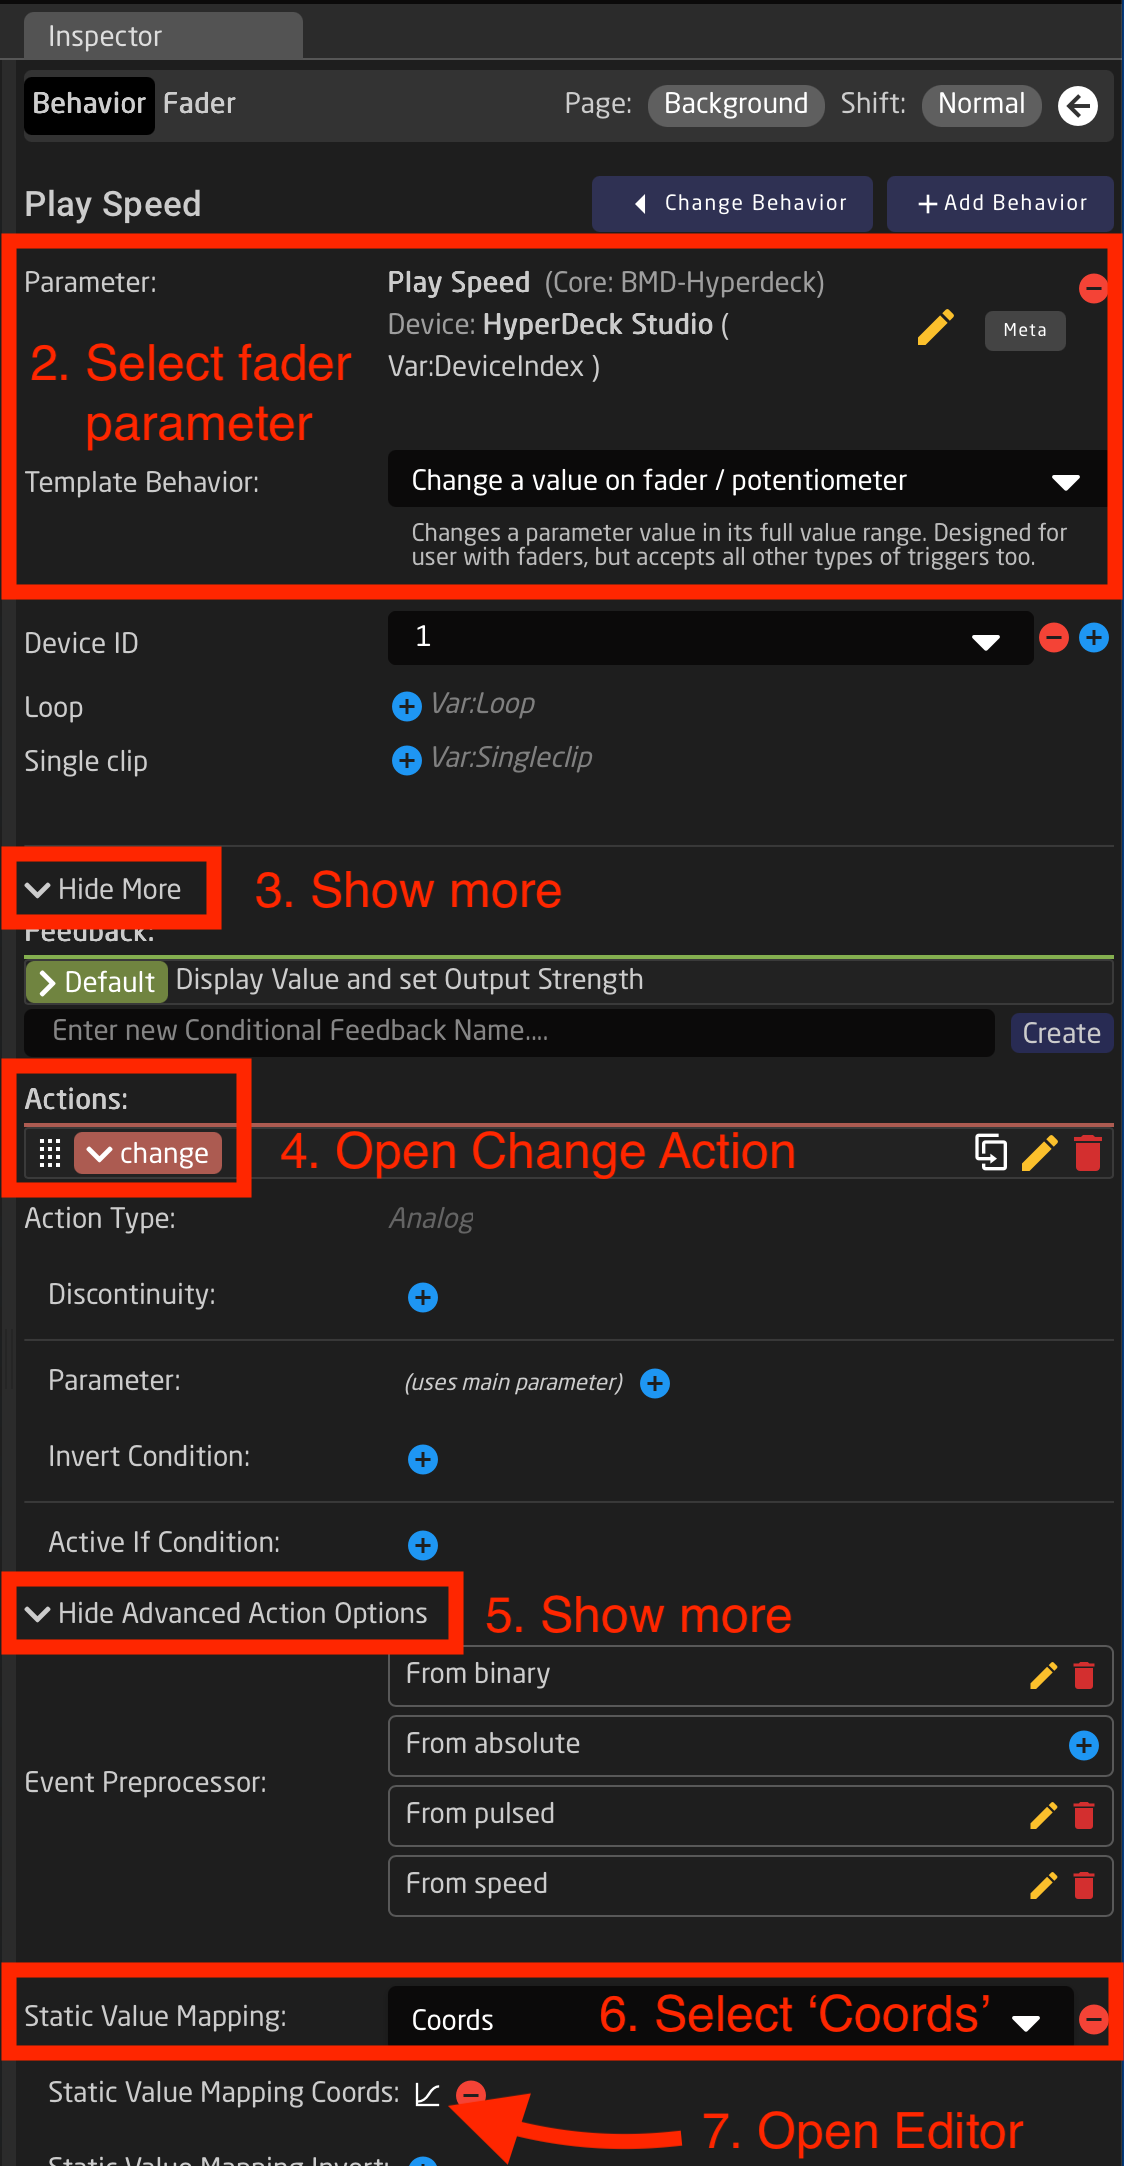
Access the curve editor
Reactor has a built-in graphic curve editor. It allows you to create any custom fader curve you want, including the examples above. You access it on the Configuration page by selecting a fader hardware component, and open the advanced settings within the Inpector. The curve editor is, of course, only available when selecting a 'fader' component, and not on buttons or knobs.
|
Guide to open the curve editor:
|
|
Edit curve
|
In the curve editor you add points, and drag them in the 0-1000 grid (0,0 being bottom and 1000,1000 being top).
Here's a guide to the features:
|
|
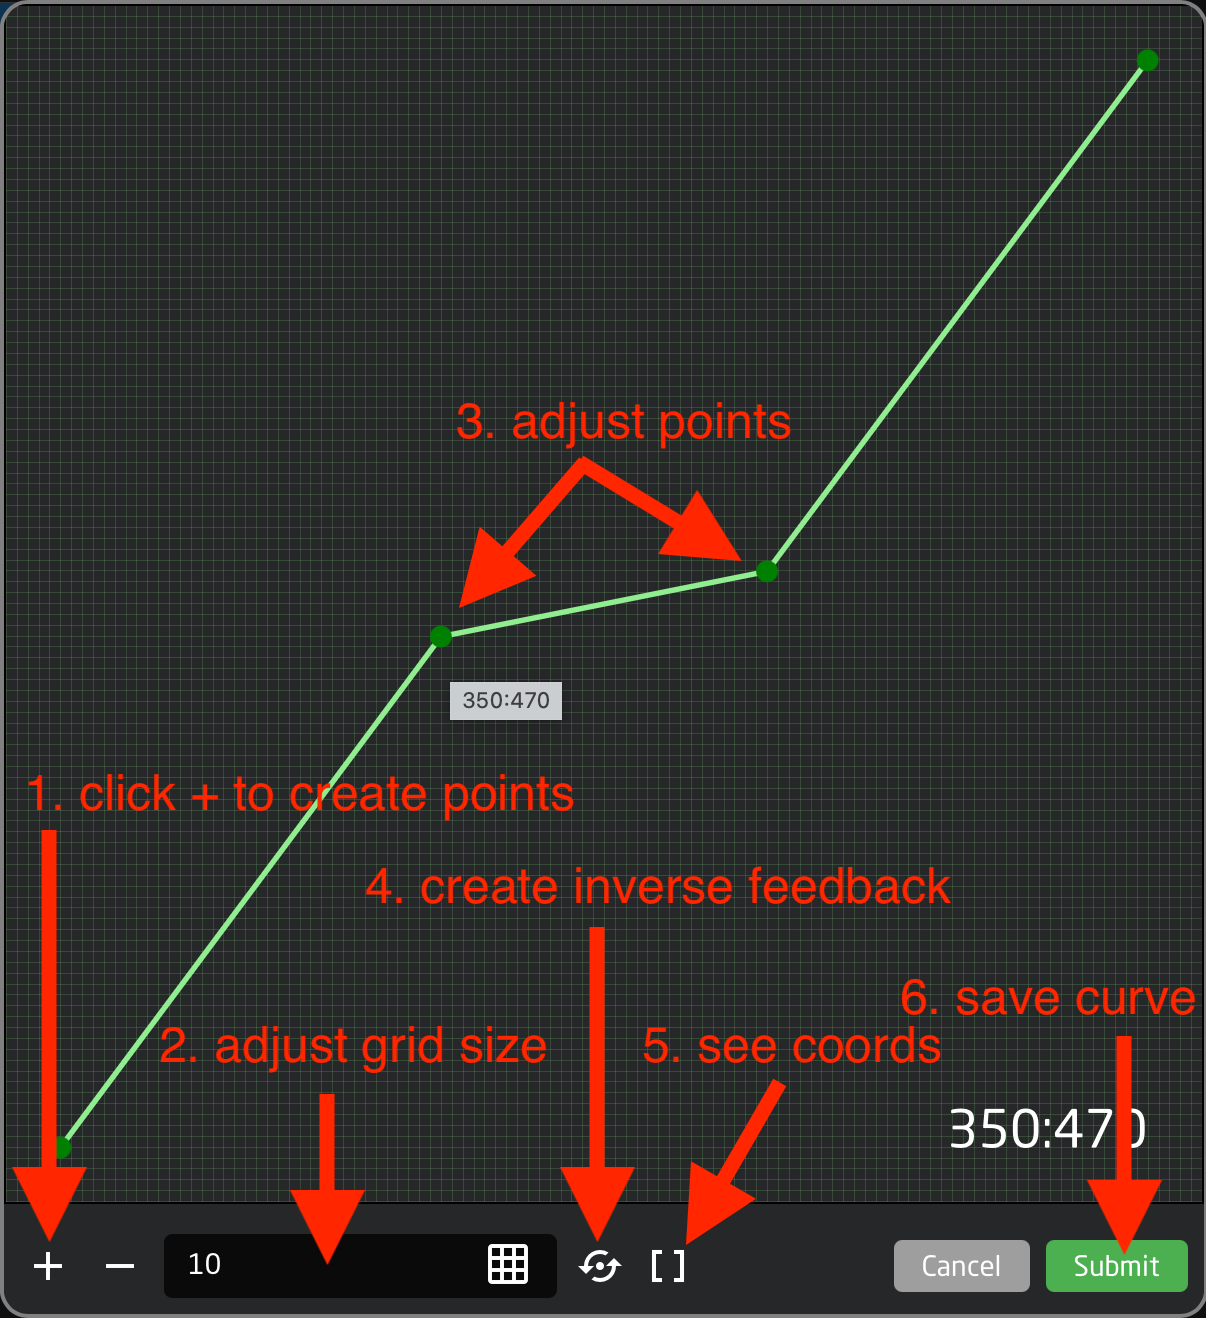
Inverted feedback
Please know that often a SKAARHOJ panel sends commands to a device - and then it listens for return-values from the device. So, you may move the motor-fader, but the fader position is actually updated by the return-value from the device.
In this case, when using a custom curve in the data you send (the Action) - it is necessary to have an inverted version of the same curve in the data you listen for (the Feedback). This will prevent the fader from 'jumping' in strange ways.
As mentioned above (in line 5), you simply click the 'circle-arrow' icon to automatically create a feedback with an inverted curve. And do remember to click it again to update it, if you have edited the curve.