Pan/Tilt/Zoom Rocker Sensitivity and Curve Setup
For all our default PTZ configs we have pre-defined up to 4 variables for you to use to tune the feeling of the joystick and zoom rocker to fit the feeling between multiple cameras to your liking.
Before in time, you would find one param that would control all 3 axes on the joystick (L/R, U/D & Rotate) as well as the Zoom rocker. This has now been split out by default to these for options that can be set pr. camera and that will remember their values between reboots, so you don't have to remember them.
The for new params are:
- PT_Speed -> Controls the scale on U/D, L/R Joystick movements (Max Speed)
- PT_Curve -> Controls the curve for U/D, L/R Joystick movements (Expo)
- Z_Speed -> Controls the scale of the Zoom rocker and Joystick rotation (Max Speed)
- Z_Curve -> Controls the curve of the Zoom rocker and Joystick rotation (Expo)
The two-speed variables are direct replacements for the old JoystickSens variable and they go just like the old variable from 1-10, with the default being 10. This correlates to a min setting of 10% of the max speed and up to the full 100% speed.
So in short 1 = 10%, 2 = 20%, 5 = 50% and 10 = 100% speed on a fully deflected joystick/rocker.
Then we have the Two new curve variables that actually replace the old JoystickExpo variable. The chances of you having seen that variable in Reactor are very slim as it's not been part of the configs before, even though it has been set as an option in all configs.
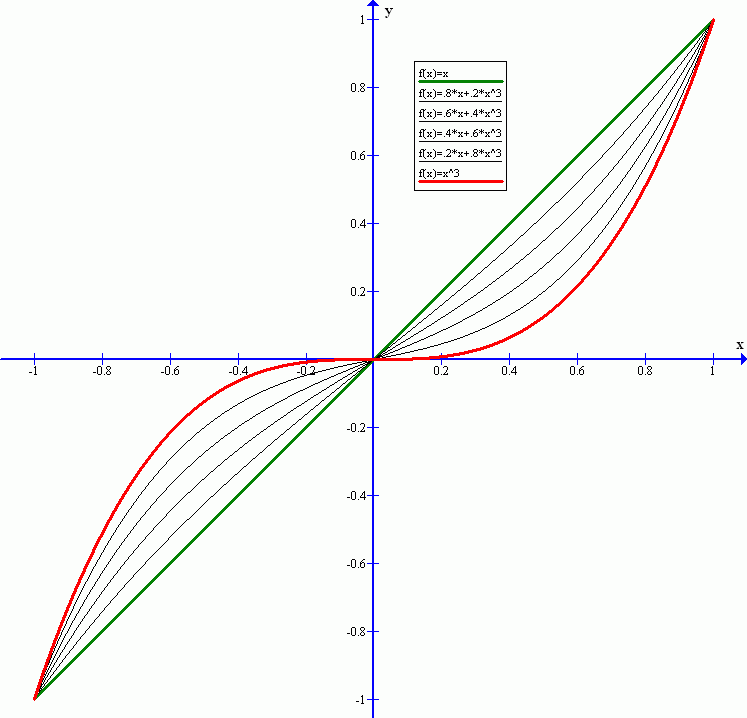
The new PT_Curve and Z_Curve replace this old variable with a name that makes more sense as well. What we control here is the amount of Expo we want on the joystick. These variables go from 0-25 giving us a wide selection from 0 = linear to 25 = 75% expo. The reason we have limited it by default to a max of 75% is that otherwise it gets so sharp that it's basically just an on/off behaviour. Adjusting this variable will give you more resolution in the middle of the joystick without losing max speed at the ends. combine this with the speed above to get the best feeling for you.
In order to visualise what the curve variables do, please take a look at this image, if you have the curve set to 0 then your joystick will follow the green curve, then as you move up towards 25 you will get closer and closer to the red curve. Thus giving you more resolution in the middle.
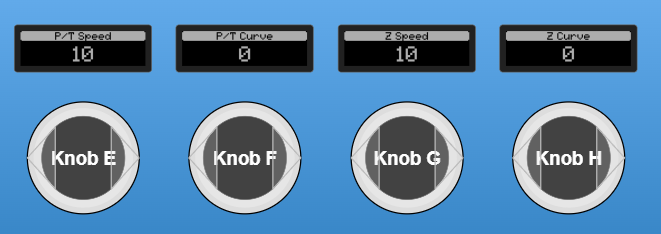
Image showing these four variables mapped to the encoders in a config:
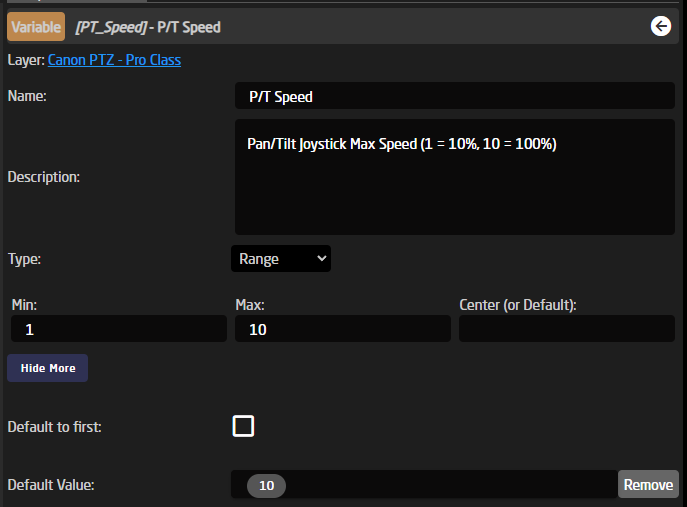
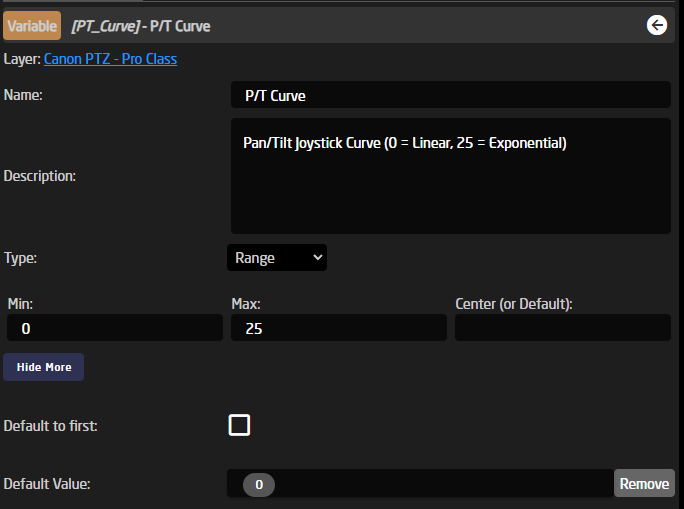
Example of the P/T Speed and P/T Curve variable setup (Note that they also have "Persistent" = true):
Here is the full definition of the 4 variables in their full JSON setup:
This snippet is taken from the file: SKAARHOJ.Devices.Canon-XC.ProClass.Basic
        "PT_Curve": {
            "Name": "P/T Curve",
            "Description": "Pan/Tilt Joystick Curve (0 = Linear, 25 = Exponential)",
            "MinMaxCenterValue": [
                0,
                25
            ],
            "Default": [
                "0"
            ],
            "Persistent": true
        },
        "PT_Speed": {
            "Name": "P/T Speed",
            "Description": "Pan/Tilt Joystick Max Speed (1 = 10%, 10 = 100%)",
            "MinMaxCenterValue": [
                1,
                10
            ],
            "Default": [
                "10"
            ],
            "Persistent": true
        },
        "Z_Curve": {
            "Name": "Z Curve",
            "Description": "Zoom Rocker Curve (0 = Linear, 25 = Exponential)",
            "MinMaxCenterValue": [
                0,
                25
            ],
            "Default": [
                "0"
            ],
            "Persistent": true
        },
        "Z_Speed": {
            "Name": "Z Speed",
            "Description": "Zoom Rocker Max Speed (1 = 10%, 10 = 100%)",
            "MinMaxCenterValue": [
                1,
                10
            ],
            "Default": [
                "10"
            ],
            "Persistent": true
        }
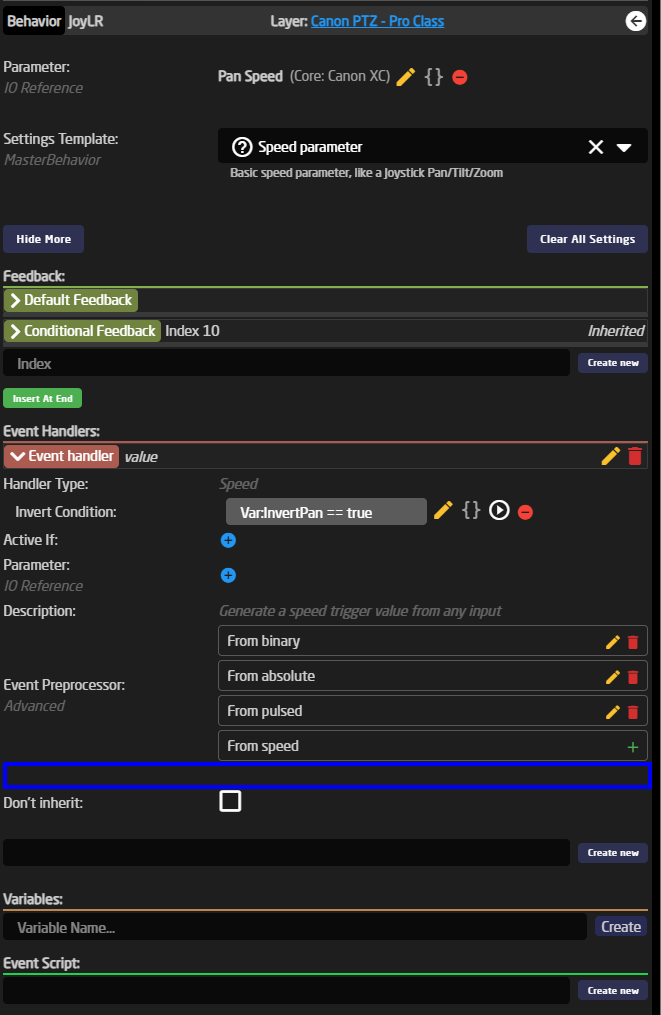
One thing you will notice when you go to look at a PTZ behaviour is that you cant find where these variables are actually used, as for the moment this is not visible in the UI, so, for now, you will have to add or change this via the JSON editor.
If we go take a look at where this would become visible at some point in the future, then that would be here inside the blue box, inside a part called "ValueMapping":
If we then Click the "Show JSON" button then, we will see the full config for the Pan joystick setup for Canon XC:
{
    "ParentID": "SKAARHOJ:SpeedControl",
    "Name": "Pan",
    "EventHandlers": {
        "value": {
            "ValueMapping": {
                "ScalingDivisor": 10,
                "ScalingIOReference": {
                    "Raw": "Var:PT_Speed"
                },
                "ExpoDivisor": 30,
                "ExpoIOReference": {
                    "Raw": "Var:PT_Curve"
                }
            },
            "InvertCondition": "Var:InvertPan == true"
        }
    },
    "IOReference": {
        "Raw": "DC:canon-xc/Var:DeviceIndex/panSpeed"
    }
}
What we look for is again the "ValueMapping" field where we can see a ScallingDivisor so that's how we get the 10% steps on the PT_Speed variable 100%/10 = 10% step size
Then the same for the Curve, we have an ExpoDivisor that is set to 30 so 100%/30 = 3% expo pr step and by having our PT_Curve variable limited to only 25 limits the max setting on the controller to 25 * 3% = 75% expo. Thus preventing the curve from becoming unusably sharp.
Don't hesitate to play around with these options to get the tunning fully right to your liking.

