Reflashing Blue Pill devices
If your Blue Pill device has become totally unresponsive - you cannot contact it in any way - the solution may be to 'reflash' the entire system software.
| NOTE: For this procedure you need the assistance from SKAARHOJ Customer Support ! Please contact: support@skaarhoj.com |
| ALERT: This procedure will ERASE ALL configurations on the device. |
REQUIREMENTS
You need the following software:
• BalenaEtcher https://www.balena.io/etcher/
• (you may need) SKAARHOJ Updater app https://www.skaarhoj.com/support/firmware-updater
• skaarOS image file (this can only be obtained from SKAARHOJ Customer Support)
PROCEDURE
- make sure you have the 'skaarOS' image file ready on your Desktop (you get this file from SKAARHOJ Customer Support)
- open BalenaEtcher app
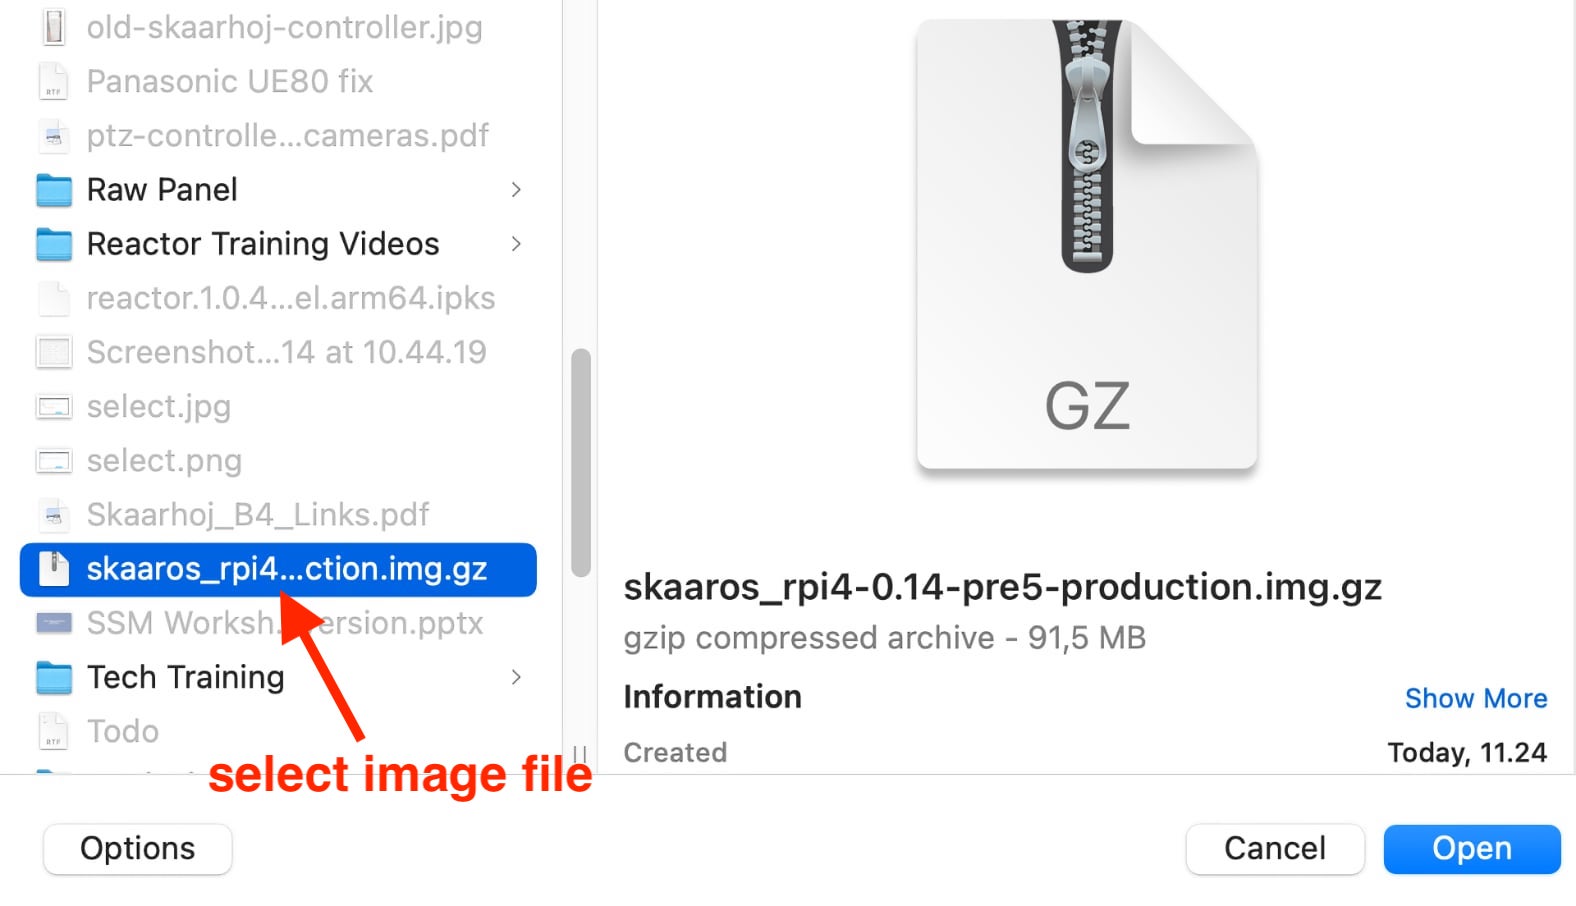
- click 'Flash from file' > select the 'skaaros_xxxx' image file from the Desktop (pic 1 and 2)
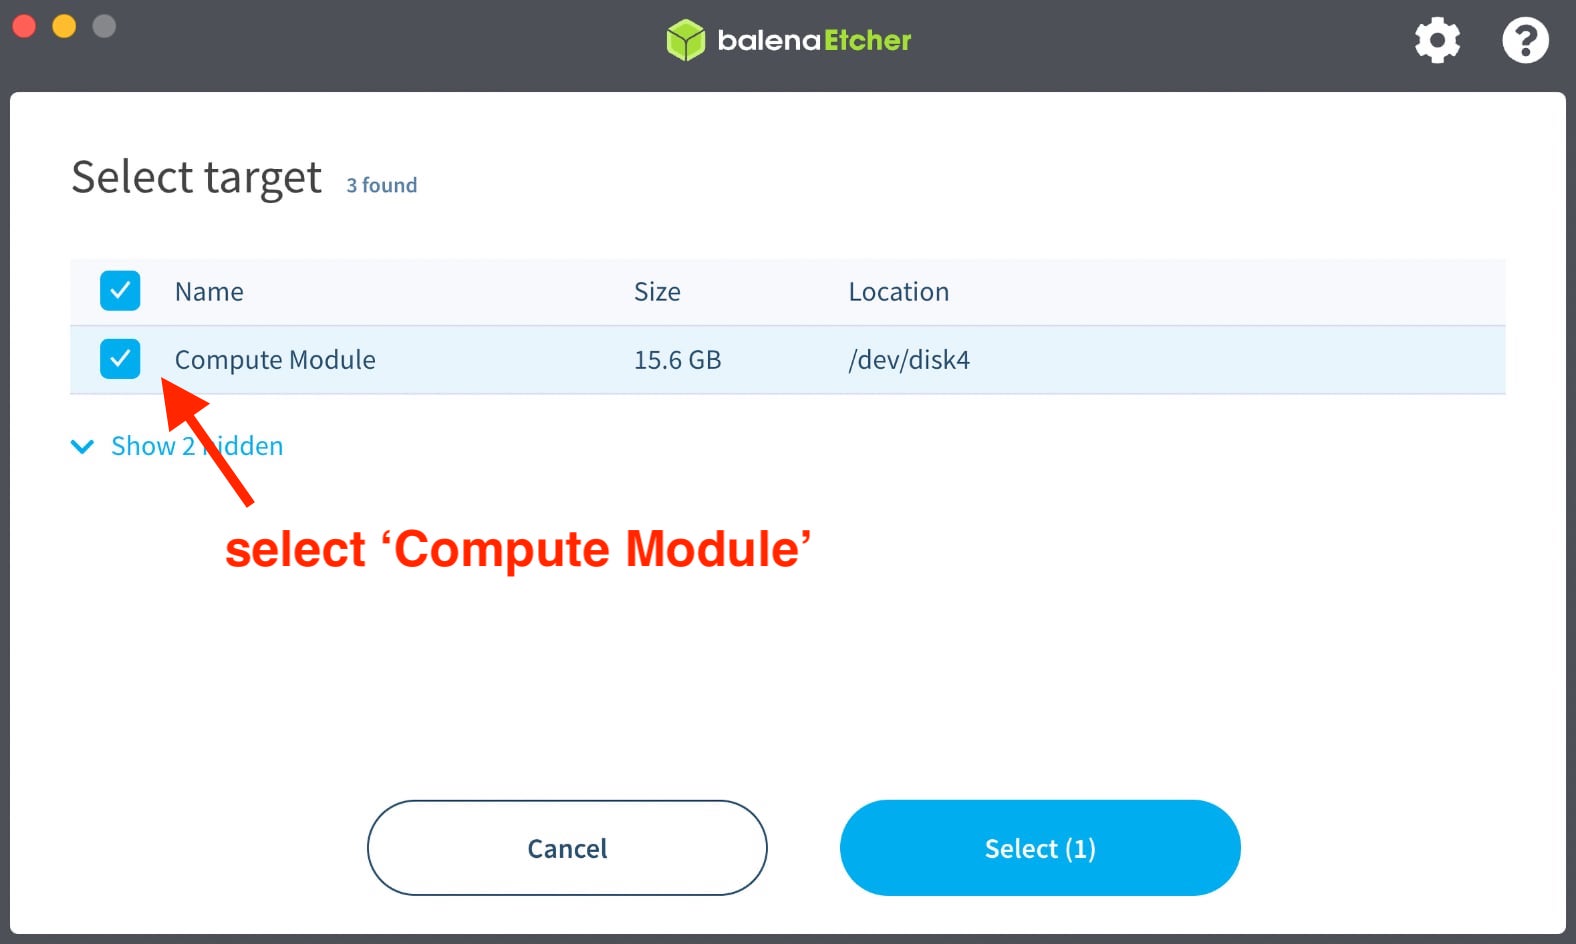
- click 'Select target'
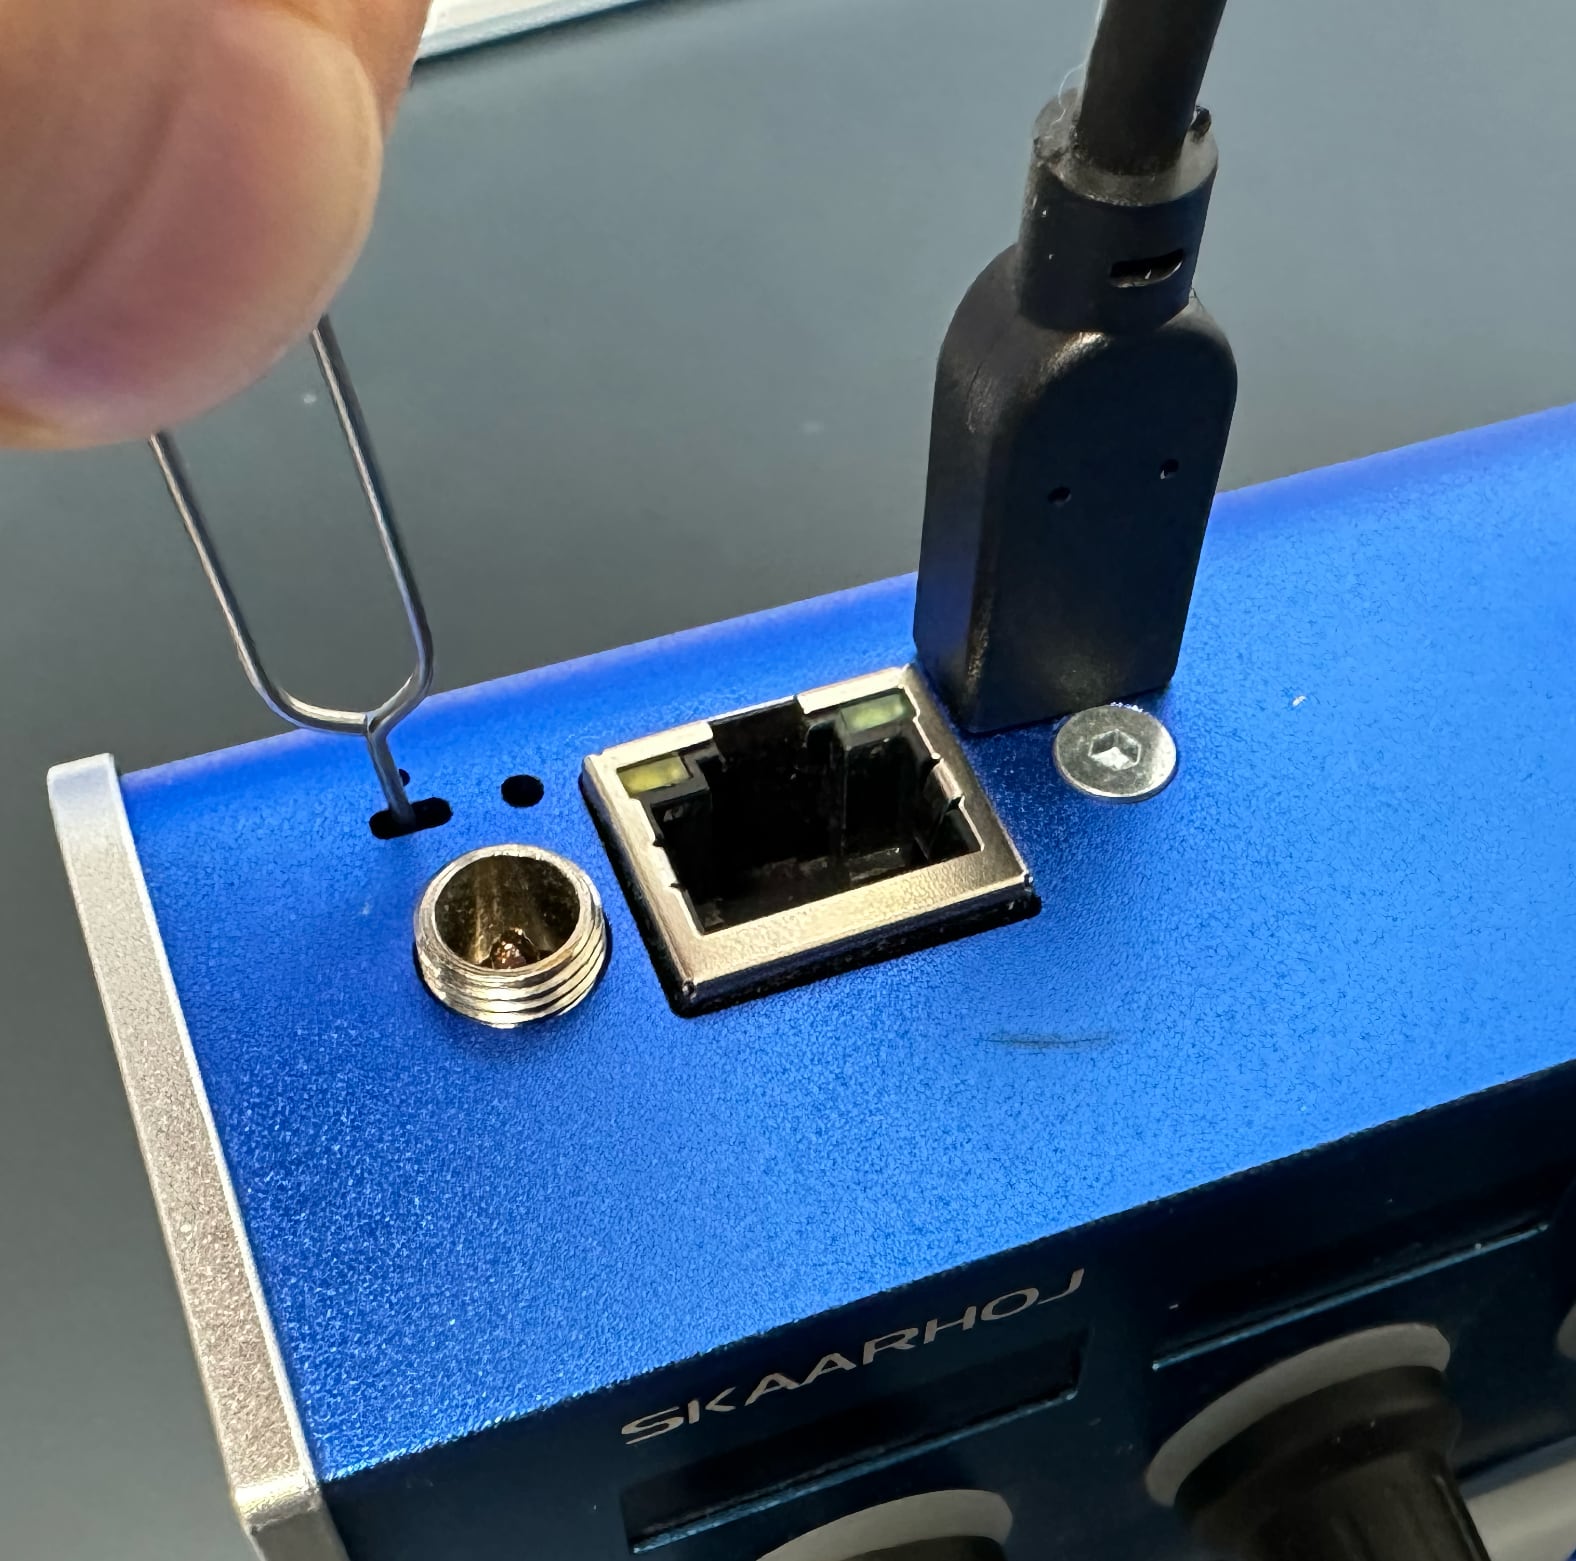
- connect Blue Pill device to computer via USB > hold paperclip pressed in the configuration hole on the device > connect power (PSU or PoE) to device (pic 3)
- when you see 'Compute Module' in BalenaEtcher, remove paperclip (if device is not found, follow 'Device not found' workaround using SKAARHOJ Updater app below)
- select 'Compute Module' > click 'Select' (pic 4)
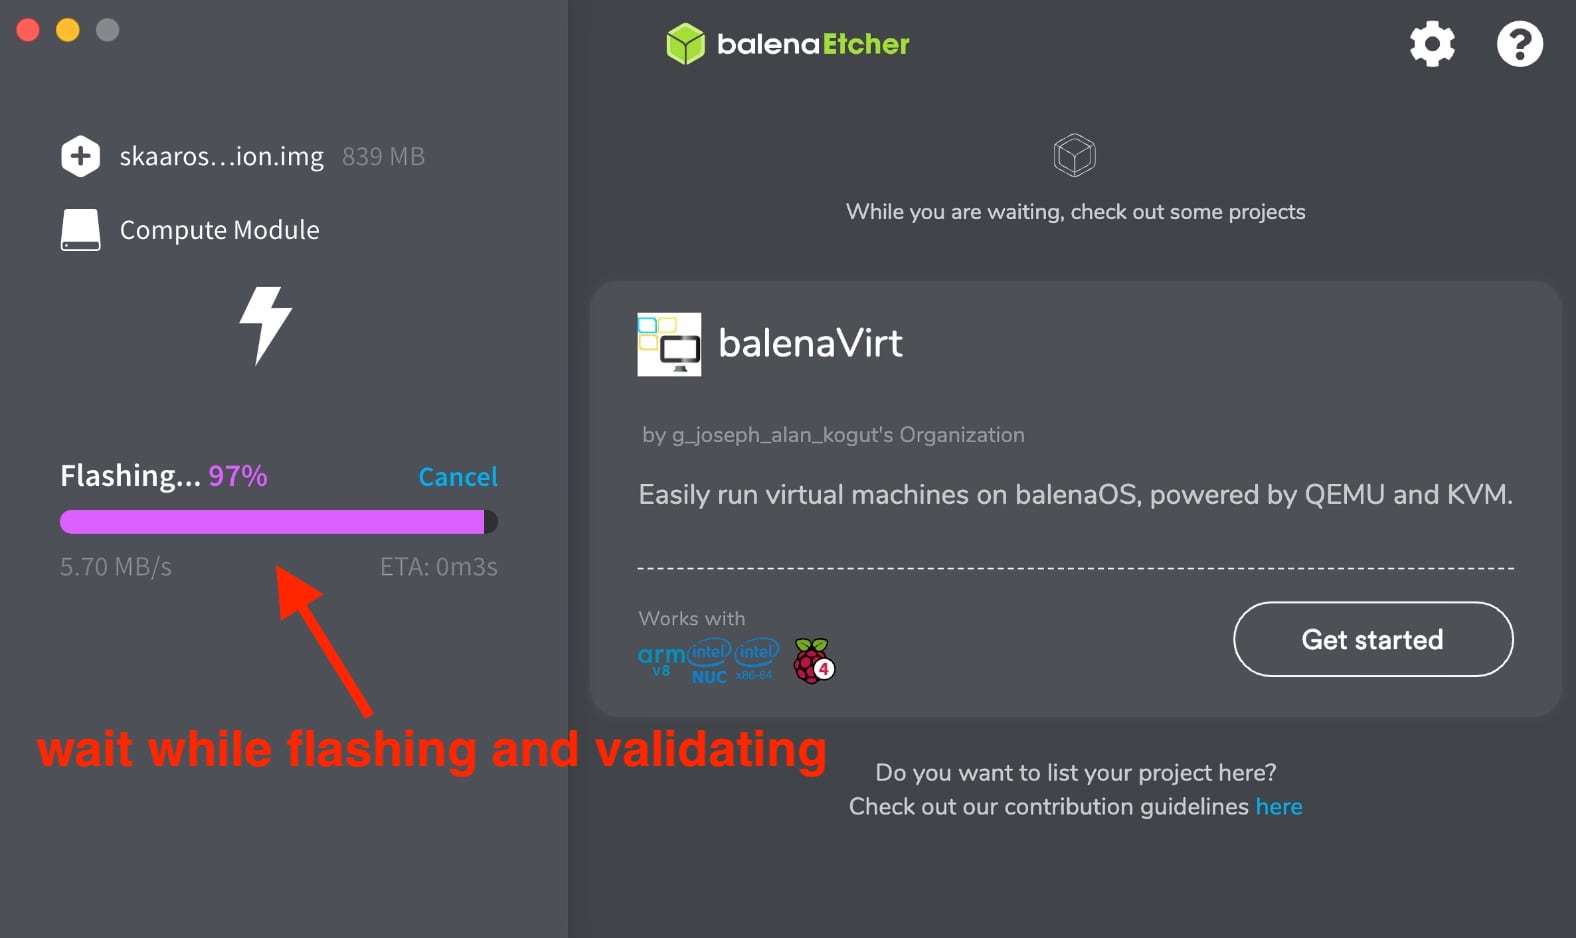
- click 'Flash!' > enter computer password > wait approx 5 min (pic 5)
- after procedure Blue Pill device will reboot. Quit BalenaEtcher.
The Blue Pill device should start up, and display the IP address it can be found at.

IF DEVICE NOT FOUND
If the 'Compute Module' is not found in step 6 please follow these steps:
- quit BalenaEtcher app
- open SKAARHOJ Updater app
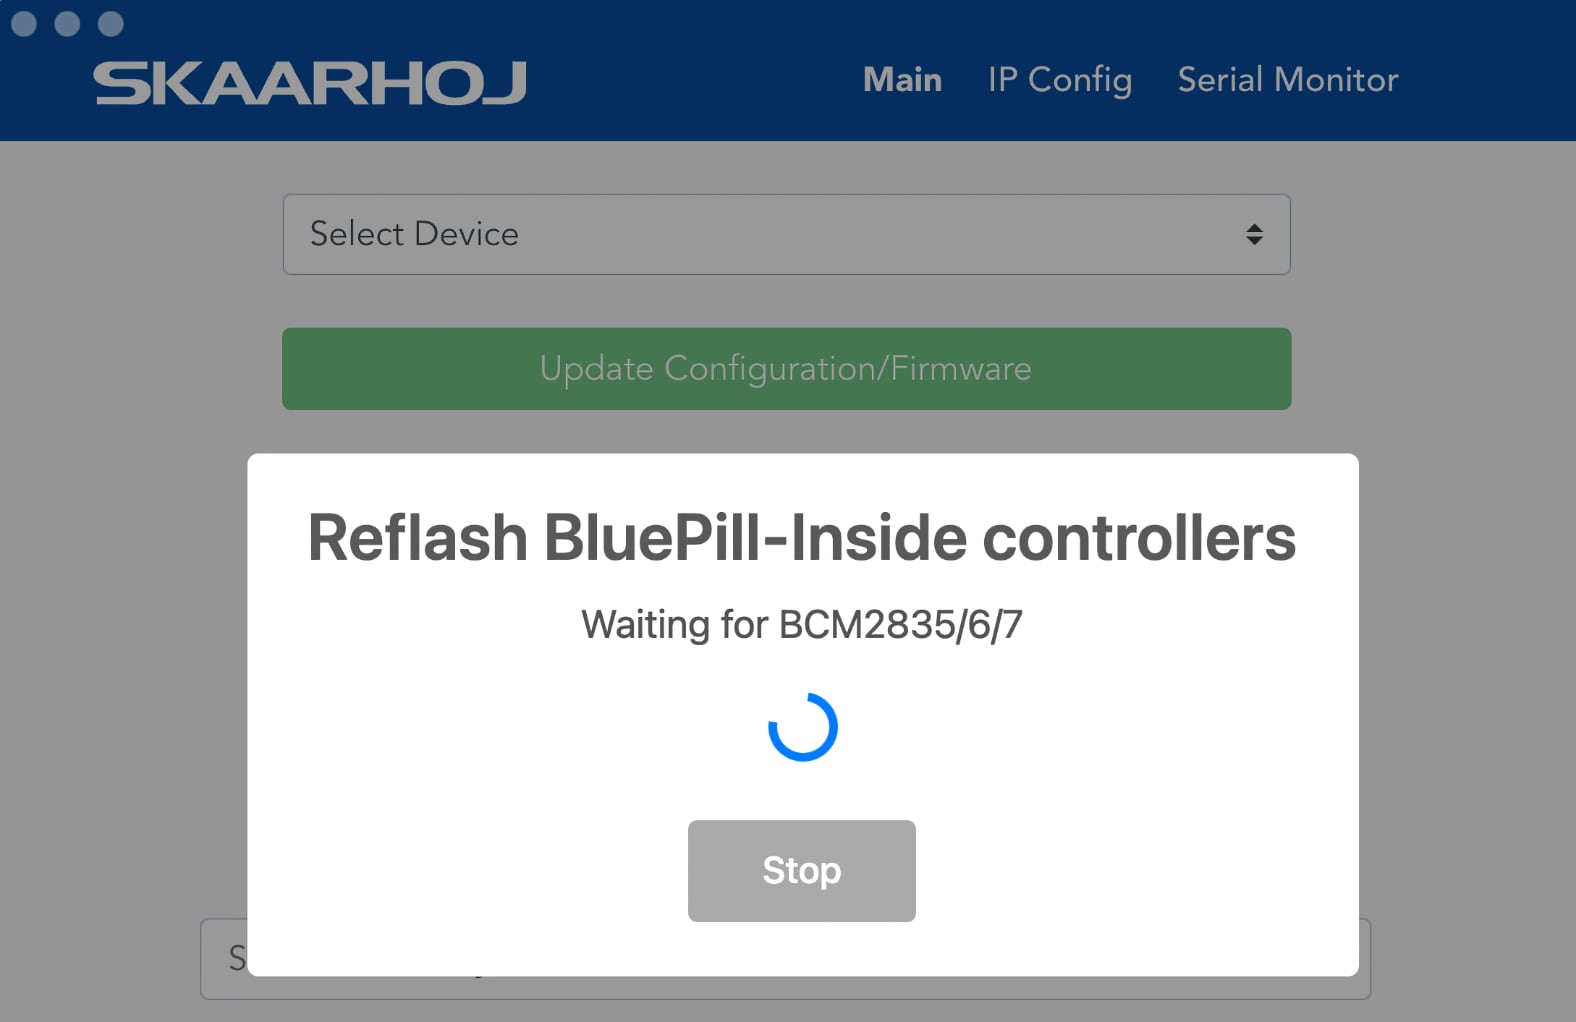
- press keys '[Shift][Option][Cmd] R' (Mac) to engage Flash Blue Pill mode (pic 1)
- connect Blue Pill device to computer via USB > hold paperclip pressed in the configuration hole on the device > connect power (PSU or PoE)
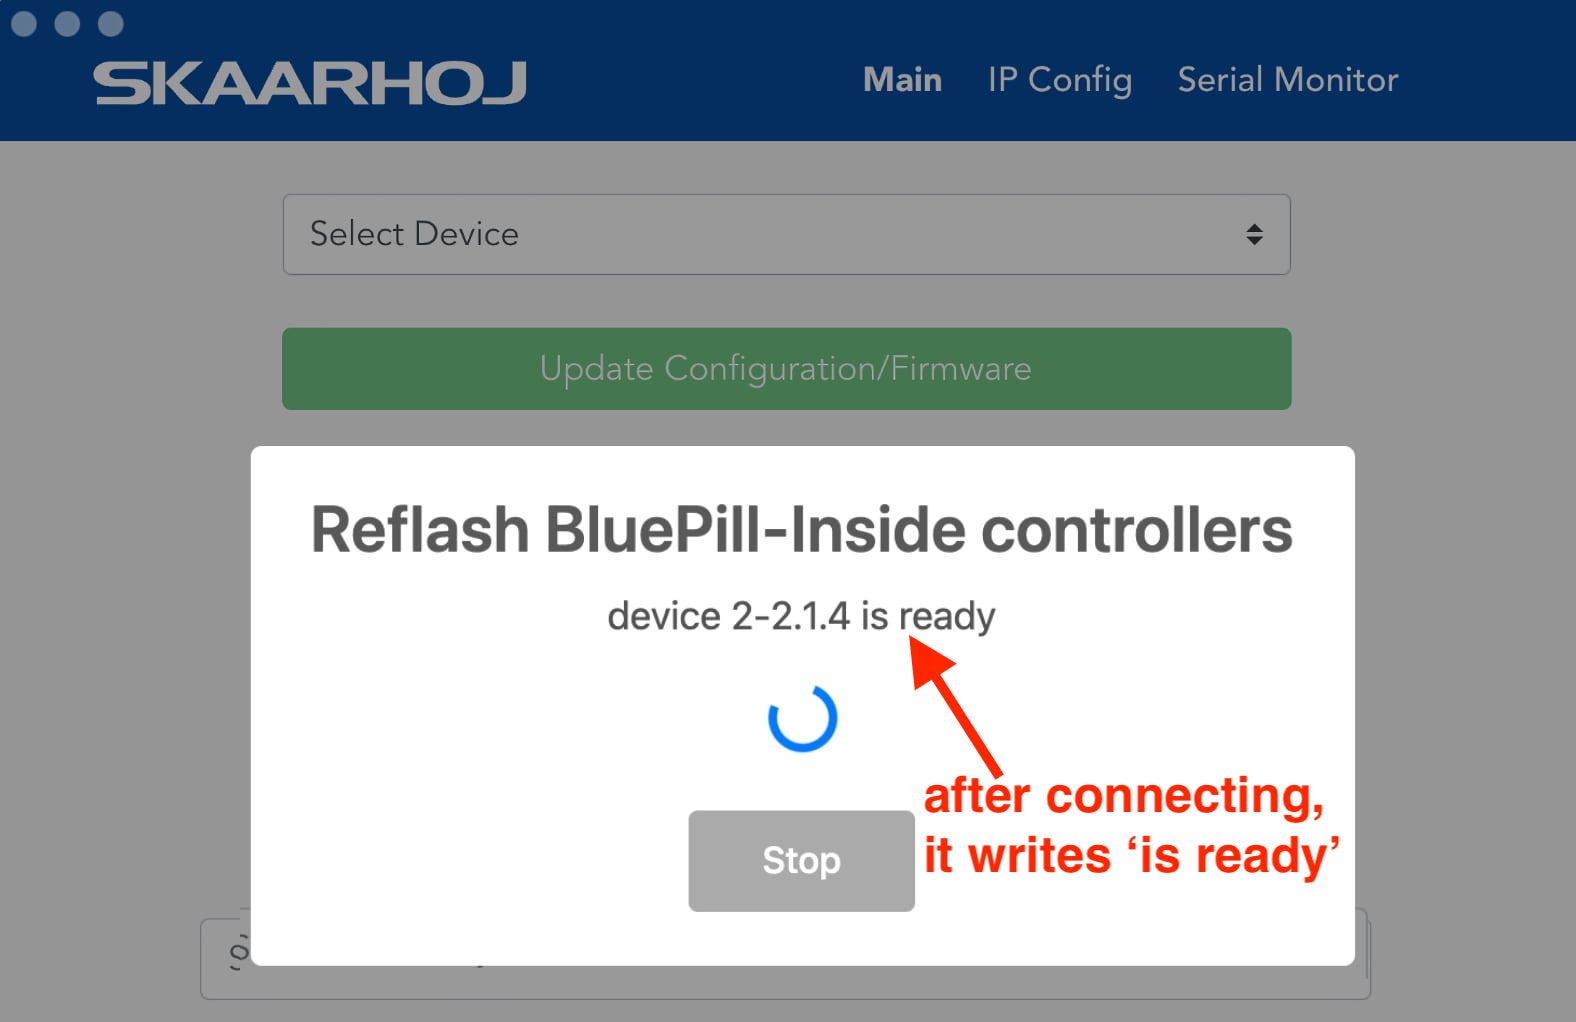
- when you see the device is connected (device x-xx.x is ready) you release the paperclip (pic 2)
- return to the procedure guide above. Follow all steps, except step 5 and 6, where you insert paperclip and power up device