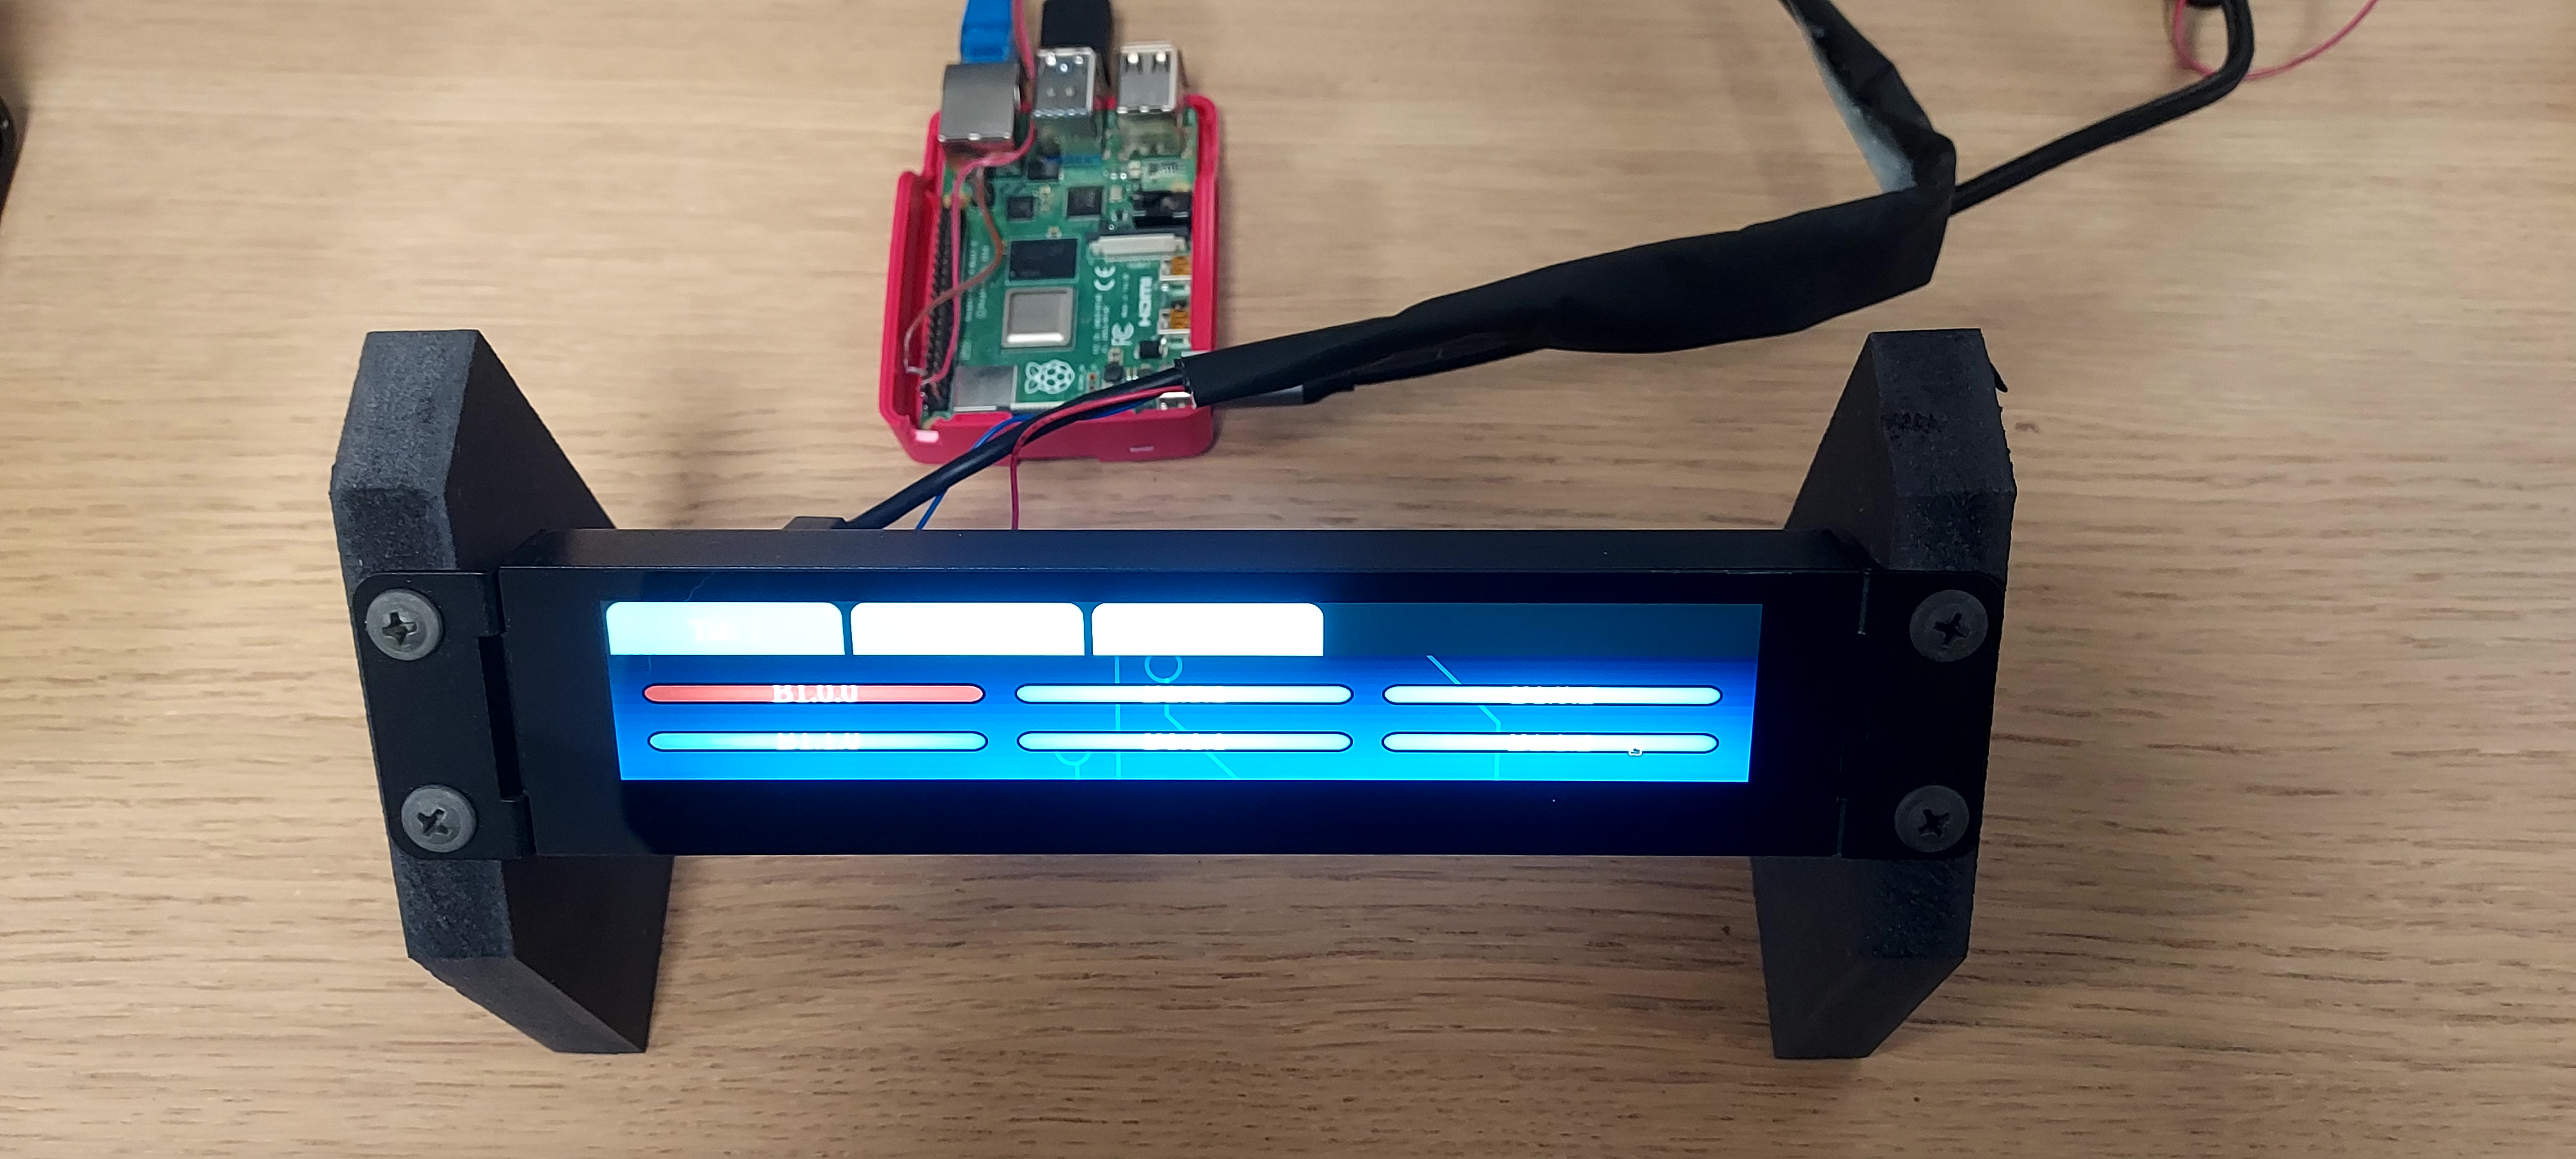
Using Densitron UReady 1U and UReady 2U Displays for with Raw Panel
The SKAARHOJ xpanel-touch package allows users to create browser-accessible software UIs, appearing on the local network as Raw Panel devices.
Densitron presents compelling touch screen options for use with xpanel-touch. Their rack-mountable designs are notable. Additionally, certain screens come equipped with an internal computer, enabling direct web browser operation on the screen without requiring an external driving computer.

Options include:
- Build a compact "rack" style touch panel using a 1RU USB display and a Raspberry Pi driving it.
- Choose a 2RU unit with an integrated computer.
This guide will assist in quickly setting up such configurations.
UReady 1U + Raspberry Pi 4 setup
Prerequisites
- Raspberry Pi 4
- 5V/3A PSU with USB Type C cable
- DM-066GN-OPUR01 UReady 1U Single Monitor
- microSD card for the operating system
- USB keyboard/mouse (only needed during initial setup)
- Monitor (only needed during initial setup)
- USB FlashDrive (optional, only needed during initial setup)
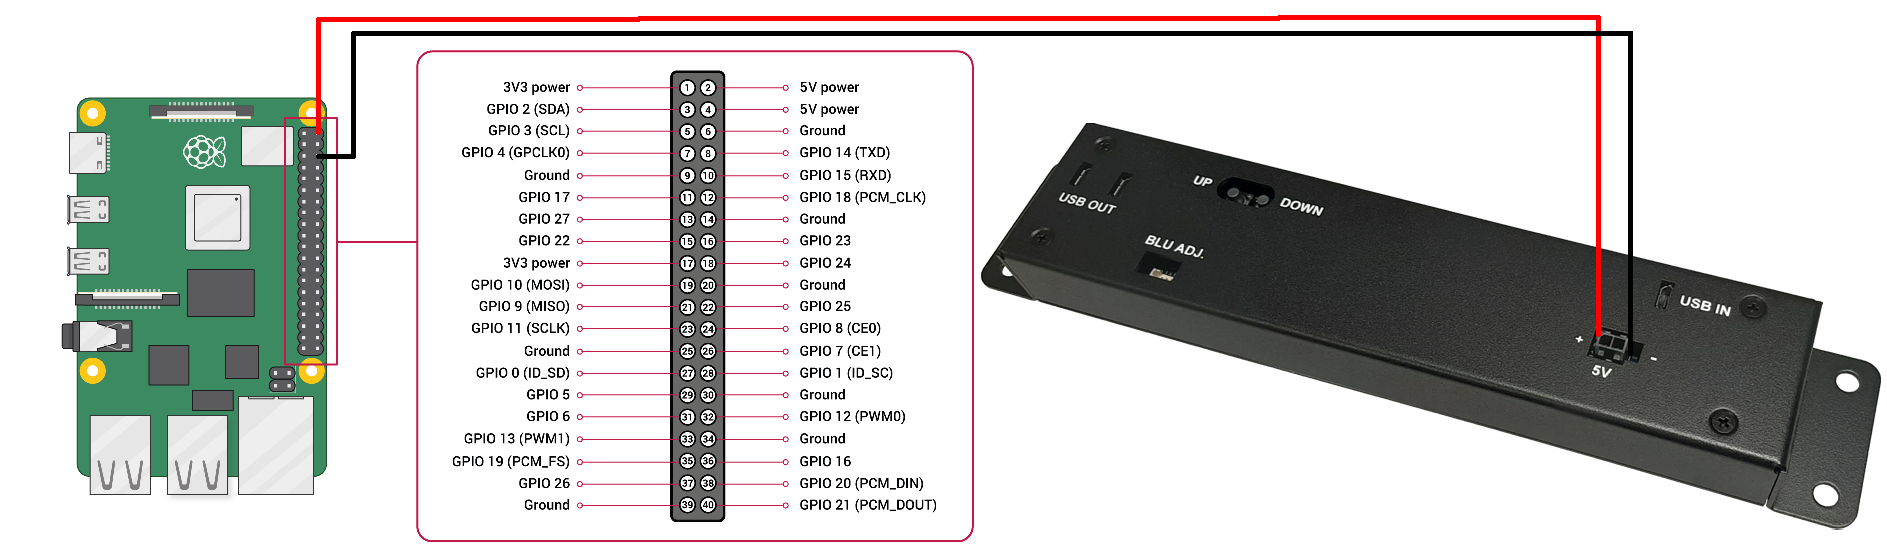
Extra Power for Densitron Screen
It has been observed that powering the Densitron screen solely via USB can be unstable. To resolve this, we recommend the following modification to provide additional power to the Densitron screen:
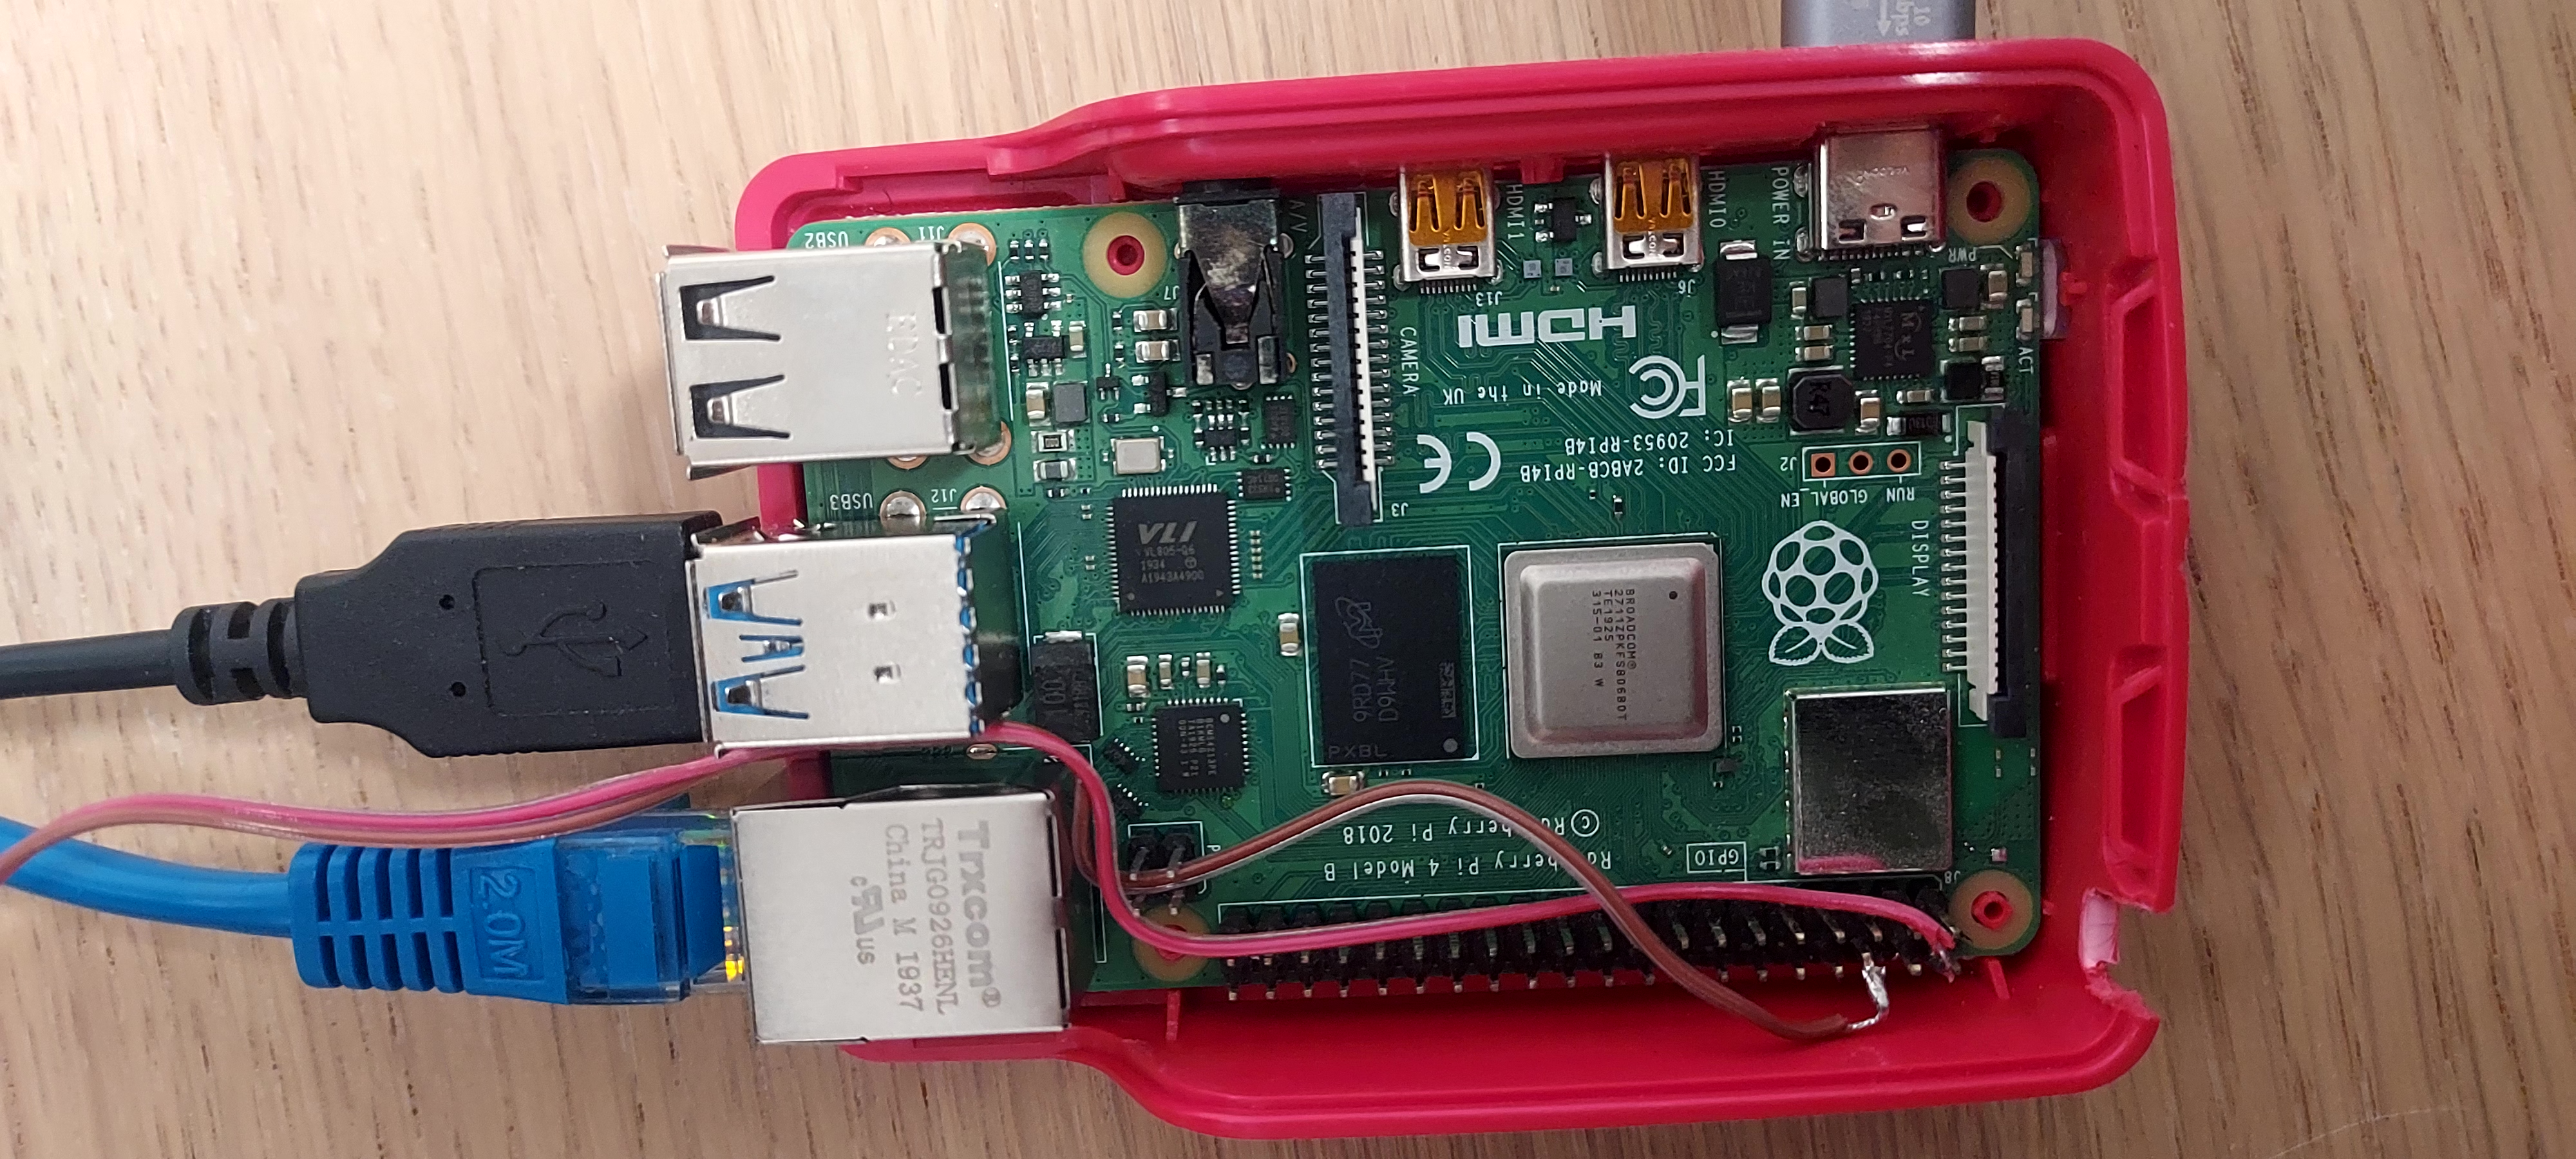
- Prepare two wires, approximately the same length as the micro USB cable you plan to use between the Raspberry Pi and the Densitron screen.
- Solder these wires to the 5V and GND pins on the Raspberry Pi.
- Solder the other ends of these wires to the respective 5V input port on the Densitron screen, which is located on the back of the screen.
Operating System
- We recommend using the Raspbian OS (Buster) version dated 2020-08-24. It can be downloaded here.
- We suggest using the Raspberry Pi Imager for flashing the OS. It's available for various operating systems and can be downloaded here.
- If you're unsure about the process at this stage, helpful guidance can be found in this article.
Setting Up Your Touch Panel:
-
Initial Setup:
- Insert the pre-flashed SD card into the Raspberry Pi (RPI).
- Connect a HDMI-compatible monitor and the USB keyboard and mouse.
- Connect the Densitron screen to the RPI using a USB-A to microUSB cable (into either USB 2.0 or USB 3.0 port). Note: The Densitron screen won't display anything at this stage.
- Power on the RPI.
-
Complete Raspbian OS Installation:
- Follow the onscreen instructions to complete the installation. This includes setting up the user, time zone, WiFi network, etc.
-
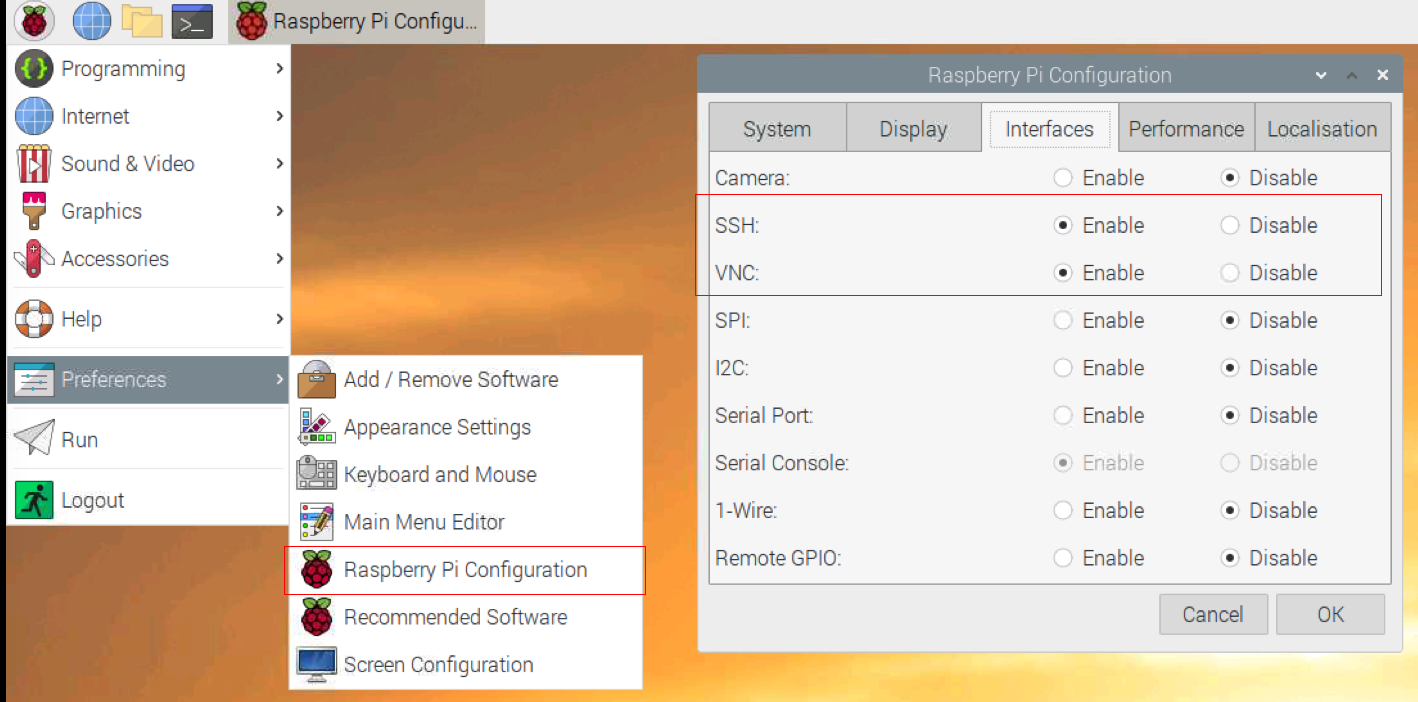
Enable Remote Access:
- To facilitate future adjustments without needing a keyboard and mouse, enable SSH and VNC servers on the RPI.
- Click the raspberry icon in the upper left corner of the screen.
- Navigate to Preferences -> Raspberry Pi Configuration.
- In the 'Interfaces' tab, enable SSH and/or VNC.
- Click 'OK' and reboot the RPI.
After rebooting, you should be able to remotely access the RPI via SSH or VNC.
Post-Setup Process
Now, our next steps are to activate the Densitron screen and configure the browser to automatically open at the required URL address. To simplify this process, we have created a small shell script that will automatically make the necessary modifications for you.
Easy Setup Method
- Open the Terminal application on your Raspberry Pi.
- Run the following command to download the script. (If your Raspberry Pi doesn't have internet access, download the file on another machine with internet access and transfer it to your Raspberry Pi using a USB flash drive. Then, continue from step 3.)
curl -O https://raw.githubusercontent.com/SKAARHOJ/Support/master/Files/Densitron/DensitronSetup1U.sh3. Next we need to give permissions to execute the file we have just downloaded. Execute following command:
sudo chmod 777 ./DensitronSetup1U.sh4. Now we are ready to execute the script. Execute following command:
sudo ./DensitronSetup1U.shWhen prompted, enter the IP address and port of your xpanel-touch web server (the Blue Pill device where it's installed) and then press ENTER.
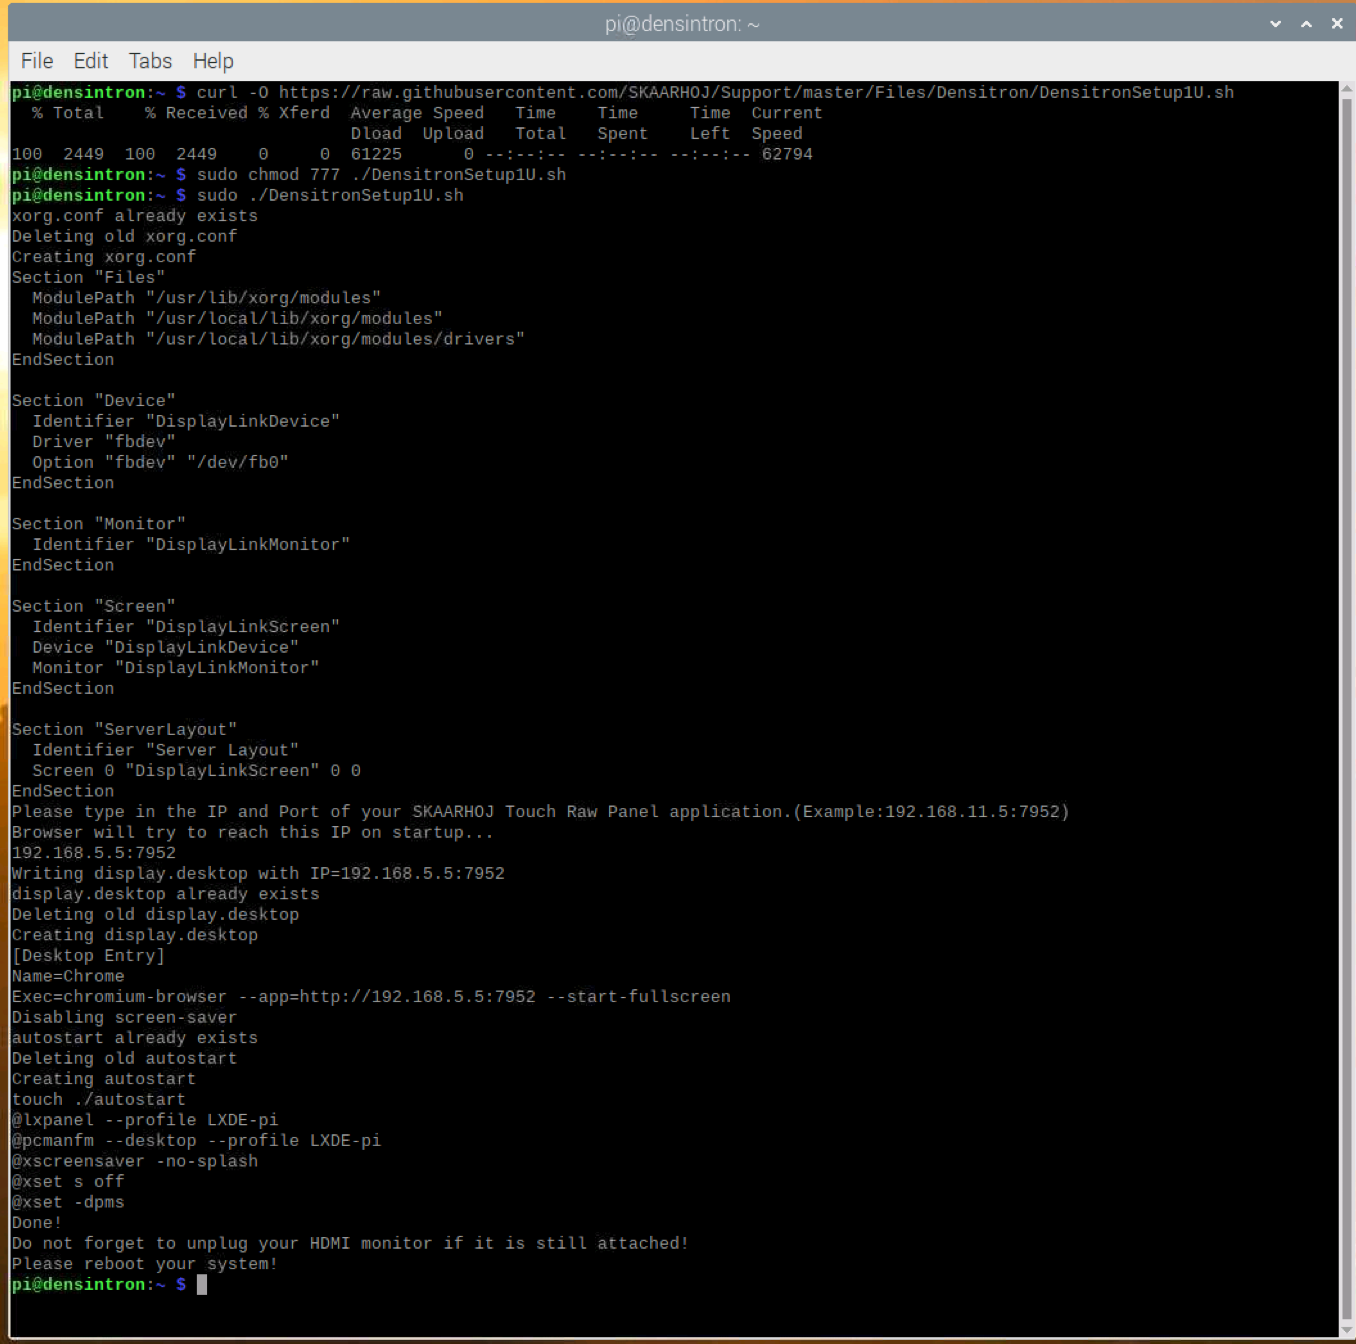
5. That is it, you can now power down your RPI, disconnect keyboard,mouse and HDMI screen. Next time you power it on the browser should open in full screen mode on the Densitron screen.
Advanced Setup Method
For advanced users interested in creating a custom setup, such as combining two Densitron screens or pairing a Densitron screen with an HDMI screen, detailed guidance is beyond the scope of this introductory tutorial. However, we will provide some basic hints to get you started:
- Edit or create /etc/X11/xorg.conf - in order to "describe" your multi monitor setup.
- Edit or create /etc/xdg/autostart/display.desktop for browser auto startup "tuning".
- Edit /etc/xdg/lxsession/LXDE-pi/autostart. It is crucial to add the following parameters:
@xset s off
@xset -dpms
If you don't apply the recommended modifications, you may encounter USB dropouts, where the device disconnects and then reconnects during screen saver activation or wake-up. This issue can result in a 'green' and unresponsive screen. The Light Display Manager doesn't automatically detect this problem. Therefore, you'll need to either manually restart the Light Display Manager or create a udev rule to restart the service automatically when this condition occurs.
sudo service lightdm restartUReady 2U setup
Luckily, the units ship with Lubuntu distribution installed and should already "work" out of the box. That minimizes the effort needed to get it up and running, the only thing we need to do is to set up autostart flow to open the browser in full screen mode. Our unit came with SSH server not installed, so we will need a keyboard and preferably mouse in order to set it up. The username and password are densitron/densitron.
-
- Plugin your keyboard and mouse to the unit and power it on.
- Once device has booted, find terminal icon in taskbar and launch it.
- We need to create a new autostart entry, to do so type the following command :
sudo nano /etc/xdg/autostart/display.desktopEnter the password if asked. We should end-up with an empty file open. Lubuntu has Firefox Browser installed by default, so this is what we are going to use. The content of the file should look like below, except of ip and port of your XTOUCH server :
[Desktop Entry]
Name=Firefox
Exec=firefox  --kiosk http://192.168.11.5:7952
Save and exit! Basically this is it! Next time the panel restarts the Firefox browser will be opened in "full screen" on the address you have entered in the config.
If at some point you need to change the ip, just edit the file again.
sudo nano /etc/xdg/autostart/display.desktopIf you want to stop autostarting the browser:
sudo rm /etc/xdg/autostart/display.desktop