
Routing Page
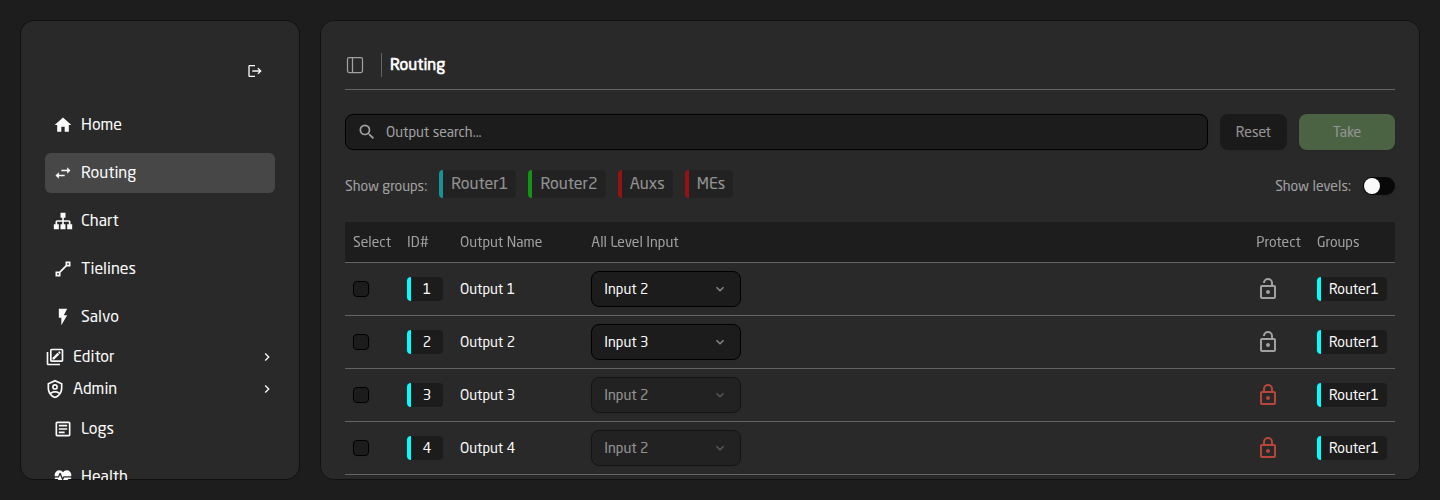
The Routing page is where an operator works. It has one row per destination, and you choose that destination’s source from a dropdown on the row.
This is not a crosspoint matrix. You do not click a grid intersection — you pick a source for a destination, the same way you would on a router panel.
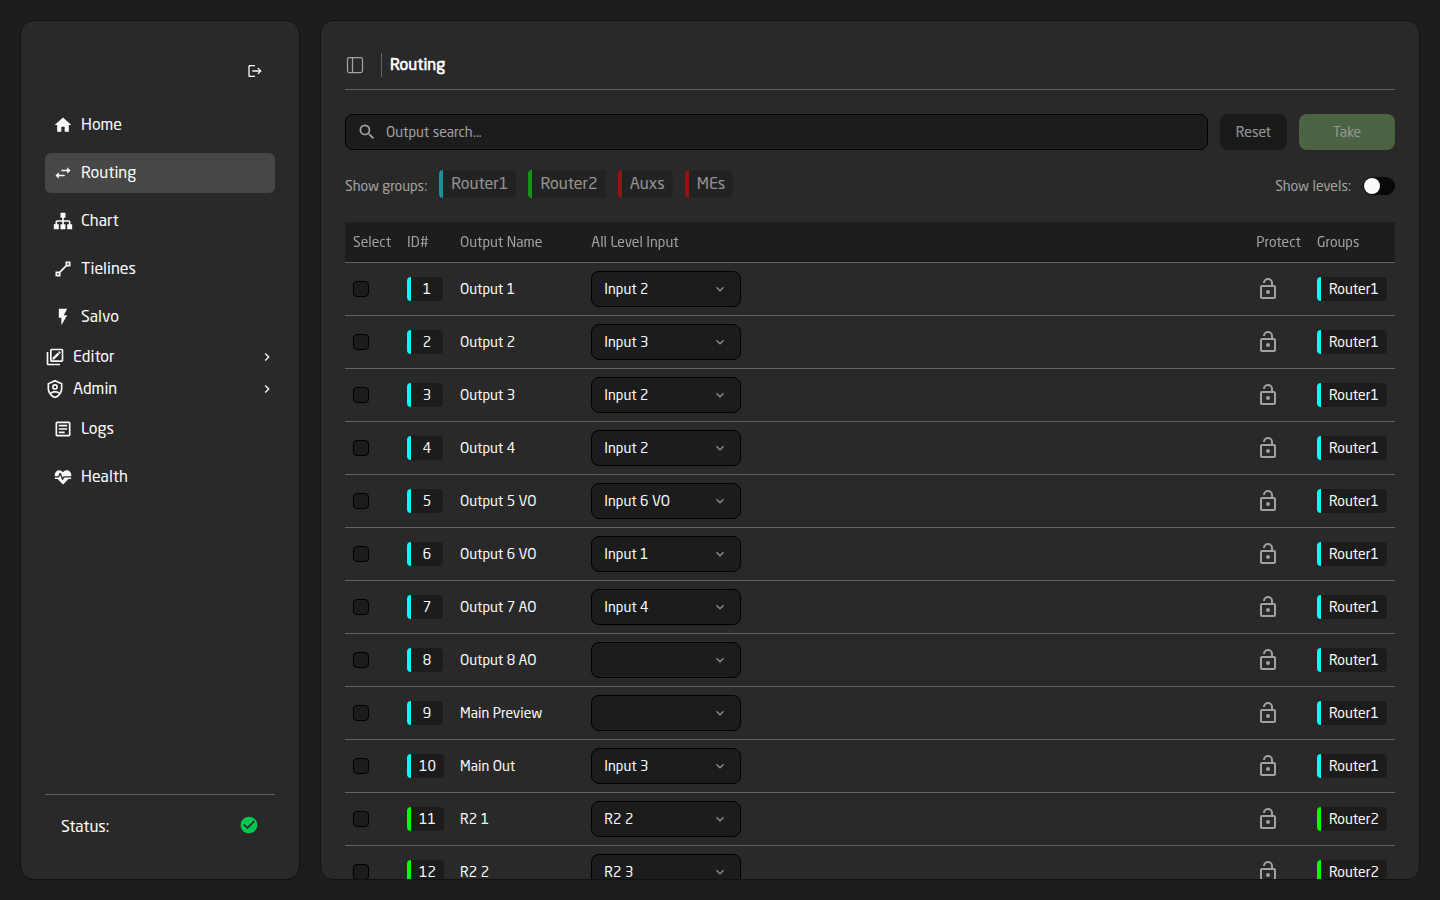
Each row shows a coloured ID badge, the destination’s name, the source it is currently taking, a Protect padlock and the groups it belongs to.
Making a route
- Find the destination’s row.
- Click its All Level Input dropdown. A searchable list of sources opens — type in the ‘Search inputs…’ box to narrow it.
- Click the source you want. The dropdown gets a green border: the change is staged, not yet on air.
- Stage as many rows as you like, then press Take.
The first entry in every source list is Released. Choosing it unroutes the destination.
Take and Reset
Nothing reaches the router until you press Take. While there are changes waiting, the Take button widens and turns green; Reset throws them all away.
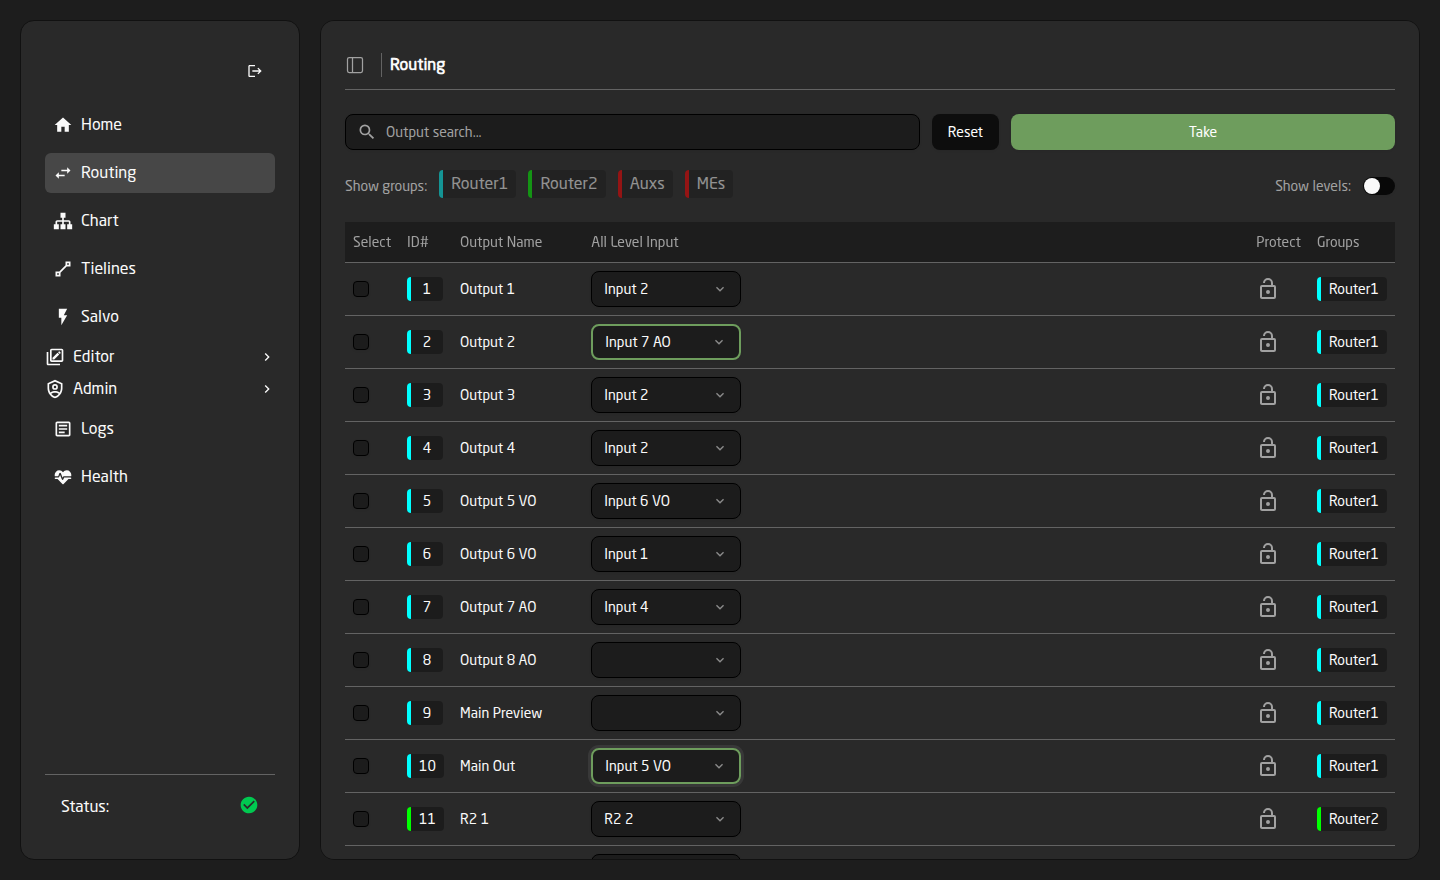
There is no undo. Reset discards changes you have not taken yet — once you press Take, the routes are live, and putting them back means routing them back. If that worries you, store the current state as a salvo first.
Staged changes belong to your browser session, so two people can prepare different changes side by side without treading on each other. The moment either of them presses Take, the resulting routes appear on every screen and panel.
Finding a destination quickly
Two filters sit above the grid and work together:
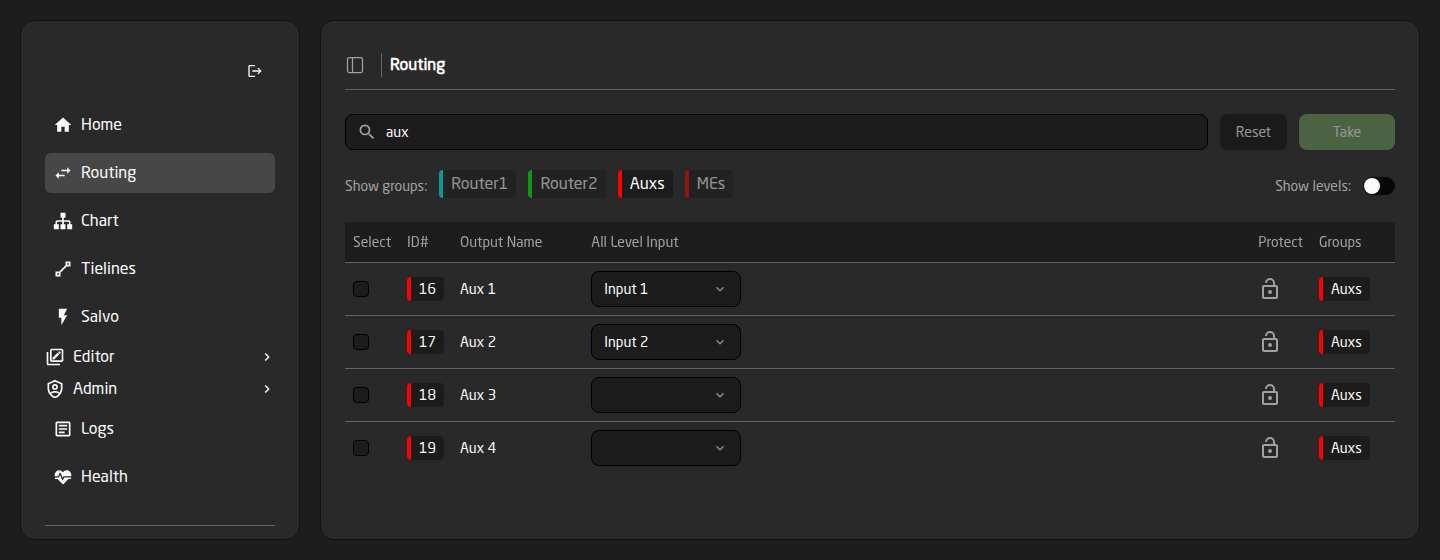
- Output search… — type any part of a destination’s name.
- Show groups: — one coloured badge per output group. Click a badge to narrow the grid to that group; the others dim.
Routing individual levels
On a multi-level system, turn on the Show levels: switch at the top right. Each destination then gets one dropdown per level next to its All Level Input.
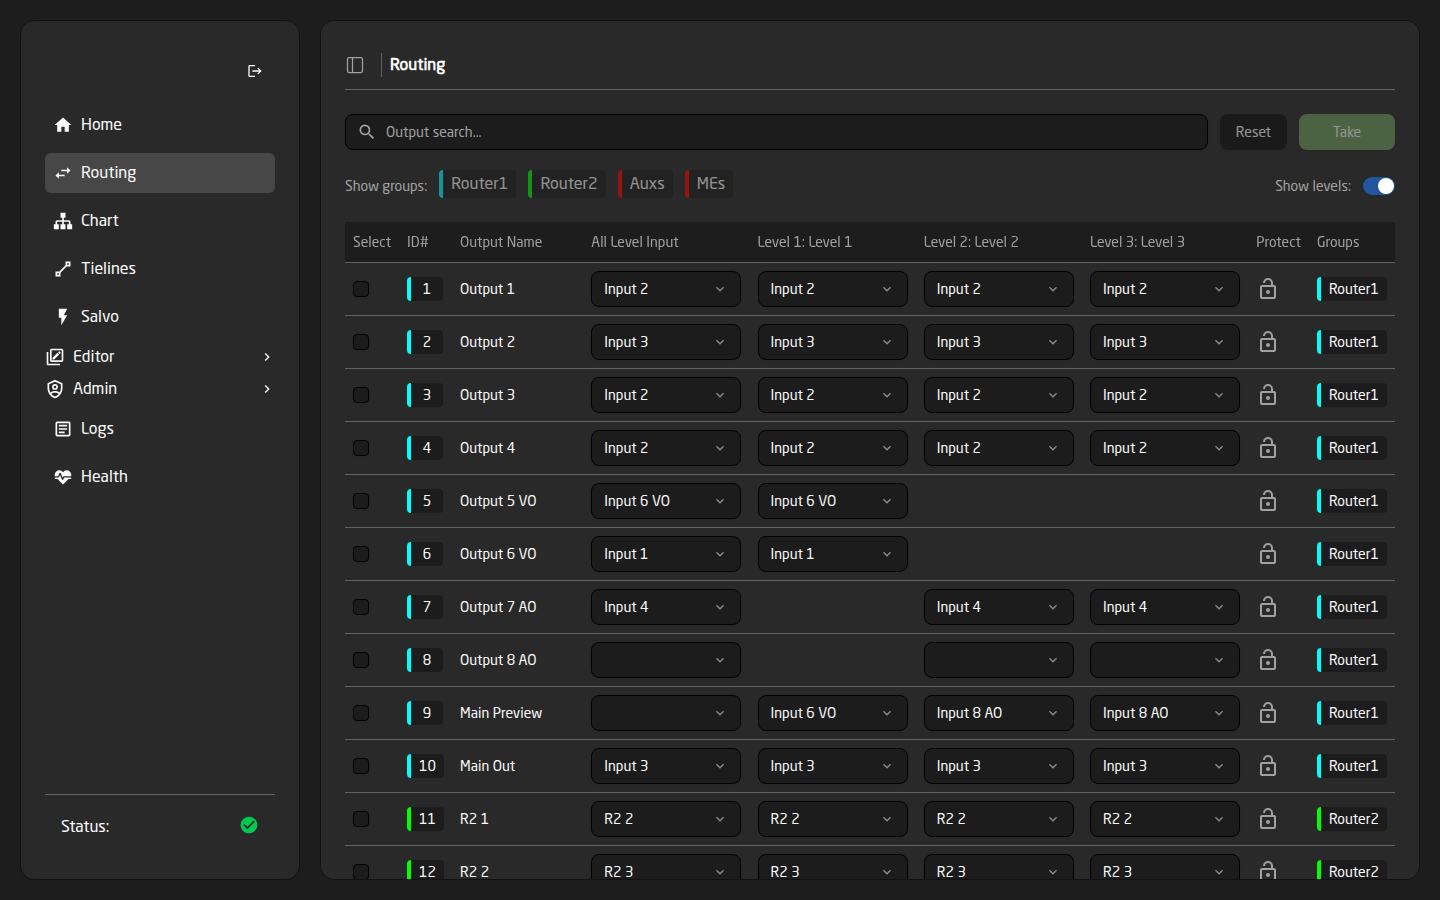
- All Level Input moves every level of that destination to one source at once — a follow.
- Picking a source in a single level column overrides just that level — a breakaway. Do the follow first, then override the level you want different.
- A level column is left blank for destinations that do not exist on that level.
A blank All Level Input cell on a routed destination means its levels currently disagree — in other words, it is in a breakaway. In the screenshot above, ‘Main Preview’ takes its Level 1 from one source and its Level 2 and 3 from another, so the All Level cell has nothing single to show.
Protecting a destination
The padlock in the Protect column locks a destination. A locked row turns its padlock red and disables its dropdowns, and the routing engine refuses every change to it — from this page, from a panel, from Reactor and from a third-party controller alike. Click the padlock again to unlock.
Storing what you see as a salvo
Tick the checkboxes in the Select column and a bar appears at the bottom of the page that stores those destinations’ current routes into a salvo. This is the quickest way to build a salvo — set the router up by hand, then capture it. It is covered step by step in Salvos.
A note on tally
The Routing page does not show red and green tally lamps. The coloured badges on it are the destination’s ID colour and its group colours. Tally is configured per input and per output in the Editors — see Tally and Dynamic Labels.
If a route will not go through
- The row is locked — a red padlock in the Protect column. Unlock it.
- Nothing happens after Take, or a ‘Take failed’ message appears — check the sidebar Status block; a device that has gone offline cannot be routed.
- One destination stays unrouted while the others move — the source and destination are on different devices and every cable between them is already in use. Look at the Tielines page and free one up.
- A source you expect is missing from the list — it may have no path to that destination, or it may be switched off by the licence. Check the License card on the Health page.