
Setup Wizard
The Setup Wizard builds a complete FlowGrid configuration from nothing, in eight guided steps. It is the right starting point for a new installation; to change one that already exists, use the Editors instead.
Open it from Wizard in the sidebar (under Admin when the login system is on). Your work is saved as you go, so you can leave and come back. The step rail at the top lets you jump around; Back and Next move one step at a time.
The wizard produces a saved project. It does not change your running router until you go to the Projects page and activate it.
1. Levels
Name the project, then add the routing levels in the order they should appear.
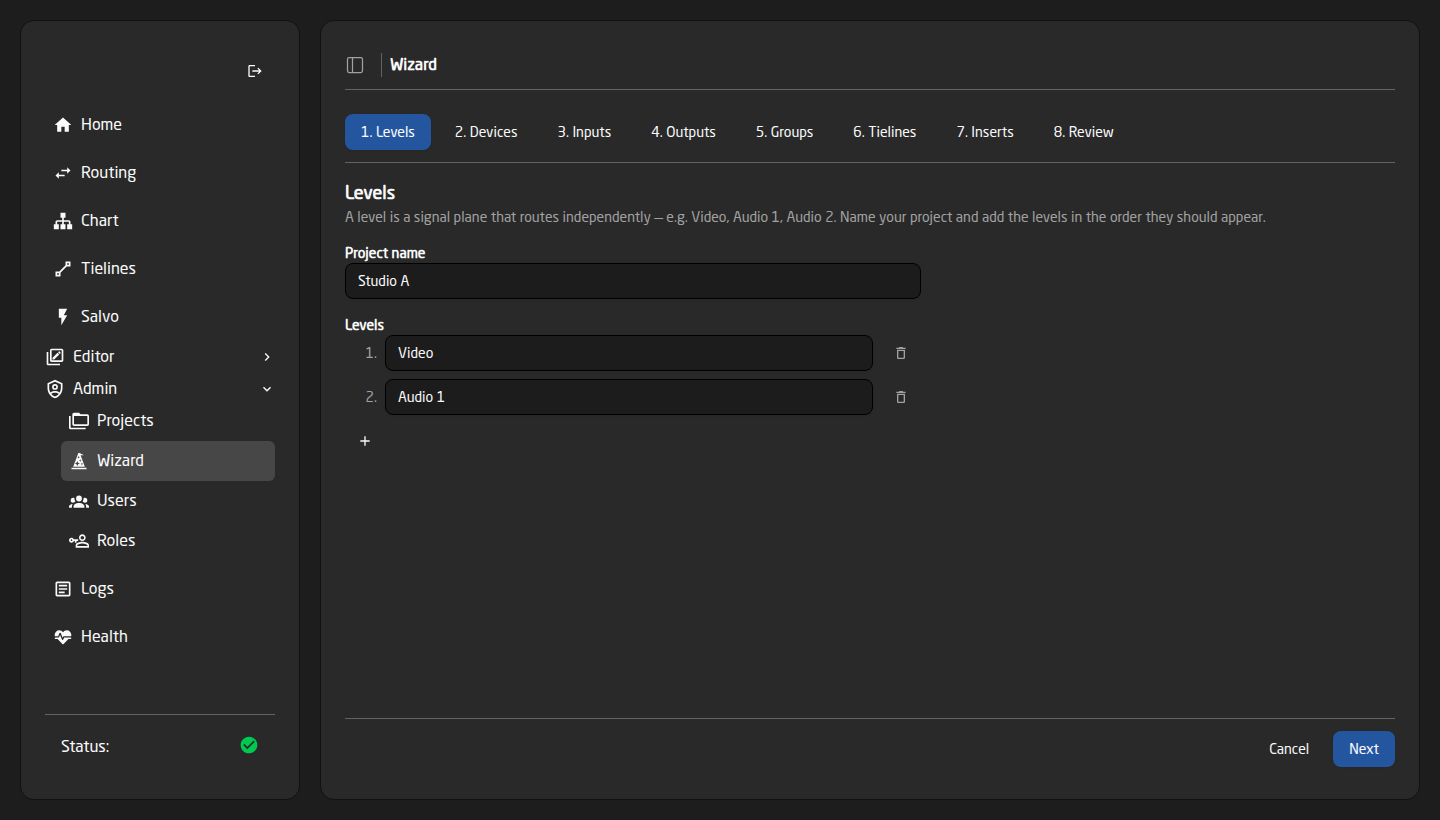
Add one level for a classic single-plane router, or several for independent per-signal routing. This is the decision that shapes everything else — if you are unsure, read the levels section of Overview & Key Concepts first.
At least one named level is required before Next will let you move on.
2. Devices
Tell FlowGrid which equipment it controls. Each device gets a friendly alias you will see everywhere else.
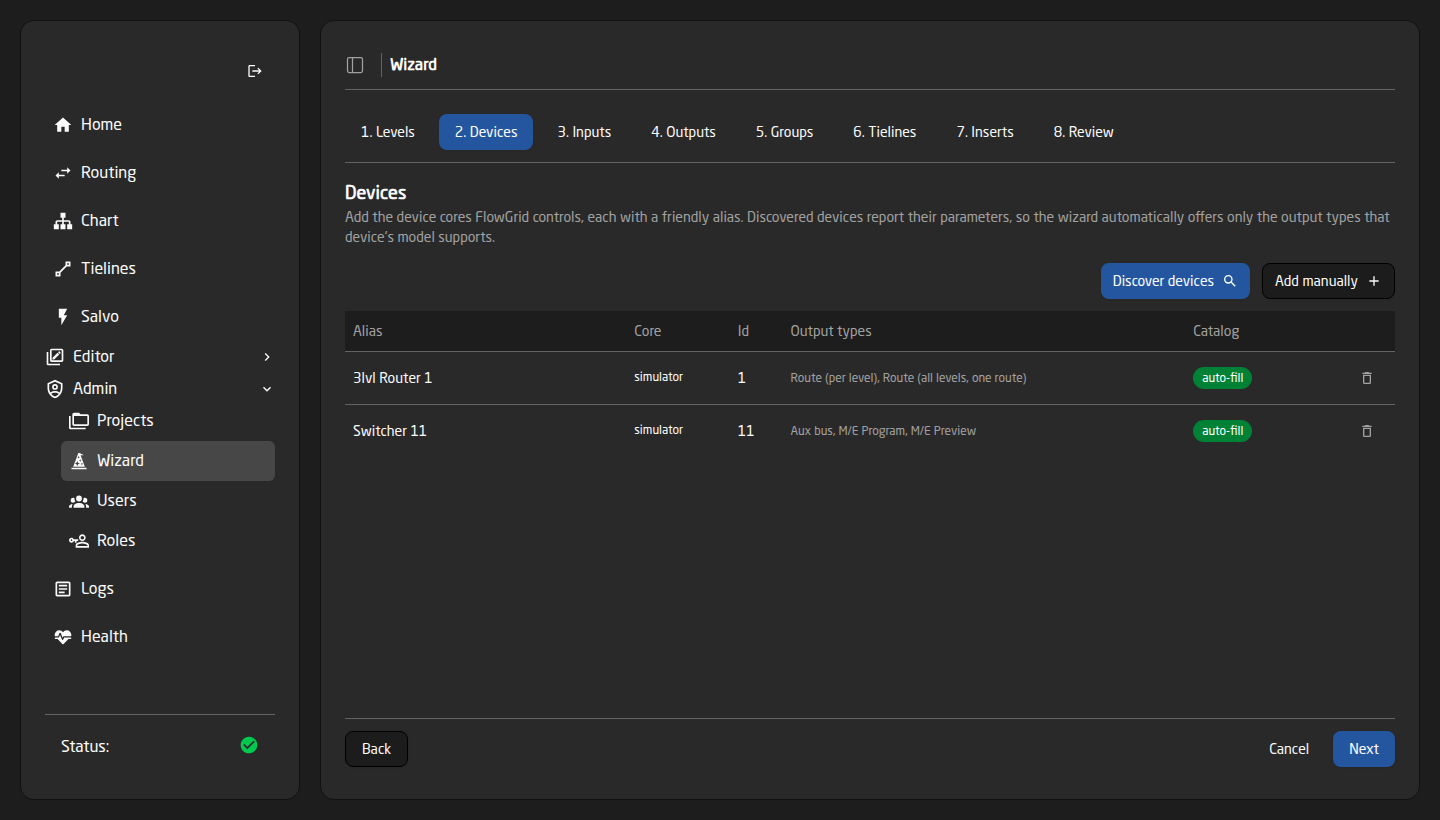
- Discover devices asks the system what is actually online and lists it. Tick what you need and press Add selected. This is the way to do it whenever the gear is connected.
- Add manually is for equipment that is not reachable yet — you type the core name and device id and fill in the details later.
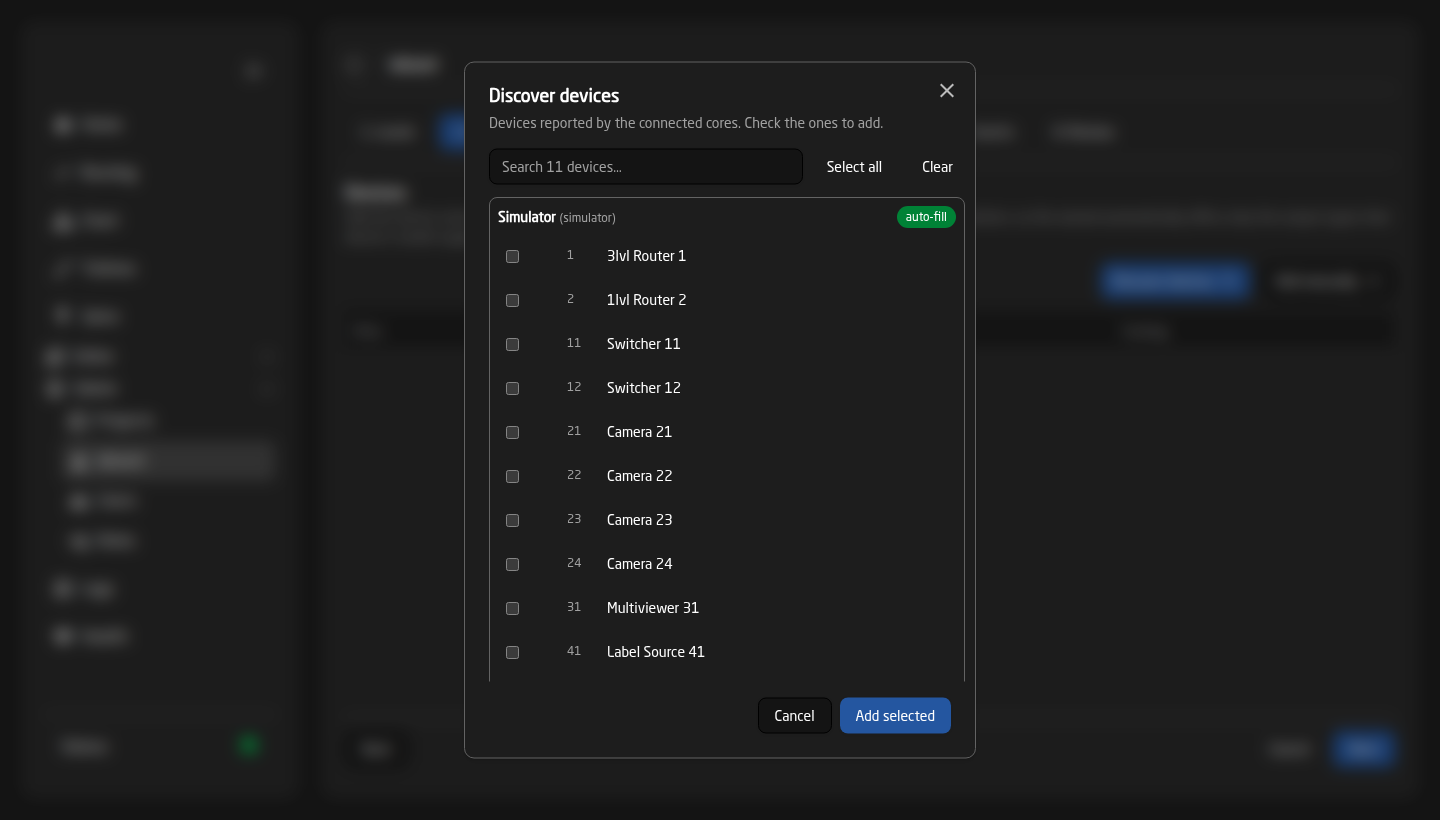
A device added by discovery carries a green auto-fill badge. That means the wizard already knows what it can do, so later steps offer you only the routing options that device really supports — far fewer ways to get it wrong.
3. Inputs
Map your logical sources onto physical ports. The panel at the top does whole ranges in one action, which is how you will do nearly all of it.
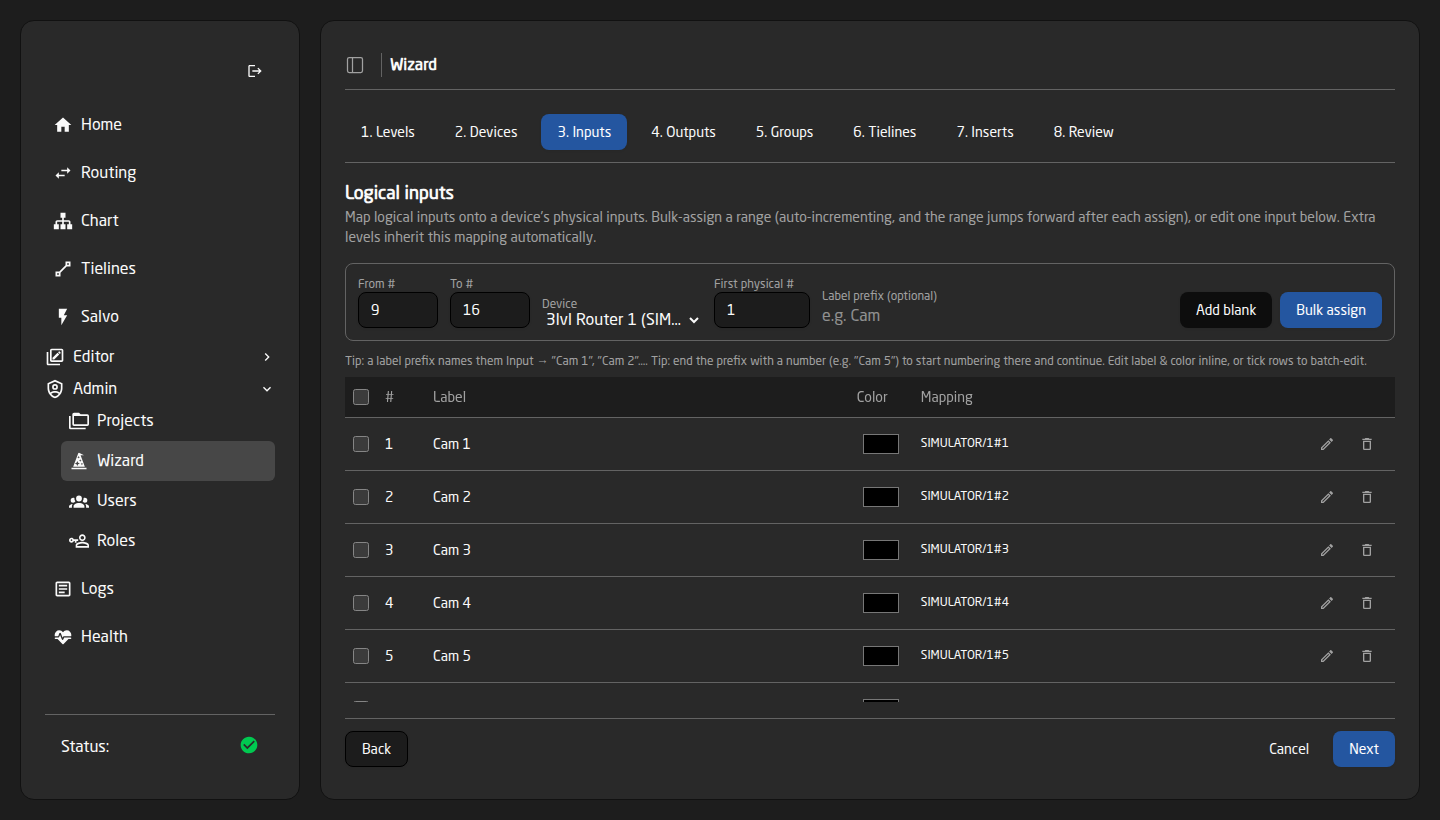
- Set From # and To # — the range of logical numbers to create.
- Choose the Device and the First physical # those numbers start at.
- Optionally give a Label prefix such as ‘Cam’, and they are named ‘Cam 1’, ‘Cam 2’…
- Press Bulk assign.
The range jumps forward after each assign, so you can go straight on to the next block on the next device without re-typing the numbers. Ending a prefix with a number — ‘Cam 5’ — starts the naming there and counts on.
Add blank creates an empty row to fill in by hand, and the pencil on any row edits it individually. Extra levels inherit a source’s mapping automatically, so you only fill them in where a level differs.
4. Outputs
The same panel, with one addition: an Output type that says how the destination is driven — a plain router crosspoint, an aux bus, an M/E, and so on.
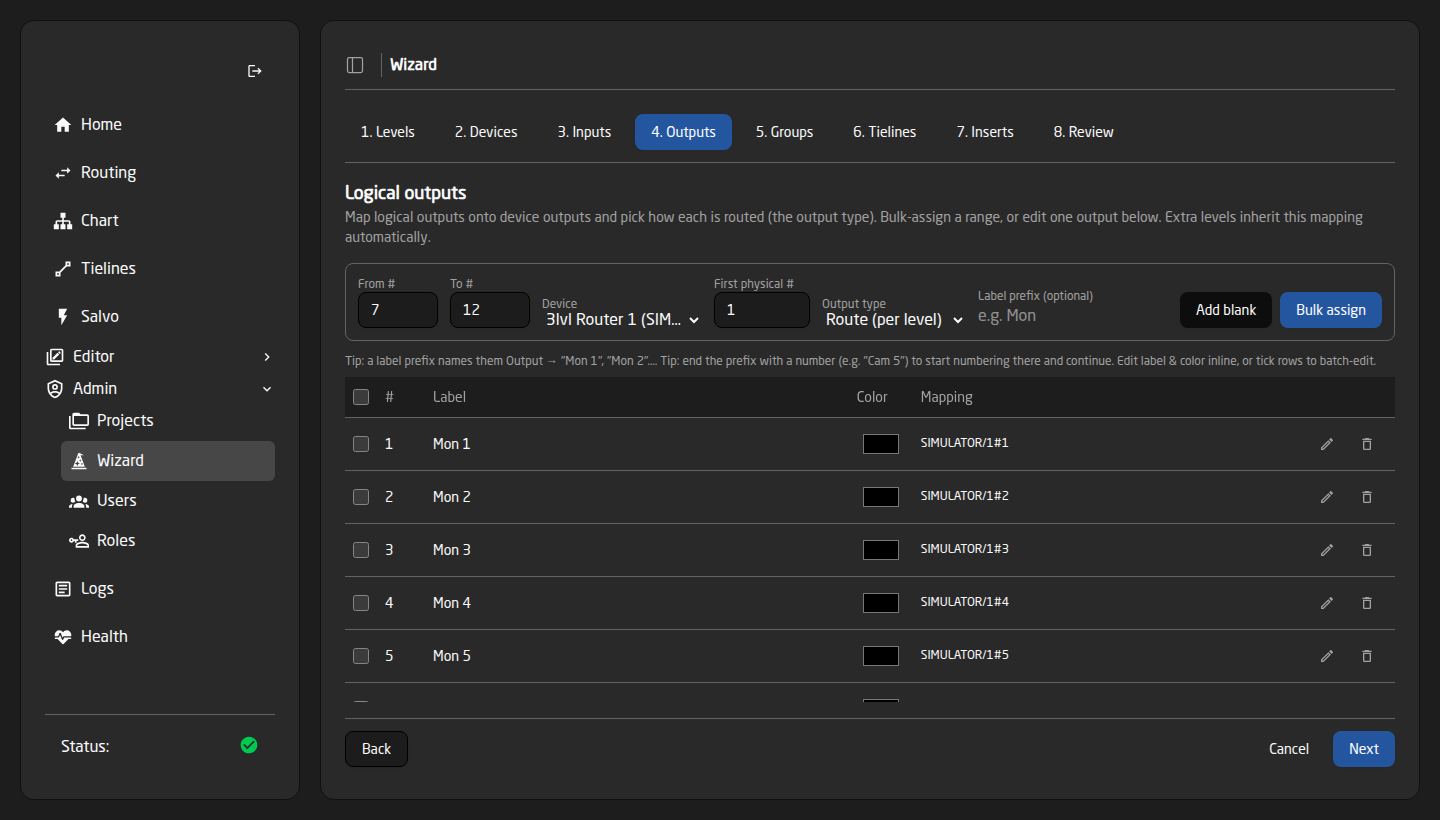
Devices added by discovery offer only the types they actually support. Selected rows can be recoloured or deleted together, and Copy → Paste copies one channel’s settings onto others, optionally stepping the numbers as it goes.
5. Groups
Groups are how operators find things: they filter the Routing page and page through sources on a panel. Give a group a name and a colour, then tick its members.
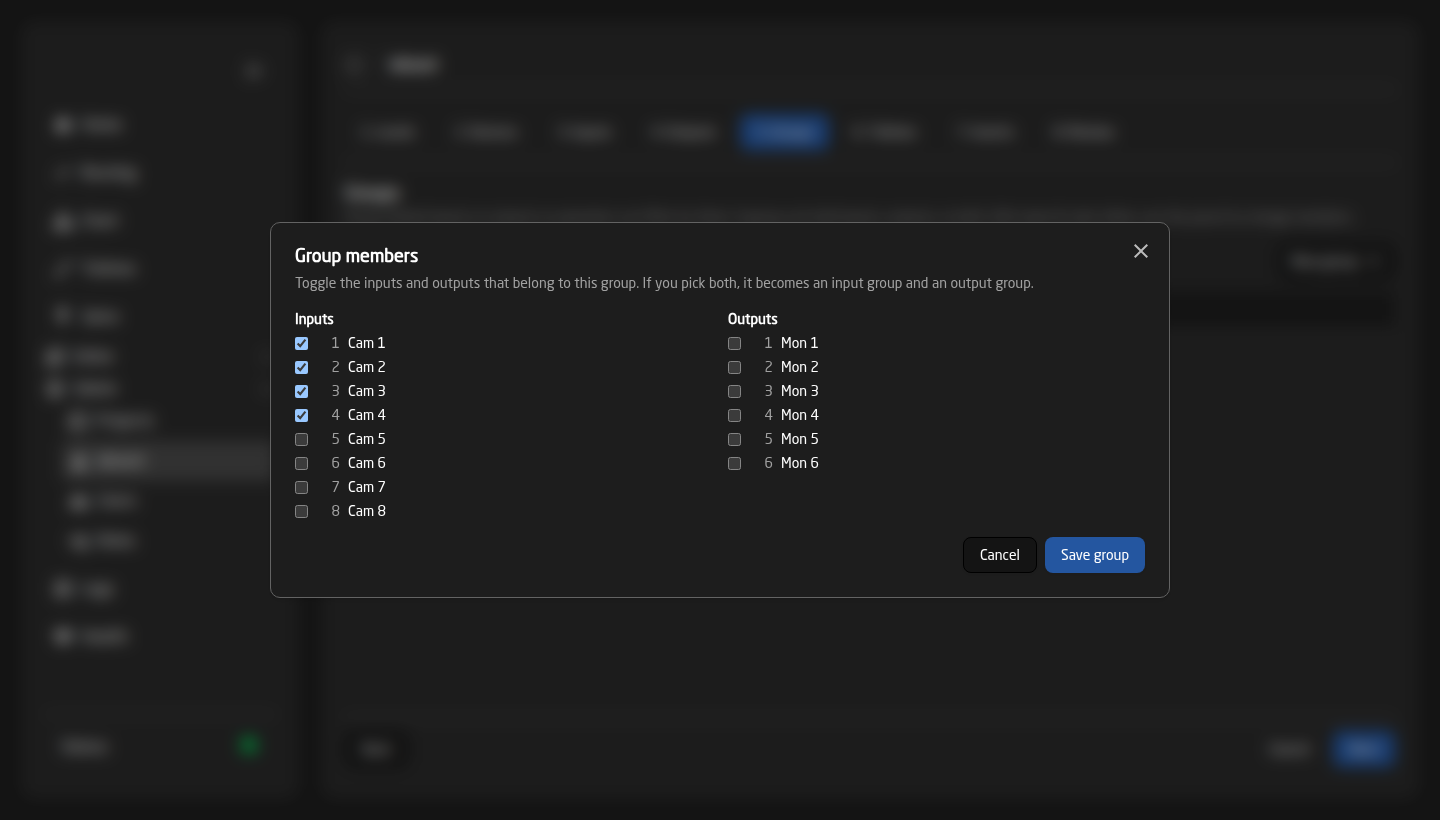
A group can hold sources, destinations, or both — tick from both columns and it acts as an input group and an output group at once.
6 & 7. Tielines and Inserts
A tieline is a cable from one device’s output into another device’s input; FlowGrid uses them automatically whenever a route has to cross between devices. An insert is the same idea pointed at an external processor.
Set the From side and the To side once and it applies to every level. Skip both steps if everything lives on one device. They are explained properly in Tielines and Inserts.
8. Review & create
The last step counts everything up and lists anything still worth looking at.
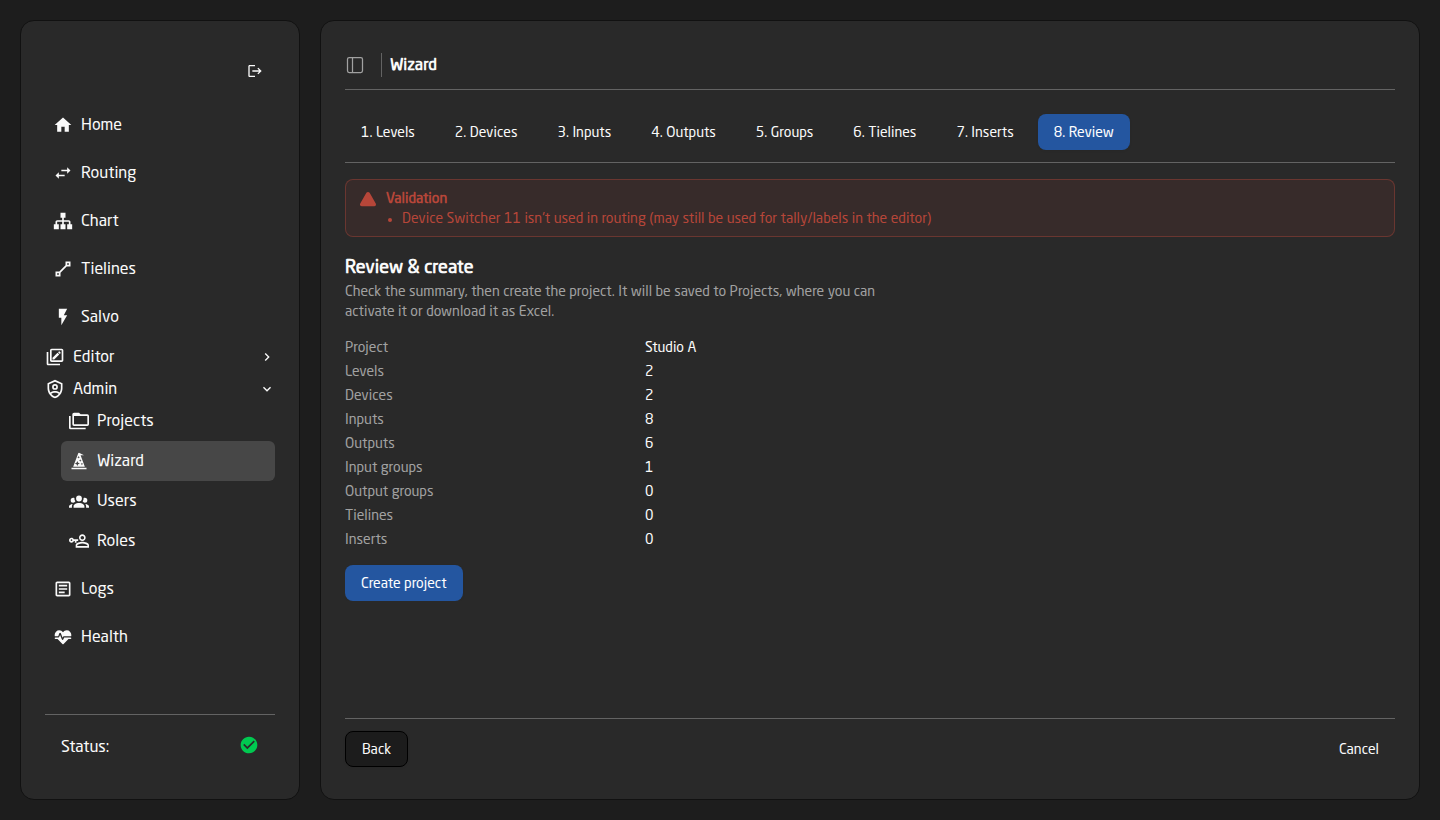
Press Create project and it is saved to the Projects page, where you activate it.
The Validation banner
A red banner appears above the step whenever something needs attention. Most warnings do not stop you moving between steps — they stop you creating. Common ones:
- A level with no name — the only thing that blocks the very first Next.
- Duplicate physical outputs — two logical destinations are driving the same physical port. Occasionally deliberate, usually a typo in a bulk assign.
- Model caps — you have more sources, destinations or levels than the device model exposes. The excess simply will not appear on panels.
- Unused device — a device that no route uses. Fine if it is only there for tally or labels.
Cancel discards the whole draft after a confirmation. There is no way back — if you are part-way through something large, use the step rail to leave it alone rather than cancelling.