Panels
The Panels section is where new SKAARHOJ panels are added to the panel collection of the project. By default the Blue Pill or Blue Pill Inside panel will already be in the Panels section.

There are two ways a panel can be added, Auto Discover and Manually.
For compatibility with Blue Pill, a UniSketch panel needs to be running UniSketch v2.5.14 or later. Starting with UniSketch v2.5.18, there were changes made to the Raw Panel implementation which is used to connect to the Blue Pill. These changes allow for better hardware mapping inside Blue Pill.
Please make sure your UniSketch panel is running the latest UniSketch release version using the Firmware Updater Application.
Auto Discover
Panels can easily be discovered by mDNS look ups on the same subnet the Blue Pill is on. This makes it very easy to discover and include a panel in the configuration. mDNS will usually search the current subnet, but with a correctly configured Blue Pill, panels on other subnets can easily be included too as long as the IP and port is known to the user.
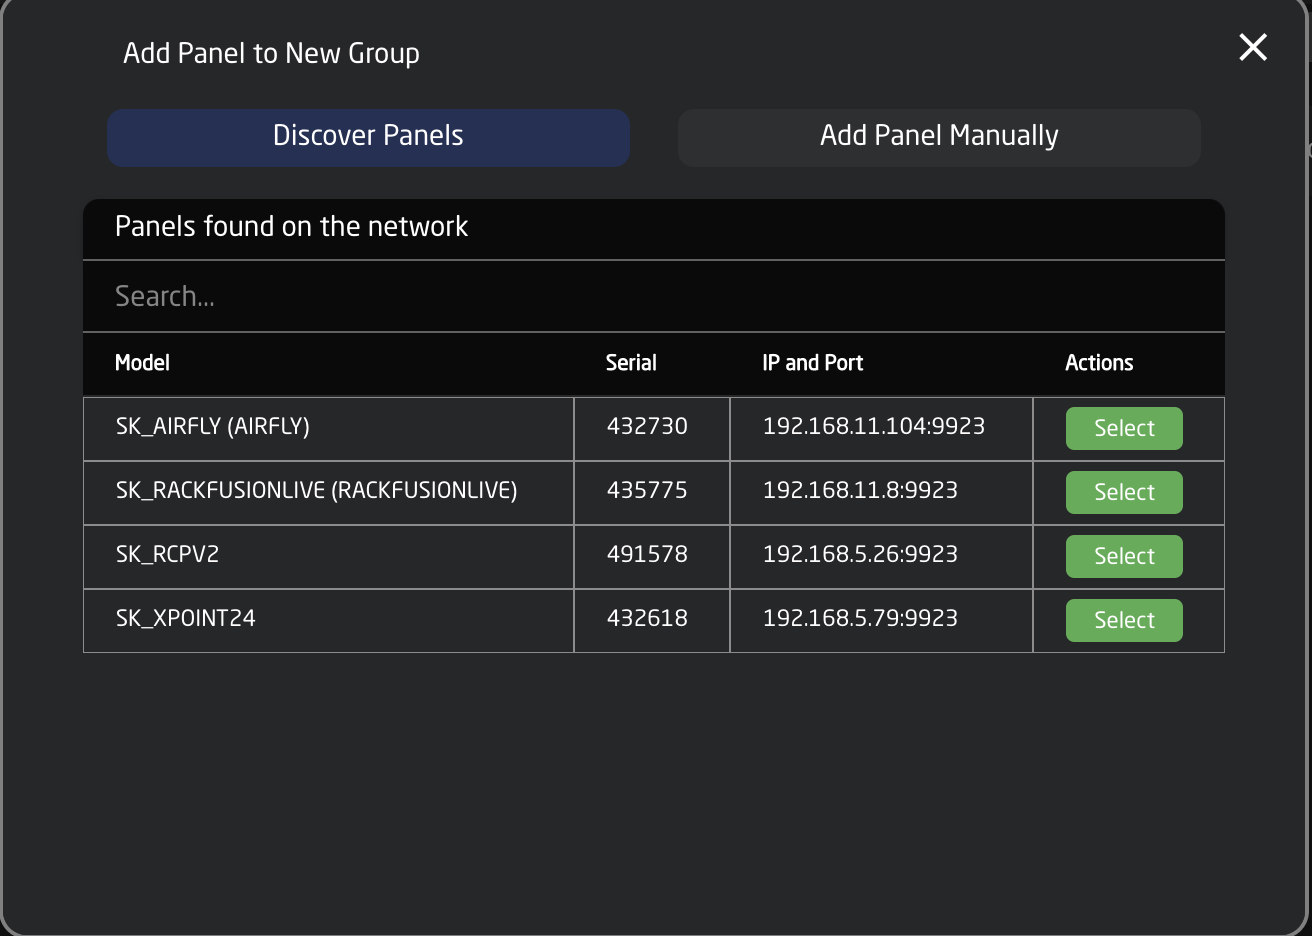
Pressing SHIFT + the green Select button will allow for multiple panel selection.
Manually Added
Panels can be picked from SKAARHOJs included library of products. Following a manual choice of panel, the user will have to enter the IP address himself including any constraints desired. See the Panel Details section for set up.
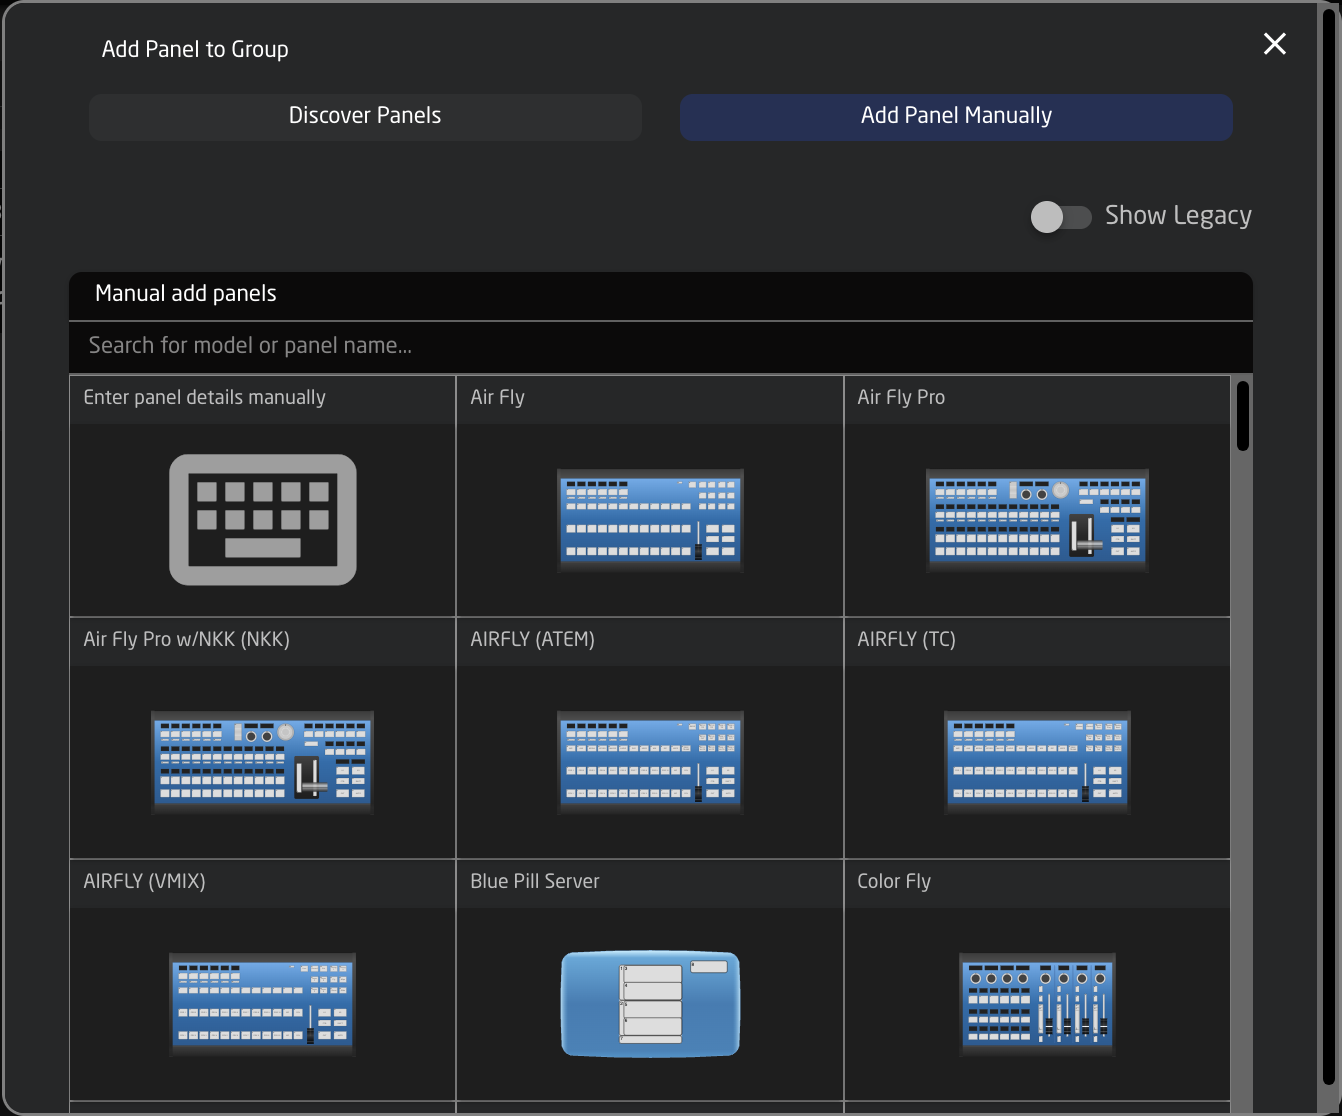
Pressing SHIFT + the green Select button will allow for multiple panel selection.
Unknown Skaarhoj Panel
Some legacy model UniSketch panels have not yet been added into our manual panel selection. These panels can still be added manually by selecting Enter Details Manually option in the Manually Added panels section.
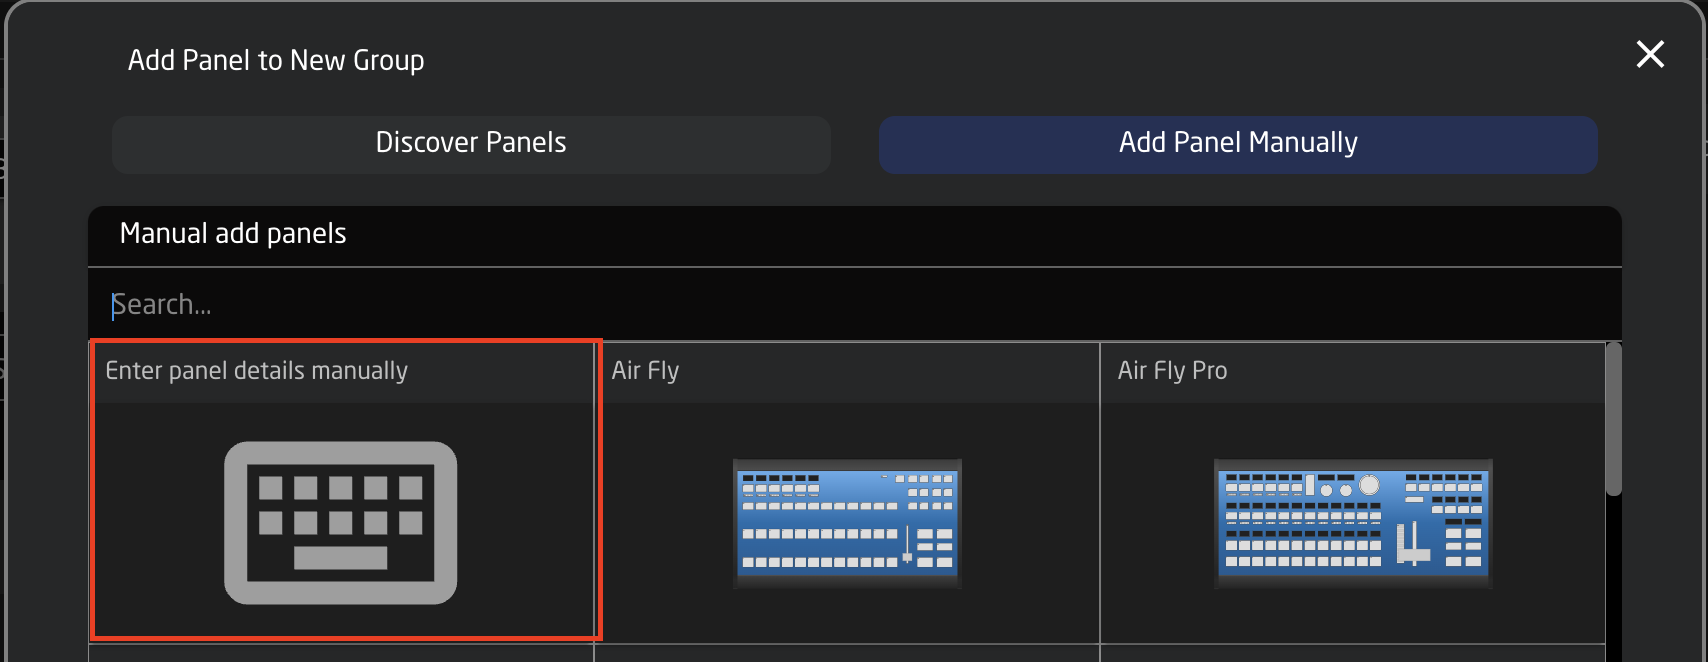
This will bring up the option to add the IP address and communication port for the Blue Pill device to connect to.

Panel Details
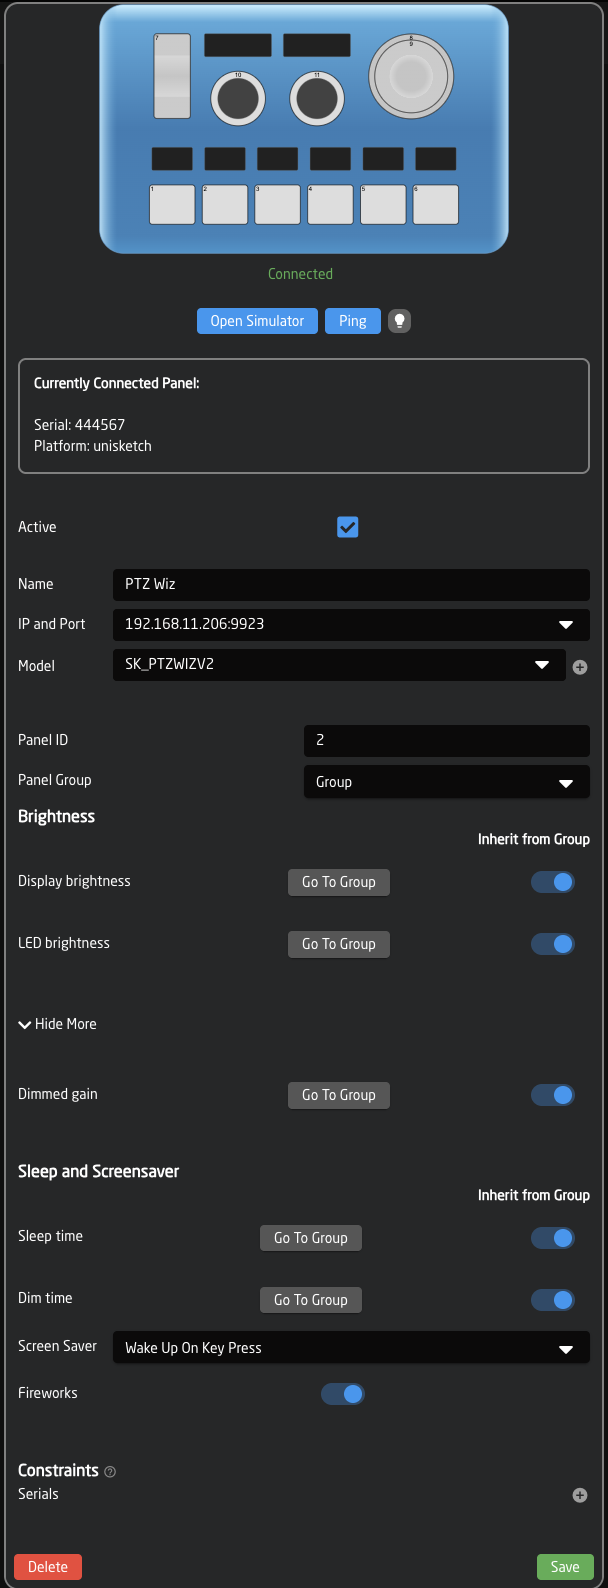
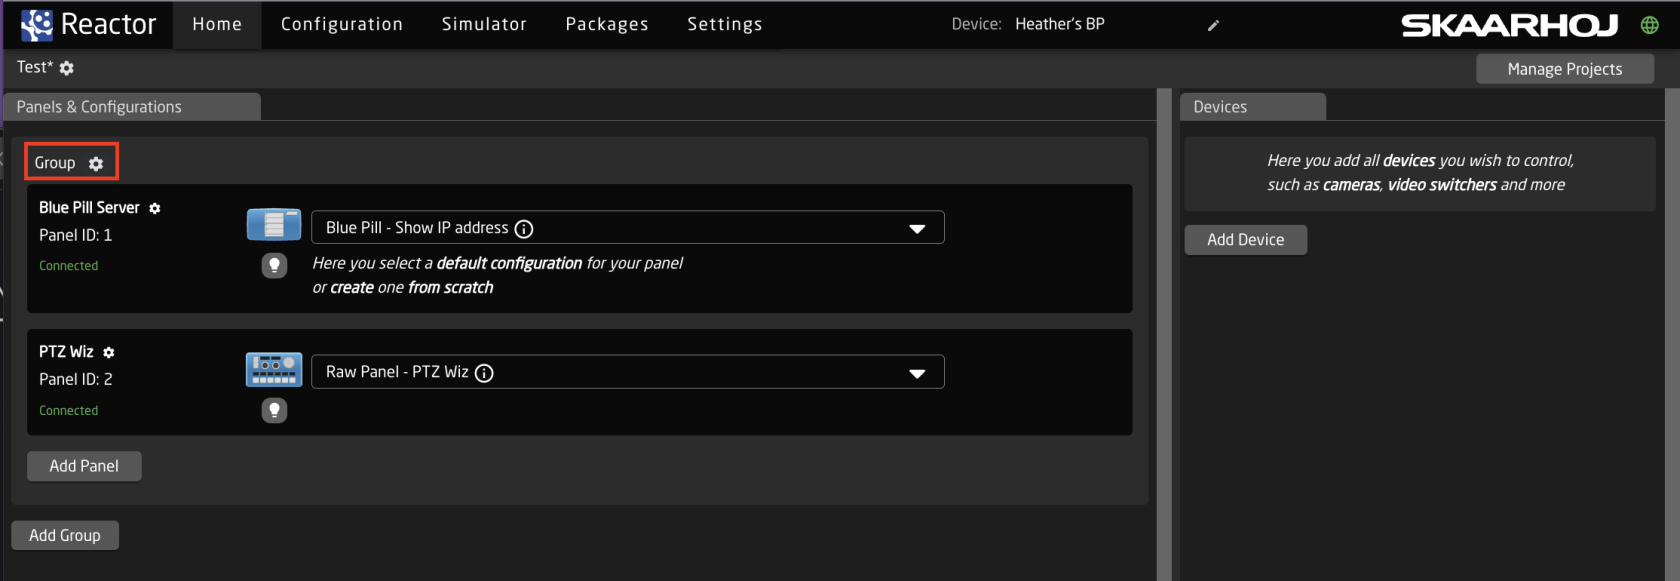
The immediate view of a panel in the Home Screen show its name, connectivity status, mapping, and any available constant sets. There is also a small light bulb button for lighting up the panel for quick real world identification.

Clicking on the panel name will open up the details. Here the general information about the panel, the settings, and the constraints can be seen and adjusted. By default the controller name will be the same as the model name, the ID will be auto generated in order, panels will per default be in the main group and the status will be active. A controller’s status needs to be active for use.
Constraints are requirements regarding the panel. Here it is determined which models are allowed, which serials are allowed, which IP and port numbers can be used and if the panel is of the server or client type (Raw Panel protocol related). Empty constraint will allow any value, but consider that a configuration always maps functionality to hardware component IDs which will change with the panel model for obvious reasons, so it’s rarely a good idea to omit constraints such as the allowed models.
By default our controllers connect using port 9923. It is important to include the port number, separated from the IP address by a colon (:), for example 192.168.11.124:9923
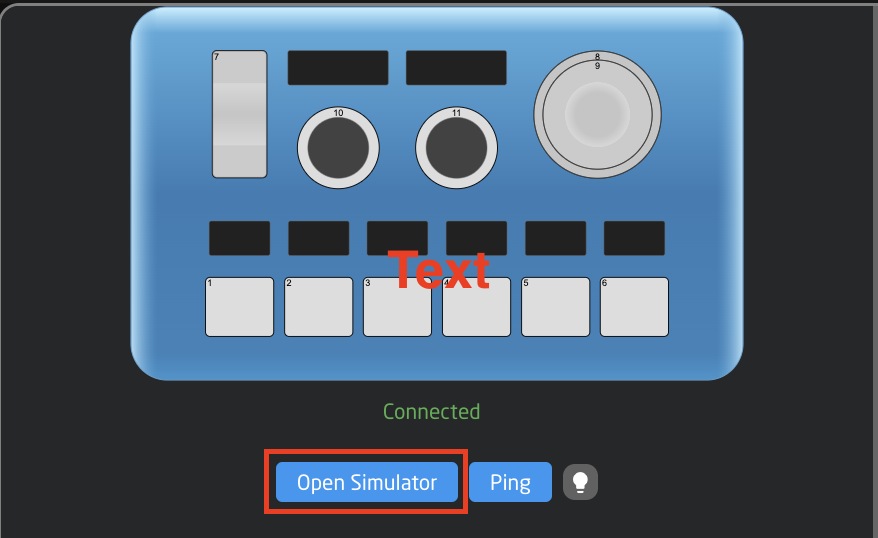
From inside the panel details it is also possible to delete the panel, simulate the panel if it is not immediate available for testing, ping the panel, and adjust some general controller settings.
Panel Simulate
The Panel Simulate option available in the panel details allows for an interactive simulation of the panel’s behaviors based on the configuration/mapping and devices without needing the physical panel available. Pressing Simulate will immediate relocate to the Simulator page for this panel, it is best to wait on simulating a panel until mapping has been selected and devices added.
Panel Groups
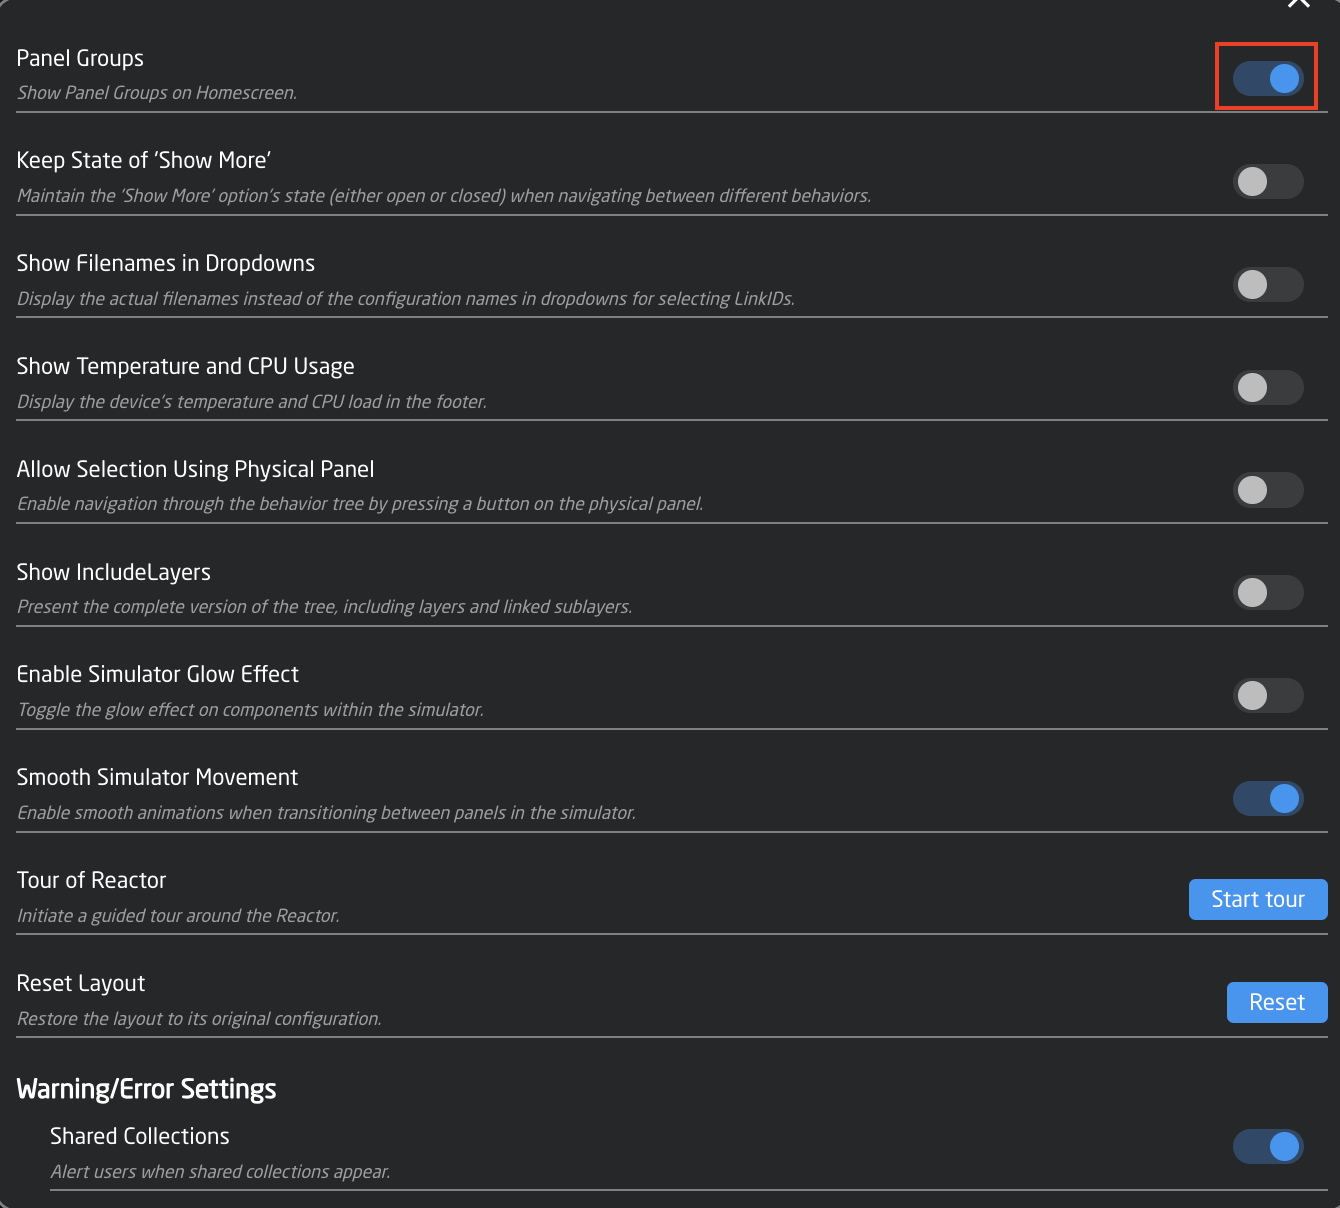
Multiple panels can be arranged in groups. This allows for an easy visual breakdown of controller set ups. To access the information, set the Home screen to show panels by opening the settings menus in the lower right corner of the packages page.
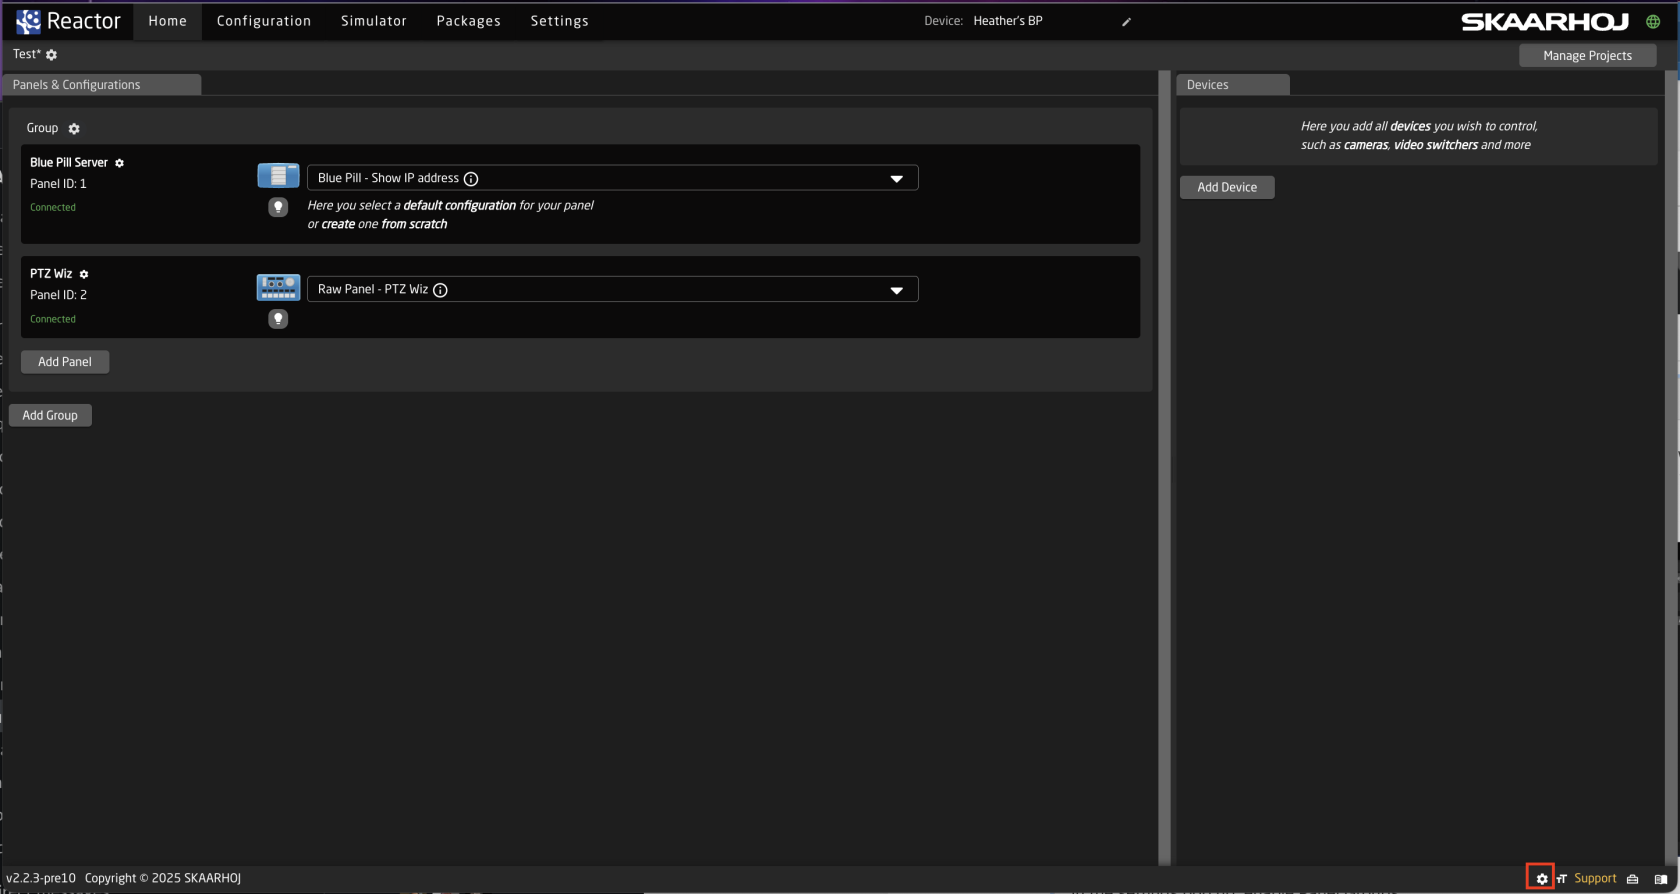
In the settings pop up, enable Panel Groups.
Enter the panel group set up by click the panel group name above the panel details.
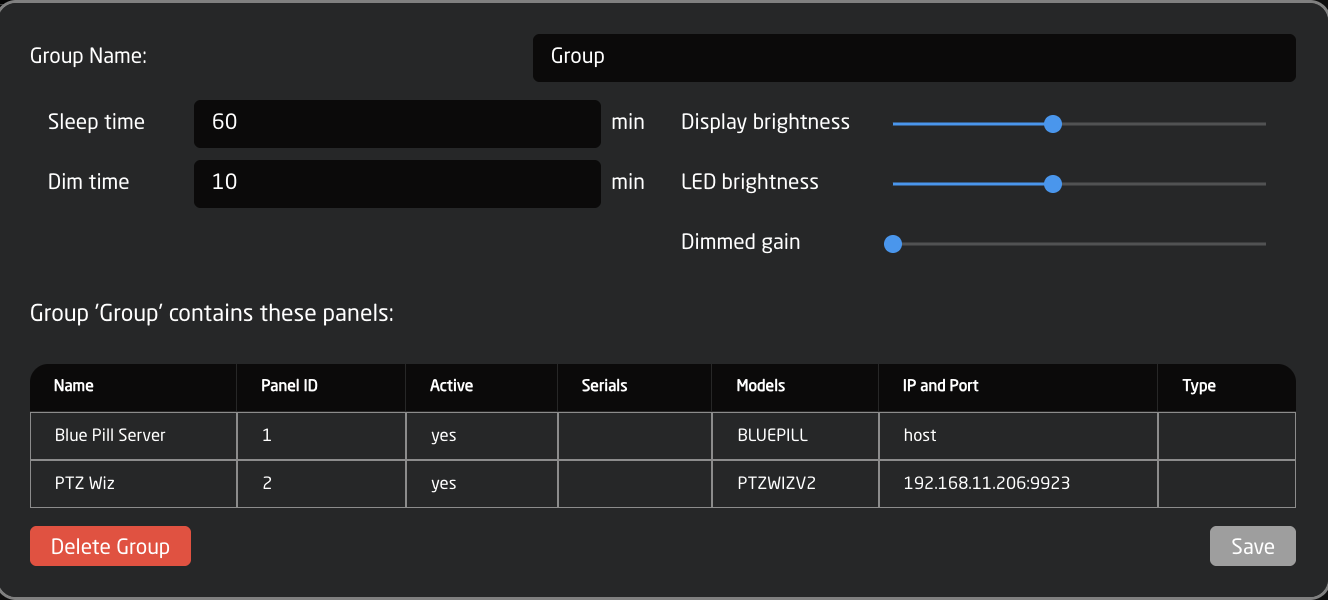
Inside the group details it is possible to edit the group name, view the group as a table, or in an adjustable graphical view. Which group a specific panel is in can be set in the Panel Details, by default all panels start in the Main Group.
In Table view the basic information of the set up is given including the panel name, id, status, serial number, model, IP, Port, connection type, and change the default display settings for the group.
Confirm Panel Connection
A panel that has established a connection with a blue pill will no longer display “Waiting for Blue Pill” or “Waiting for Raw Panel”.