Routing Triggers
An example of a Routing Triggers settings table can be seen below. From here the camera select will trigger a specific route on either a designated routing panel or an aux source of a router.
Routing Trigger Settings Table

| Column | Description |
| Order | Allows for quick rearranging of camera order. Right clicking on drag will allow for deleting the row. |
| Mute | Allows for removing access to a specific camera or to leave a blank spot on the panel |
| Bound Device | Opens a pop up window to select the specific device to insert into the slot. Helps bind the core to the device. |
| Device ID | The device number for the router or switcher to be used. See Devices section of this page for location information. |
| Routing Device Name | The device name for the router or switcher to be used. See Devices section of this page for location information. |
| Use Switcher or Hub | Drop down to select the configuration snippet to be used. The snippet name usually contains the device's name for ease of identification. |
| ME/Bus Select | The ME/Bus/Aux number to route onto. |
| Fallback Input | If Joystick Override is used, this will be the fallback input RCP only |
|
|
Delete the row. |
|
|
Duplicates the details of the column. |
|
|
Increments the number in the column by +1. |
|
|
Adds a new line to create additional routing trigger. Please Note, a Route Index cell needs to be added in the Camera Select Routing Index column for every new destination added. |
|
|
Opens a table to create multiple new routing trigger. See Batch Create section below. |
Batch Create
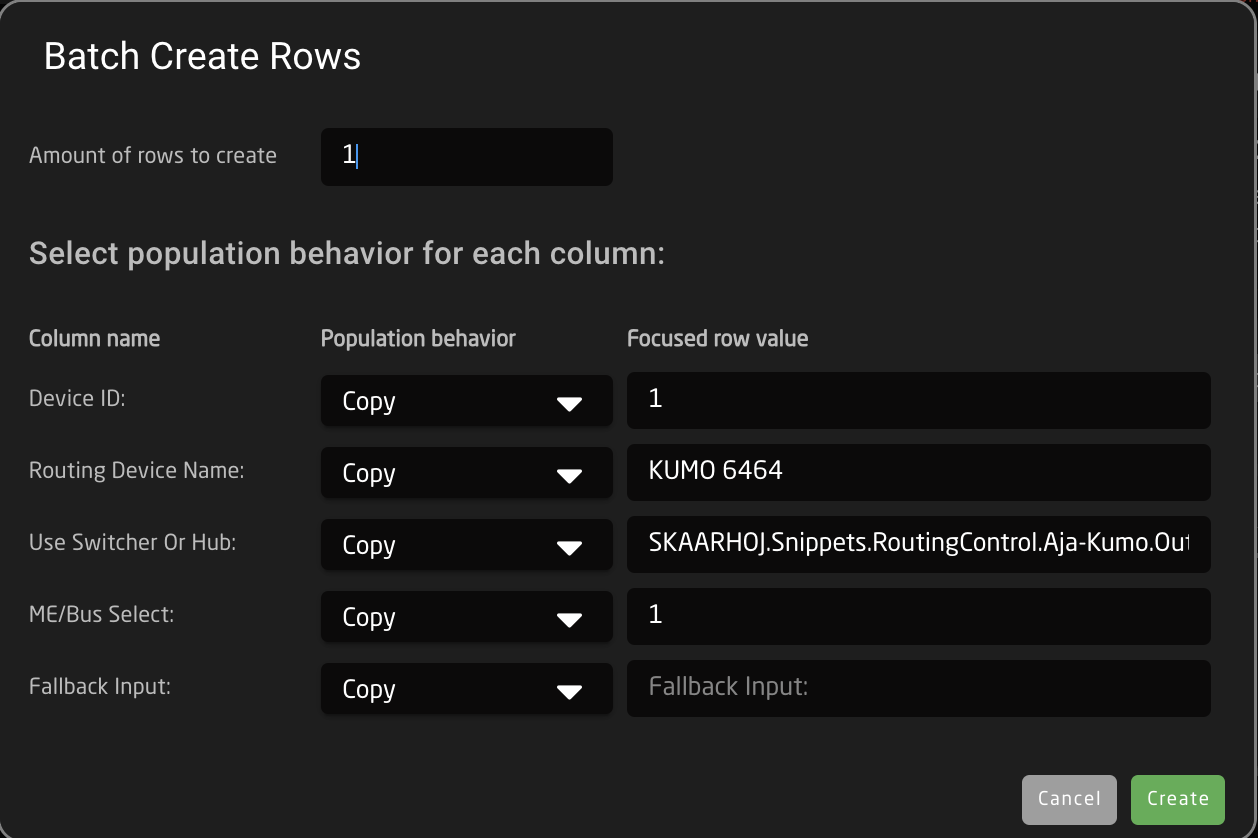
| Amount of Rows to Create | The number of additional rows to be created. |
| Column Name | Which settings table row's info being referenced. |
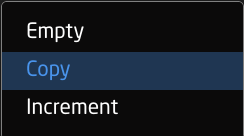
| Populate Behavior | Select if the settings table row is to be empty, copied, or incremented by 1.
|
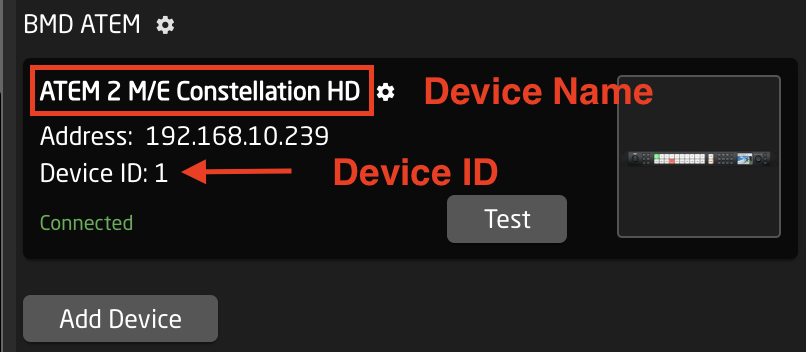
Devices
In the connected Devices the Device number and name are found in the device information. Input this information in the Routing Trigger's settings table in the column of the same names.
Camera Select Settings Table
To complete the process, the Routing Index number needs to be set in the Camera Select settings table. This number is the one associated with input number on the router or switching panel.
Please note that sometimes the first input might have an internal number of 0 (example: Atem Aux has Black as the first in the drop down, this is input 0 for aux routing)
If setting up multiple Routing Trigger destinations in the Routing Trigger Settings table, additional Route Index cells need to be add in the Routing Index column in the Camera Select Settings Table for the additional destinations to function.
